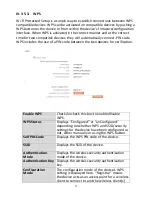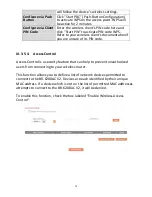
63
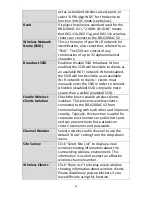
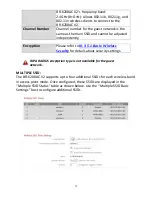
act as a standard wireless access point, or
sele t AP B idge
-
WDS fo the de i e to
function in WDS mode (see below).
Band
Displays the wireless standard used for the
BR-6208AC V2
s
. GHz
B+G+N
means
that 802.11b, 802.11g, and 802.11n wireless
clients can connect to the BR-6208AC V2.
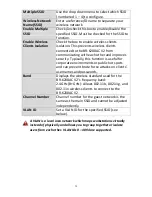
Wireless Network
Name (SSID)
This is the name of your Wi-Fi network for
identification, also sometimes referred to as
SSID .
The SSID can consist of any
combination of up to 32 alphanumerical
characters.
Broadcast SSID
Enable or disable SSID broadcast. When
enabled, the SSID will be visible to clients as
an available Wi-Fi network. When disabled,
the SSID will not be visible as an available
Wi-Fi network to clients
–
clients must
manually enter the SSID in order to connect.
A hidden (disabled) SSID is typically more
secure than a visible (enabled) SSID.
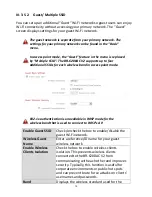
Enable Wireless
Clients Isolation
Check the box to enable wireless clients
isolation. This prevents wireless clients
connected to the BR-6208AC V2 from
communicating with each other and improves
security. Typically, this function is useful for
corporate environments or public hot spots
and can prevent brute force attacks on
lie ts use a es a d pass o ds.
Channel Number
Select a wireless radio channel or use the
default Auto setti g f o the d op
-down
menu.
Site Survey
Cli k Sele t
Site List
to displa a e
window showing information about the
surrounding wireless environment. This
information is useful to select an effective
wireless channel number.
Wireless Clients
Click
Sho List
to display a new window
showing information about wireless clients.
Please disable any pop-up blockers if you
have difficulty using this function.
Summary of Contents for BR-6208AC V2
Page 1: ...1 BR 6208AC V2 User Manual 09 2016 v1 0 ...
Page 45: ...41 3 You will arri e at the Status s ee Use the menu down the left side to navigate ...
Page 65: ...61 ...
Page 114: ...110 ...
Page 116: ...112 ...
Page 118: ...114 4 Cli k P ope ties 5 Sele t I te et P oto ol Ve sio 4 TCP IPv4 a d the li k P ope ties ...
Page 123: ...119 ...
Page 125: ...121 ...
Page 130: ...126 3 Cli k Lo al A ea Co e tio 4 Cli k P ope ties ...
Page 134: ...130 5 Choose your connection and right click then sele t P ope ties ...
Page 138: ...134 6 Cli k Appl to sa e the ha ges ...
Page 145: ...141 3 You oute s IP add ess ill e displa ed e t to Default Gate a ...
Page 147: ...143 3 A e i do ill ope t pe ip o fig a d p ess E te ...
Page 148: ...144 4 You oute s IP add ess ill e displa ed e t to Default Gate a ...
Page 150: ...146 4 Click the TCP IP tab and your router s IP address will be displayed next to Router ...
Page 167: ...163 ...


