background image


F

F

e

e

d

d

e

e

r

r

a

a

l

l


C

C

o

o

m

m

m

m

u

u

n

n

i

i

c

c

a

a

t

t

i

i

o

o

n

n


C

C

o

o

m

m

m

m

i

i

s

s

s

s

i

i

o

o

n

n


I

I

n

n

t

t

e

e

r

r

f

f

e

e

r

r

e

e

n

n

c

c

e

e


S

S

t

t

a

a

t

t

e

e

m

m

e

e

n

n

t

t


This equipment has been tested and found to comply with the limits for a 
Class B digital device, pursuant to Part 15 of FCC Rules.    These limits are 
designed to provide reasonable protection against harmful interference in a 
residential installation. This equipment generates, uses, and can radiate 
radio frequency energy and, if not installed and used in accordance with the 
instructions, may cause harmful interference to radio communications.     
 
However, there is no guarantee that interference will not occur in a 
particular installation. If this equipment does cause harmful interference to 
radio or television reception, which can be determined by turning the 
equipment off and on, the user is encouraged to try to correct the 
interference by one or more of the following measures:     
 
1. Reorient or relocate the receiving antenna. 
2. Increase the separation between the equipment and receiver. 
3. Connect the equipment into an outlet on a circuit different from that to   
    which the receiver is connected. 
4. Consult the dealer or an experienced radio technician for help. 


Copyright

©

 by Edimax Technology Co, LTD. all rights reserved.    No part of this 

publication may be reproduced, transmitted, transcribed, stored in a retrieval system, or 
translated into any language or computer language, in any form or by any means, 
electronic, mechanical, magnetic, optical, chemical, manual or otherwise, without the 
prior written permission of this company 
 
This company makes no representations or warranties, either expressed or implied, with 
respect to the contents hereof and specifically disclaims any warranties, merchantability 
or fitness for any particular purpose.    Any software described in this manual is sold or 
licensed "as is". Should the programs prove defective following their purchase, the 
buyer (and not this company, its distributor, or its dealer) assumes the entire cost of all 
necessary servicing, repair, and any incidental or consequential damages resulting from 
any defect in the software. Further, this company reserves the right to revise this 
publication and to make changes from time to time in the contents hereof without 
obligation to notify any person of such revision or changes. 
 
All brand and product names mentioned in this manual are trademarks and/or registered 
trademarks of their respective holders. 

Summary of Contents for EN-9230TX-32

Page 1: ...G Gi ig ga ab bi it t E Et th he er rn ne et t P PC CI I A Ad da ap pt te er r EN 9230TX 32 Q Qu ui ic ck k I In ns st ta al ll la at ti io on n G Gu ui id de e Q Q I I G G Version 3 0 October 2006 ...

Page 2: ......

Page 3: ... joint dans le CD I It ta al li ia an no o Incluso nel CD il QIG in Italiano M Ma ag gy ya ar r A magyar telepítési útmutató megtalálható a mellékelt CD n N Ne ed de er rl la an nd ds s De nederlandse QIG treft u aan op de bijgesloten CD P Po ol ls sk ki i Skrócona instrukcja instalacji w języku polskim znajduje się na załączonej płycie CD P Po or rt tu ug gu uê ês s Incluído no CD o QIG em Portug...

Page 4: ...nsmit and 1000Mbps Receive If you connect the adapter to 100BaseTX hub the network speed is 100Mbps Similarly if the hub is a switching hub which supports full duplex function then the speed will be doubled to 200Mbps This adapter supplies many drivers including Microsoft Windows 98 98SE Me NT 2000 XP Netware Server 4 x 5 x 6 x Netware ODI for DOS Linux Unix and MAC OSX 10 2 x 10 3 Whatever your r...

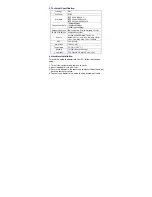
Page 5: ... Server 4 x 5 x 6 x Netware ODI for Linux Unix MAC OSX 10 2 x 10 3DOS LED Link Activity Dimension 120 x 40 mm Temperature 32 131 F 0 55 C Humidity 10 95 Non condensing Certification FCC Class B CE Mark C tick VCCI 4 Hardware Installation To insert the network adapter into your PC follow the steps as below 1 Turn off the computer and remove its cover 2 Insert the adapter into a PCI slot 3 Secure th...

Page 6: ...proper cable is connected to the adapter port and the Hub Switch complies with the adapter specification such as 10Mbps 10BaseT 100Mbps 100BaseTX and 1000MbpsTX then check the LED The adapter provides LED to indicate network status Link Activity The LED indicates if the UTP has been LINK ok or not When the light is OFF it indicates that the UTP port has not been connected or Link not ok when the l...

Page 7: ...ch the receiver is connected 4 Consult the dealer or an experienced radio technician for help Copyright by Edimax Technology Co LTD all rights reserved No part of this publication may be reproduced transmitted transcribed stored in a retrieval system or translated into any language or computer language in any form or by any means electronic mechanical magnetic optical chemical manual or otherwise ...

Page 8: ......

Reviews: