


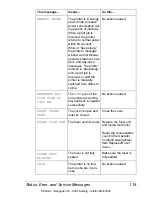


Status, Error, and Service Messages
123
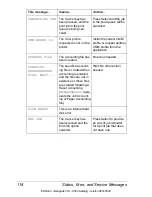
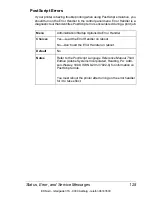
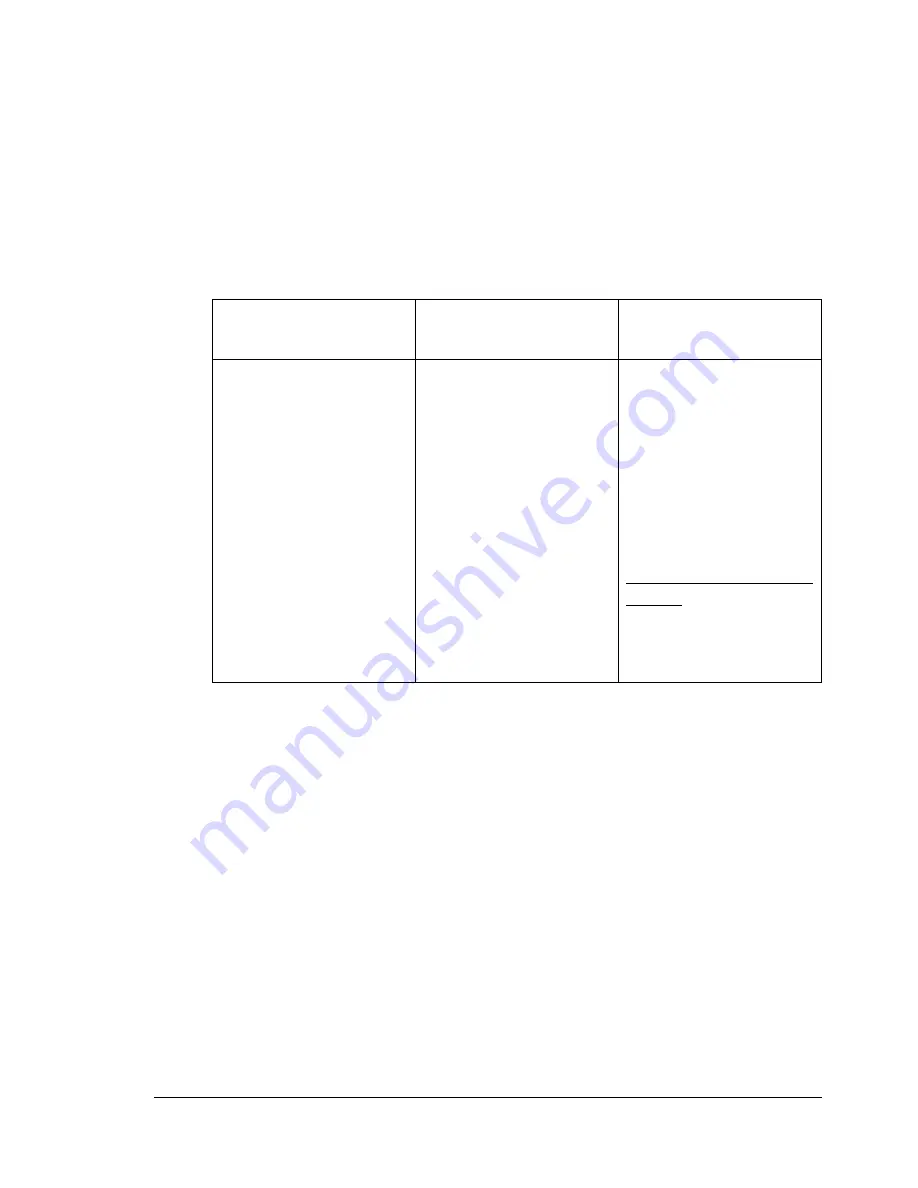
Service Messages
A service message sometimes occurs as a result of an unusual combination
of events, not because of an actual problem. When the printer stops and a
service message displays in the message window, turn the printer off and
then back on. This often clears the service message indicator, and printer
operation resumes. Always try this before making a service call.
Service calls should be placed to the vendor from whom you purchased the
printer. If you cannot get service from your vendor, see the
Service & Support
Guide
for additional contact information.
This service
message...
means...
do this...
CALL FOR SERVICE
<X>
An error has been
detected with the item
indicated
<X>
in the
service message.
Reboot the printer. This
often clears the service
message indicator, and
printer operation can
resume. If the condition
persists, contact your
local vendor or check
the
Service &
Support Guide
or
www.konicaminolta.net/
printer/ for information
on KONICA MINOLTA-
authorized service
providers.
EDNord - Istedgade 37A - 9000 Aalborg - telefon 96333500
Summary of Contents for Magicolor 3300
Page 1: ...magicolor 3300 User s Guide 1800738 001A EDNord Istedgade 37A 9000 Aalborg telefon 96333500 ...
Page 9: ...Software Installation EDNord Istedgade 37A 9000 Aalborg telefon 96333500 ...
Page 20: ...EDNord Istedgade 37A 9000 Aalborg telefon 96333500 ...
Page 21: ...Using Media EDNord Istedgade 37A 9000 Aalborg telefon 96333500 ...
Page 52: ...EDNord Istedgade 37A 9000 Aalborg telefon 96333500 ...
Page 53: ...Color Printing EDNord Istedgade 37A 9000 Aalborg telefon 96333500 ...
Page 59: ...Replacing Consumables EDNord Istedgade 37A 9000 Aalborg telefon 96333500 ...
Page 78: ...EDNord Istedgade 37A 9000 Aalborg telefon 96333500 ...
Page 79: ...Maintaining the Printer EDNord Istedgade 37A 9000 Aalborg telefon 96333500 ...
Page 87: ...Troubleshooting EDNord Istedgade 37A 9000 Aalborg telefon 96333500 ...
Page 135: ...Installing Accessories EDNord Istedgade 37A 9000 Aalborg telefon 96333500 ...
Page 159: ...Technical Specifications EDNord Istedgade 37A 9000 Aalborg telefon 96333500 ...
Page 198: ...EDNord Istedgade 37A 9000 Aalborg telefon 96333500 ...


