ePower / EE800W-POE
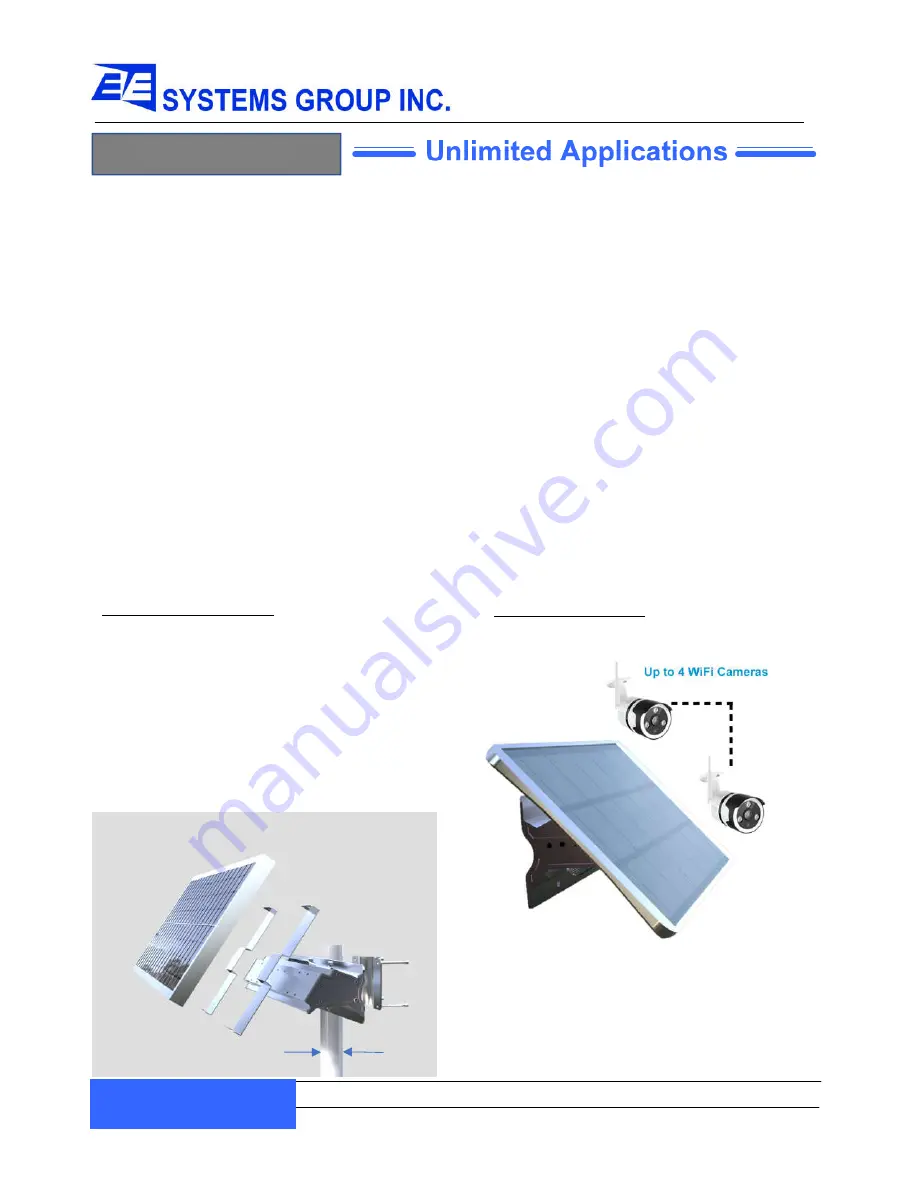
Assembly (Fig. 1)
•
Since the battery and control board are already set up inside the control box, so the first step is
install the solar panel connecters onto the control enclosure.
•
Adjust the solar panel holding bracket arms to match the size of the solar panel then put the solar
panel on the arms and tight them by provided self-drilling screws on top and bottom (refer Fig.2,
you will need a size 4mm wrench to adjust the screws on the arms).
•
Connect power load (IPC, Transceiver, etc.) and solar cables from the solar panel and the control
enclosure. Make sure you connect them together at the right polarity and firmly.
(Check color code
on Page 2 for cable connections)
•
Mount the whole system on the pole (Only for pole mounting,
you will need a size 6mm wrench to
adjust the screws for bracket
) with the provided pole holding bracket.
•
Make sure the solar panel to face to directly sunlight (
South
) without any blocks or shadow. Push the
main switch to ON position to activate device.
EE850W330-1,2C or EE8100W650-3,4C
As package options, IP Camera setup, via Tech support:
•
Connect provided power cable/extension cable for
each IPCs
•
Follow the IPC’s instruction to connect local Wi-Fi
network, make sure IPC mounting locations cover by
facility Wi-Fi signal
•
App online live chat or directly: (866) 749-0567
•
IPC Tech support email: support@netvue.com
EE Systems Group Inc.
12346 Valley Blvd, Suite A, El Monte, CA 91732 Phone Number: 1-877-579-3889 www.eleding.com
Rev: 10/08/2019
Solar 100% Off-Grid Duel DC Power Generator
Installation Ways
Pole Mount as recommended, also works well on Ground/Floor or Wall Mount
Thank you for choosing eLEDing!
Package Includes: (IPCs options, refer Fig.3)
1 x Solar Panel; 1 x Mounting Bracket; 1 x Control Enclosure Built with Battery Pack; 1 x Pack of Screws
INSTRUCTION
Note:
*Solar Panel must be mounted in a non-obstructed position that allows at least 5-6 hours direct sunlight all year round. For most of the North America
projects. The solar panel can be pointed to east, west and south but
definitely not to north
.
*For northern hemisphere installations, a south-facing position is best and visa-versa for southern hemisphere installation.
*Solar Panel Maintenance: Use soft, wet cloth to clean the solar panel periodically (at least once a one year) to avoid energy output reduction resulted from
accumulated dust. Clean accumulated snow ASAP during snowing season.
EESGI guarantees this product to be free from defects in material & workmanship for (1) year.
This warranty does not apply to damage from misuse or incorrect installation/ connection.
This warranty does not cover accessories, bulbs, batteries, high voltage accidents, alterations,
unauthorized use or repair, neglect, misuse, abuse, damages or defects resulting from normal
wear and tear (including chips, fading scratches, abrasions or discoloration due to usage or sun
exposure), or failure to follow instructions for care and maintenance, fire, flood, and Acts of God.
This warranty does not include liability for incidental or consequential damages.
EESGI is not responsible for any damages in excess of the retail purchase price of the product
under any circumstances. The consumer is responsible for the installation of, removal of, and
reinstallation of the product.
One Year Limited Warranty
Fig. 1
2”to 4”
1
Fig. 3
All manuals and user guides at all-guides.com


