SAFETY : Read this First !
•
Do not connect the appliance if there are obvious signs of transportation
damage.
•
Read this user manual thoroughly before attempting to use this appliance.
•
Installation and repair should be attempted only by qualified technical personnel.
•
It is dangerous to modify any part of this appliance.
•
The manufacturer declines all responsibility in case of failure to adopt proper
safety measures.
•
Ensure the location in which this appliance is installed has good, permanent
ventilation.
•
The distance between the bench top to the lower part of the hood must not be at
less than 65 cm or higher than 75 cm.
•
Use an electrical connector with earth that is correct for your location.
•
Check that the voltage in your area is correct before plugging in.
•
The electrical connection of this appliance:
Blue
=
NEUTRAL
Brown
=
LIVE
•
Multiple plugs and extension cables must not be used. Overload is dangerous
and may cause a fire.
•
Ensure that the power supply chord is free from any heat source or sharp
objects.
•
The appliance should be switched off and the electrical supply disconnected
before any cleaning or maintenance work can be carried out.
•
This appliance is not intended for use by persons (including children) with
reduced physical, sensory or mental capabilities, or lack of experience and
knowledge, unless they have been given supervision or instruction concerning
use of the appliance by a person responsible for their safety. Children should be
supervised to ensure that they do not play with the appliance.
•
If the supply cord is damaged, it must be replaced by the manufacturer, its
4
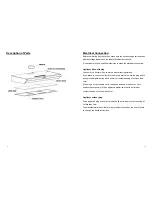
Cleaning & Maintenance
SURFACES
: Wash with warm soapy water and a soft sponge. Never use
abrasive detergent, scouring pads, steel wool or solvents on any part of this
appliance as this will cause irreparable damage.
Aluminum Grease Filters
: Wash in the dishwashers or soak the panels in a
degreasing agent for an hour, then rinse off.
LIGHT BULB REPLACEMENT
: Before attempting to replace the light bulb,
make sure that the light switch is turned off. Remove the grease filter to
access the lamp area. Remove the damaged light bulb and replace with an
incandescent oval bulb maximum 40W.
13


