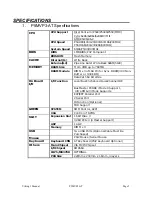
Viking 3 Manual
P5MVP3-AT
Page 4
INSTALLATION GUIDE
2.2 Processor Installation
Before putting the CPU into the CPU ZIF socket, lift up the locking bar on the
side of the socket, making sure that Pin 1 of the CPU (the corner with the notch)
is facing towards the notch on the CPU socket. Press the CPU firmly into the
socket making sure that it is firmly seated. Continue to push down on the CPU
while lowering the locking bar to lock the CPU in place.
It is always necessary to use a reliable CPU cooling fan with a heat sink.
Most fans will snap onto the ZIF socket.
2.3 DIMM Memory Installation
To install a DIMM module, simply line the notches of the module up with the
notches in the DIMM socket on the motherboard and push the module into the
socket and lock the plastic clips on the ends of the socket. DIMM memory can be
added one at a time.
2.4 Mounting the Motherboard in the Case and Connecting
the Cables
Mounting the Motherboard
Line up the keyboard connector on the motherboard with the keyboard hole on
the case. This should also help you in lining up the mounting holes on the
motherboard. Then use screws to mount the motherboard into the case.
Note: It is important that the motherboard is secure and does not touch the
bare metal of the case. This could cause the motherboard to short.
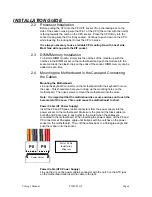
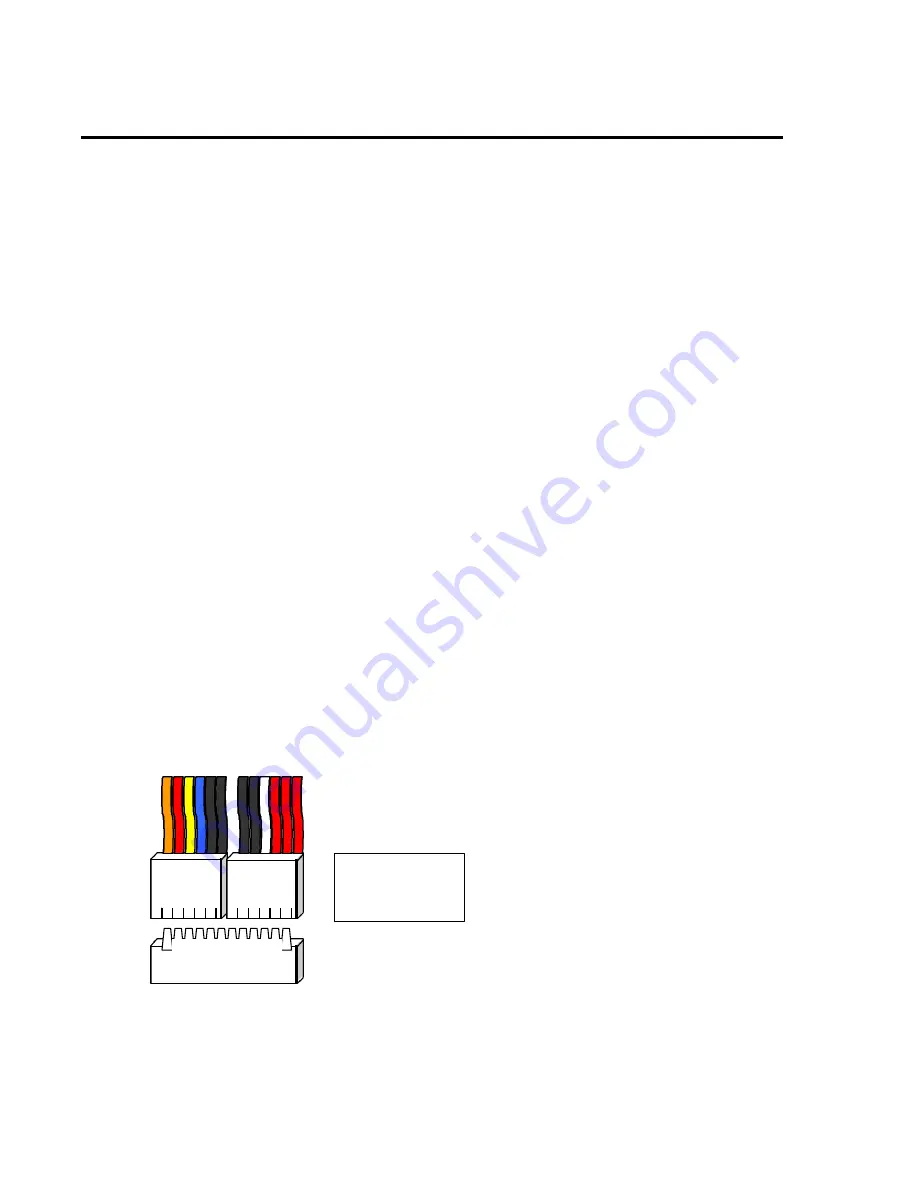
Power Cable (AT Power Supply)
Insert the P8 and P9 power cable connectors from the power supply into the
power socket on the motherboard. Make sure the ground (the black cable) on
both P8 and P9 are next to each other in the center when the cables are
connected to the motherboard. When inserting the power cables, tilt the P8 and
P9 connectors at 45-degree angle until it aligns with the notches on the power
socket on the motherboard. Then, tilt the cables back to a 90-degree angle and
push them down into the socket.
Power Cable (ATX Power Supply)
Line up the clip on the power cable’s connector with the notch on the ATX jack
on the motherboard and insert the cable in the jack.
P8
P9
Power Socket
Power Cable
Installation
Diagram


