Mechanical Operation and Maintenance Manual for ER20-1100 Industrial Robot
35
to ensure the transmission precision and stability of the timing belt.
Since the J5 and J6 axes are driven by timing belt, so the belt would probably loosen
after operation keeping on a period of time, witch would cause decline of robot precision.
Further more, after a long-time operation, the timing belt may appear wear, cracking or others
conditions. Without replacement or maintenance, it may lead to transmission failure, and even
economic losses. Therefore, it is recommended to check the running state of the timing belt
regularly (every half year suggested). To ensure the transmission precision and stability of the
timing belt, it is suggested that promptly tighten the loosened parts and replace the damaged
parts.
4.4.1 Tightening the timing belt
Customers can use a tensioner to adjust the timing belt, or contact our after-sale service
personnel. The parameters of adjusting operation are refer to table 4-9 as follows.
Table 4-9 Reference of tension and frequency when tightening the timing belt
Tension
(
N
)
Tensioning frequency
(
Hz
)
Timing belt
80
(
1±3%
)
Axis J5
:
115
See the operation steps as follows:
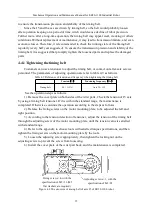
1). Remove the cover plate on both sides of the wrist parts. Check the tension of J5 axis
by using a timing belt tensioner. If it is within the standard range, the maintenance is
completed. Otherwise, continue the operation according to the steps as follows.
2). Release the fixing screws on the motor mounting plate, to be adjusted the left and
right position.
3). According to the tension detection of tensioner , adjust the tension of the timing belt
through the adjusting screw of the motor mounting plate, until the tension value is satisfied
with standard range.
4). Refer to the appendix to choose tools with satisfied torque specifications, and then
tighten the fixing screws on the motor mounting plate by the tools.
5). Loosen the adjusting screw appropriately, then tighten the locking nut on the
adjusting screw to prevent the screw from loosening.
6). Install the cover plate of the wrist part back, and the maintenance is completed.
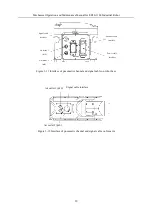
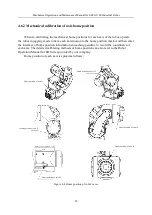
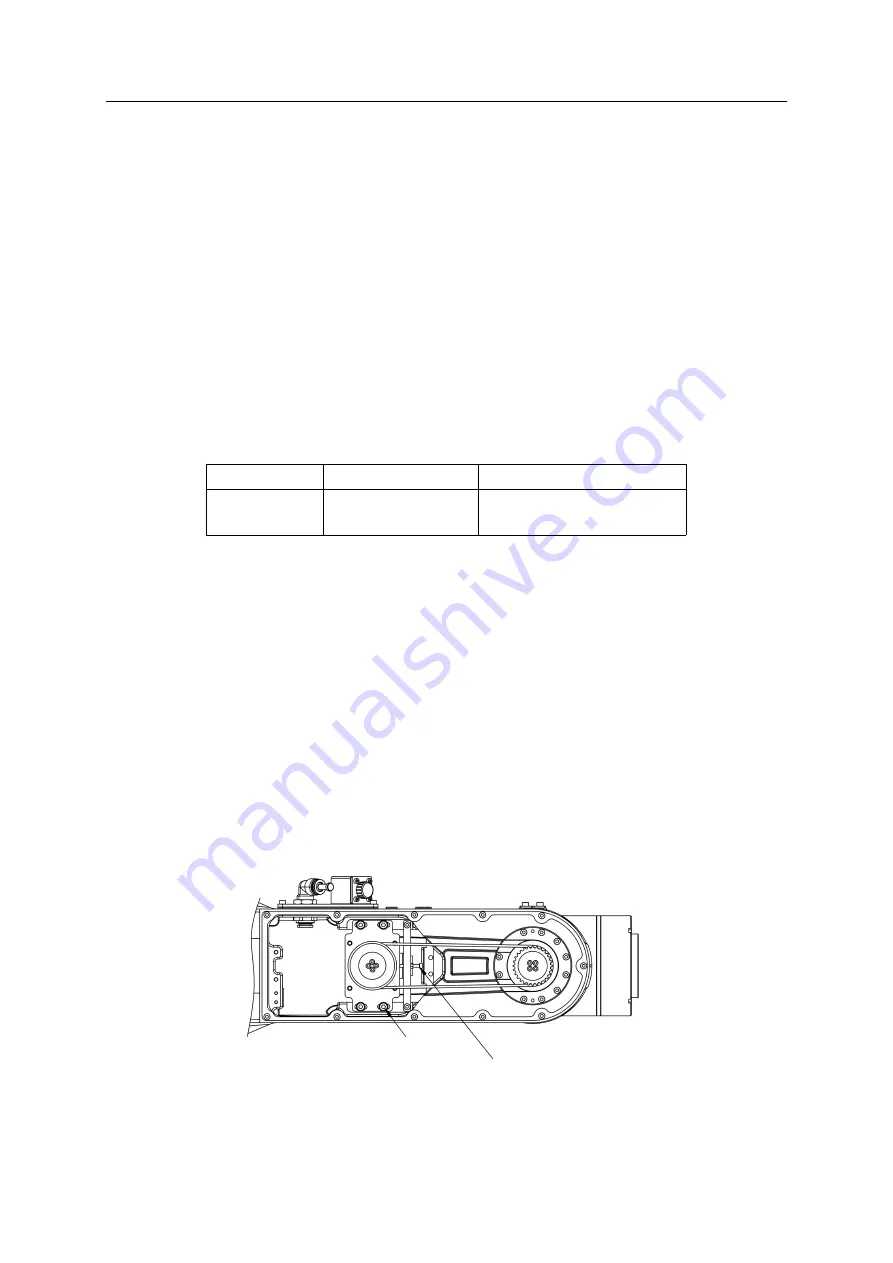
Figure 4-2 The structure of timing belt of axis J5 of ER20-1100 robot
Fixing screws ×4, with the
specification of M5×16 (M5
flat washers are required)
Adjusting screws ×1, with the
specification of M3×22

