background image

MASTERVISION MINI REC ZOOM

CÁMARA DE INSPECCIÓN

INSPECTION CAMERA

ESPAÑOL ............................. 2
ENGLISH ............................ 11
GARANTIA / GUARANTEE ... 23

MANUAL DE INSTRUCCIONES 
OPERATING INSTRUCTIONS

COD.60119
COD.60125
COD.60054
COD.60134
COD.60139
COD.60144
COD.60154
COD.60159

Summary of Contents for MASTERVISION MINI REC ZOOM 60054

Page 1: ...REC ZOOM C MARA DE INSPECCI N INSPECTION CAMERA ESPA OL 2 ENGLISH 11 GARANTIA GUARANTEE 23 MANUAL DE INSTRUCCIONES OPERATING INSTRUCTIONS COD 60119 COD 60125 COD 60054 COD 60134 COD 60139 COD 60144 CO...

Page 2: ...o lesiones graves Evite que entren objetos o l quidos Nunca derrame l quidos de ning n tipo sobre la unidad de visualizaci n de v deo El l quido aumenta el riesgo de descargas el ctricas y da os en el...

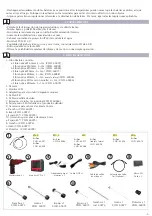
Page 3: ...60097 Fibra ptica 4 5mm L 2m COD 60098 b Fibra ptica 5 5mm L 1m COD 60086 c Fibra ptica 9mm L 1m COD 60071 Fibra ptica 9mm L 5m COD 60088 Fibra ptica 9mm L 1m frontal y lateral COD 60038 d Fibra ptica...

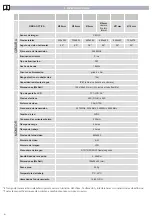
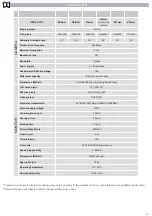
Page 4: ...nte de alimentaci n pilas 4 x AA Rango efectivo sin obst culos 10m Capacidad resistente al agua IP67 s lo el cabezal de la c mara Dimensiones WxDxH 195x165x55 mm Sin incluir el tubo flexible Tipo de p...

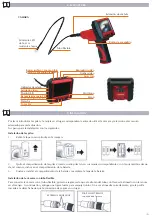
Page 5: ...de la bater a Instalaci n de la c mara con tubo flexible Para conectar la c mara con el tubo flexible primero aseg rese de que el extremo del tubo con llave est alineado con la ranura en el mango A co...

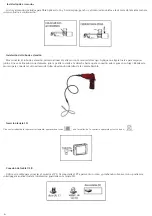
Page 6: ...ineados correctamente gire la perilla roscada a la derecha hasta que la conexi n este segura en su lugar Repita este proceso para conectar el otro extremo del tubo de extensi n de tubo de la c mara fl...

Page 7: ...ue aparezcan im genes de la c mara en la pantalla LCD 3 Puede grabar videos y sacar fotos al mismo tiempo o hacer diferentes ajustes de operaci n Nota Cuando est en uso el tubo deber a maniobrar f cil...

Page 8: ...a reanudarlo Avance r pido pulsar y mantener pulsado el bot n durante unos 2 segundos Rebobinar pulse y mantenga pulsado el bot n durante unos 2 segundos En el modo de avance r pido o rebobinar pulse...

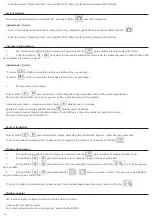
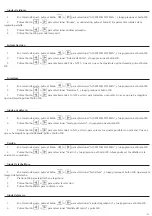
Page 9: ...se ha elegido la opci n deseada pulse el bot n OK Ajuste por defecto 1 En el modo de ajuste pulse el bot n o para seleccionar AJUSTE DEL SISTEMA y luego presione el bot n OK 2 Pulse el bot n o para s...

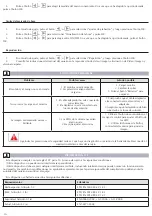
Page 10: ...do entre el monitor y el adaptador 2 Aseg rese que el adaptador est bien conectado a la toma de corriente La imagen es demasiado oscura o brillante 1 Los LEDs de la c mara necesitan alg n ajuste 2 Hay...

Page 11: ...shock and damage to the product The unit is not shock resistant Avoid high impact resulting from things such as dropping the unit from height Do not immerse camera handle or monitor in water Avoid moi...

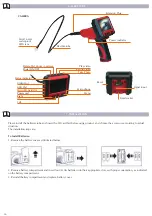
Page 12: ...m L 1m front side COD 60038 d Fibre optic 11mm with spring L 1m COD 60096 e Fibre optic 16mm L 1m COD 60070 2 Handle 3 LCD monitor 4 Power adapter European charger 5 USB cable 6 AV Output cable 7 Exte...

Page 13: ...e FM Bandwidth 18Mhz Power supply 4 x AA batteries Unobstructed Effective Range 10m Waterproof capacity IP67 for camera head Dimensions WxDxH 195x165x55 mm excluding flexible tube LCD Screen type TFT...

Page 14: ...compartment and insert four 4 AA batteries into their appropriate slots with proper orientation as indicated on the battery compartment 3 Reinstall battery compartment and replace battery cover CAMERA...

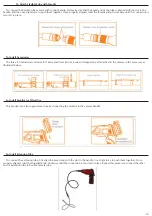
Page 15: ...ccessories for 16mm and 9mm mirror hook and magnet are all attached to the camera in the same way as illustrated below To Install Monitor for Wired Use This product can also support wired use by conne...

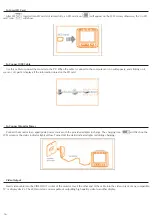
Page 16: ...the information stored on the SD card To Connect Monitor Power Connect the monitor to an appropriate power source with the provided adapter to charge The charging icon will flash on the LCD screen or...

Page 17: ...9mm Recording Video 1 In real time monitoring mode press the button on top of the monitor to begin recording 2 Press it again to stop recording It can make video recordings with voice due to device c...

Page 18: ...sired video Press OK button to view and press again to exit In the real time monitoring mode only playback can be conducted by button Deleting Video Picture 1 In the real time monitoring mode press th...

Page 19: ...the or button to toggle between YES and NO that is to format or cancel Once you have highlighted your desired selection press the OK button Default Setup 1 In the setting mode press the or button to s...

Page 20: ...Monitor does not charge 1 Adapter cable not attached properly 2 Adapter not connected to power 1 Make sure the adapter cable is connected between the monitor and the adapter 2 Make sure the adapter i...

Page 21: ......

Page 22: ......

Page 23: ......

Page 24: ......

Reviews: