7
eltric K. Heckel GmbH
Weiherstraße 29
D-95448 Bayreuth
www.eltric.com
eltric K. Heckel GmbH
Weiherstraße 29
D-95448 Bayreuth
www.eltric.com
D
D
EN
EN
NL
NL
INTRODUCTION
The infrared controlled remote control is a tool for the external configuration of the sensor highbay
(Art.Nr.: 2400340). One remote control is capable of configuring multiple highbays simultaneously.
The maximum distance to the relevant highbay is 15m.
INDICATION LEDS
On the remote control there are a number of indication LEDs in the upper part.
These have the following meaning:
LED
DESCRIPTION
LED
DESCRIPTION
Brightness
Light brightness level (during
Occupancy detection)
Lux value setting where the
motion sensor switches on
Sensitivity
Sensor detection range
sensitivity
Setting lux threshhold where
the lamp works permanently
(even without occupancy
detection)
Hold time
Working time after detection
until off/standby
Standby-dim
Luminosity / dimming level
after the set "hold time" has
expired
Daylight sensor
Enable motion detection in
cer-tain daylight
Standby-time
Duration of "standby-dim"
level after detec-tion
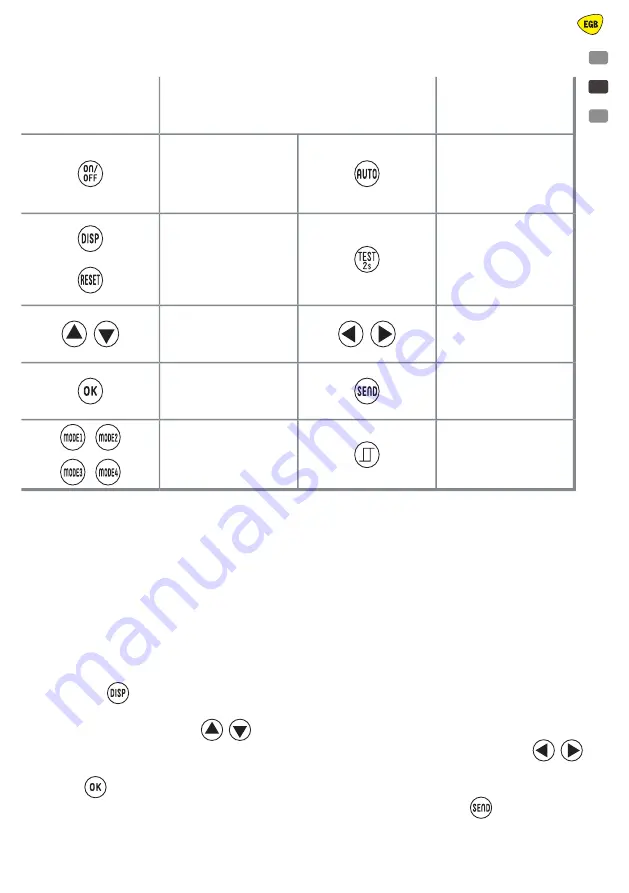
buttons remote
(img.01)
Remote Control button Operation
Change sensor settings
1. Press the
button, the remote control will display the last settings of the remote control via
the indication LEDs.
2. Press the navigation keys
to navigate within current settings. A flashing led indicator
shows which setting view you’re in on the remote control. Press the navigation key
to
change parameters of the appropriate setting type (flashing LED).
3. Press
to save the current settings view to the remote control.
4. Point the remote control at the sensor you want to set up and press the
button to send it.
The product with the sensor will flash 1x to confirm that it has received the settings. This step
can be repeated with multiple luminaires with the same sensor so that all luminaires contain
the same settings.
BUTTON
DESCRIPTION
BUTTON
DESCRIPTION
Press the <on/off> key
to turn the lamp on or off
permanently. The highbay
re-sponds by blinking once.
(Press <auto> key to get out
of this mode)
The remote starts in setup
mode with the last program-
med settings
- Displays the latest set-
tings using the remote
control LEDs indication.
- Resets the settings to the
dip-switch settings of the
sensor
Put the sensor in test mode,
the product responds 2 se-
conds to motion detection
Activate/navigate the remote
control in set-tings
Change parameters on the
remote control
Confirm setting/parameter
Send current remote control
setting view to sensor
Activate display of saved
settings in remote control
Activate the daylight function
on the remote control
2400340_1EGB_Manual_200929_EGB_683_625 - Complete Book A5.indb 7
29-9-2020 14:14:42


