


7
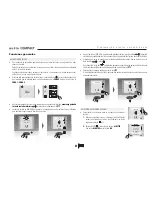
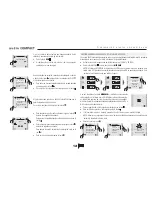
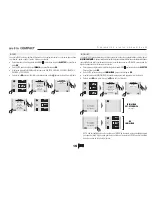
E n c e n d i d o d e l s i s t e m a
MUY IMPORTANTE:
Antes de conectar el equipo a la alimentación o red, asegúrese de seleccionar la
alimentación adecuada en la parte inferior de la consola: (
230 V~ por defecto
,
115 V~ en función del país).
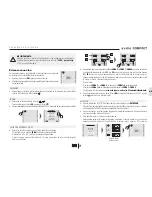
ENCENDIDO
Para encender el sistema, pulsar la tecla superior izquierda, de forma que la consola pasará de
estar en OFF stand-by, a ON encendida .
IDIOMA
Seleccione el idioma mediante las teclas y .
Para confirmar pulse la tecla
OK
y para salir la tecla .
Una vez seleccionado el idioma, el sistema solicita el SET-UP o la selección de las zonas que se van a utilizar.
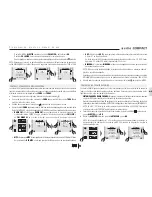
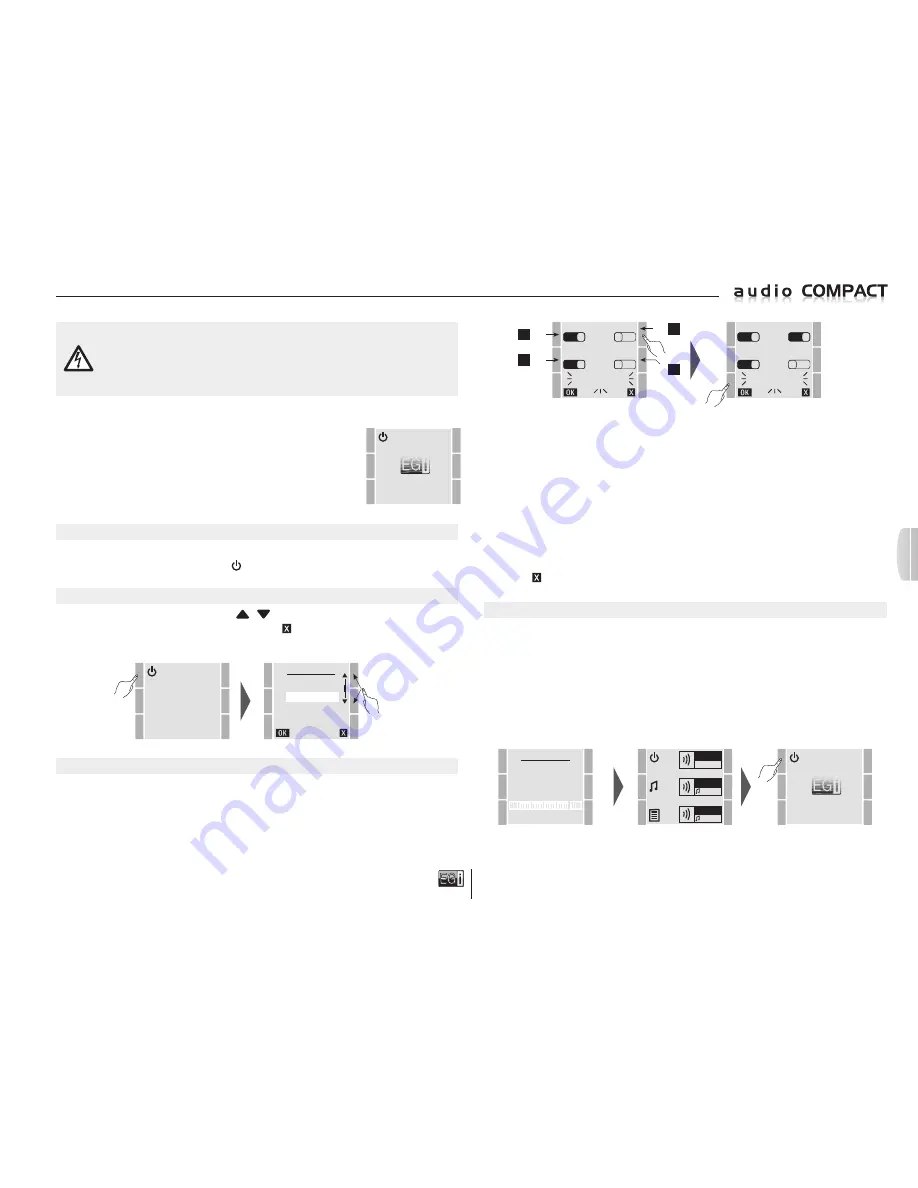
ZONA 1
ZONA 3
1
1
ZONA 2
ZONA 1+2
1
0
SELECCIONAR
ZONAS ACTIVAS
En el ejemplo que se muestra arriba se añade la
ZONA 3
a la
ZONA 1
y
ZONA 2
que vienen por defecto.
El sistema también permite unir la
Z1
y la
Z2
en una sola zona, para que las 2 salidas traseras
Z1
y
Z2
funcionen a la vez, disponiendo de un total de 100 W para una sola zona; siempre y
cuando cada salida tenga un ramal diferente de altavoces. En este caso por ambas salidas sonará
lo mismo, al mismo volumen de música y avisos.
De esta forma:
Si se activa la
ZONA 1
o la
ZONA 2
, se desactiva la
ZONA 1+2
automáticamente.
Si se activa la
ZONA 1+2
, se desactivan automáticamente la
ZONA1
y
ZONA 2
.
Por lo general, le aconsejamos que
si no esta seguro, active las 3 zonas individualmente.
Una vez seleccionadas las zonas, pulse la tecla
OK
para seguir adelante con el SET-UP, o pulse
la tecla para volver a la pantalla inicial.
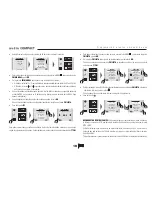
AUTOSCAN
Una vez confirmado el SET-UP de zonas, pasa a realizar el proceso de
AUTOSCAN
.
Este proceso memoriza las 30 mejores emisoras por sensibildad de recepción y busca el nombre de
éstas a través de FM/RDS. Este proceso puede durar más de un minuto.
Una vez terminado, el sistema queda programado inicialmente para que Ud. pueda empezar a
manejarlo, pasando a la pantalla inicial.
En la pantalla inicial, el sistema ya está encendido.
Para apagarlo pulse la tecla superior izquierda, para pasar la consola a stand-by. La consola no
perderá sus datos (incluso si hay pérdida de la luz eléctrica) y pasará a OFF stand-by.
A U T O S C A N
C R E A N D O
L I S TA F M
2 7 / 3 0
K I S S F M
ZONA 1
FM
ZONA 2
FM
ZONA 3
FM
ZONA 1
ZONA 3
1
0
ZONA 2
ZONA 1+2
1
0
SELECCIONAR
ZONAS ACTIVAS
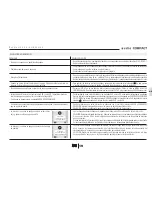
Primera conexión
En la primera conexión a la alimentación, el sistema lleva a cabo un proceso
de inicialización que comienza al recibir alimentación.
Aparece el logotipo de
EGi
y pasa a posición stand-by.
Al transcurrir unos segundos se apaga la pantalla y se activa con la pulsación
de cualquier tecla.
L A N G U A G E
D E U T S C H
E N G L I S H
E S PA Ñ O L
F R A N Ç A I S
I TA L I A N O
P O RT U G U E S
SELECCIÓN DE ZONAS Y SET-UP
Seleccione sólo las zonas que va a utilizar o que están conectadas.
Por ejemplo, si sólo desea la
ZONA1
sólo dejará seleccionada la
1
.
Si quiere sólo la 2 o la 3, sólo dejará seleccionada la deseada.
Si por el contrario, quiere utilizar más de 2 ó 3 zonas, seleccionar las zonas a utilizar, dejando
libre la que no desea.
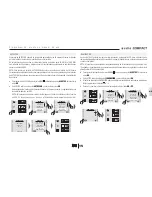
(Pantalla Inicial
de la consola)
SI
/ NO
SI
/ NO
SI /
NO
SI /
NO
es


