25
USER MANUAL
MAGIC 500 PLUS ULTRASOUND UNIT
T +49 7461 96 580 0 | F + 49 7461 96 580 90 | export@eickemeyer.com | www.eickemeyer.com
6.12 Check List Management
6.12.1 Save and View Check List
1. In the B, B / B mode, freeze the desired image.
2. Record the “ID” and “Result” according to the text input method, press
key to confi rm and save to check list.
3. Press direction keys
to move the cursor to “Checklist”, press
key to enter check list interface.
4. Press direction keys
to view stored check lists.
5. Press
key to exit check list interface and press
key to return to real-time status.
Explanation:
1. In the check list, the contents of each column respectively: SN, ID, Result and Time.
2. The main unit stores up to 200 check lists.
6.12.2 Delete Check Lists
1. In the B, B / B frozen status, press direction keys
to move the cursor to “Checklist”, press
key to enter check list
interface.
2. Press direction keys
to clear all the check lists.
3. Press
key to exit check list interface and press
key to return to real-time status.
6.12.3 Transfer Check Lists to Workstation
1. In the B, B / B mode, freeze the desired image.
2. Press direction keys
to move the cursor to “Checklist”, press
key to enter check list interface.
3. Press
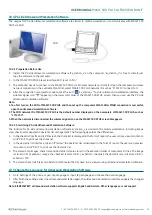
key, a symbol “>>>” prompt appears at the top right of the screen, after the prompt disappear, all the check lists
will be transferred to ultrasound workstation.
4. Press
key to exit check list interface and press
key to return to real-time status.
Note: The specifi c functions of ultrasound workstation, see Chapter Ten “Ultrasound Workstation Software Instructions”.
6.13 Obstetric List Management
6.13.1 Save and View Obstetric List
1. In the B, B / B mode, freeze the desired image.
2. Obstetric results were obtained by obstetric measurement, the results were saved to the main unit.
3. Press direction keys
to move the cursor to “OB List”, press
key to enter obstetric list interface.
4. Press direction keys
to view stored obstetric lists.
5. Press
key to exit obstetric list interface and press
key to return to real-time status.
Explanation:
1. In the obstetric list, the contents of each column respectively: SN, Time, ID, Animal, Formula, G.A and EDC.
2. The main unit stores up to 200 obstetric lists.
6.13.2 Delete Obstetric Lists
1. In the B, B / B frozen status, press direction keys
to move the cursor to “OB List”, press
key to enter obstetric list
interface.
2. Press direction keys
to clear all the obstetric lists.
3. Press
key to exit obstetric list interface and press
key to return to real-time status.
6.13.3 Transfer Obstetric Lists to Workstation
1. In the B, B / B mode, freeze the desired image.
2. Press direction keys
to move the cursor to “OB List”, press
key to enter obstetric list interface.
3. Press
key, a symbol “>>>” prompt appears at the top right of the screen, after the prompt disappear, all the obstetric
lists will be transferred to ultrasound workstation.
4. Press
key to exit obstetric list interface and press
key to return to real-time status.
Note: The specifi c functions of ultrasound workstation, see Chapter Ten “Ultrasound Workstation Software Instructions”.


