37
USER MANUAL
MAGIC 500 PLUS ULTRASOUND UNIT
T +49 7461 96 580 0 | F + 49 7461 96 580 90 | export@eickemeyer.com | www.eickemeyer.com
• Please follow local laws and regulations to choose the disinfectants.
3. After disinfection, rinse the probe with a large number of sterile water (about 2 gallons) for at least one minute to
remove the residual chemicals. You may follow the recommended method by the disinfectant manufacturer to rinse.
4. After fi nishing the rinsing, use a sterilized cloth or gauze to wipe the water on the surface of probe. Do not dry the
probe by heating it.
Attention!
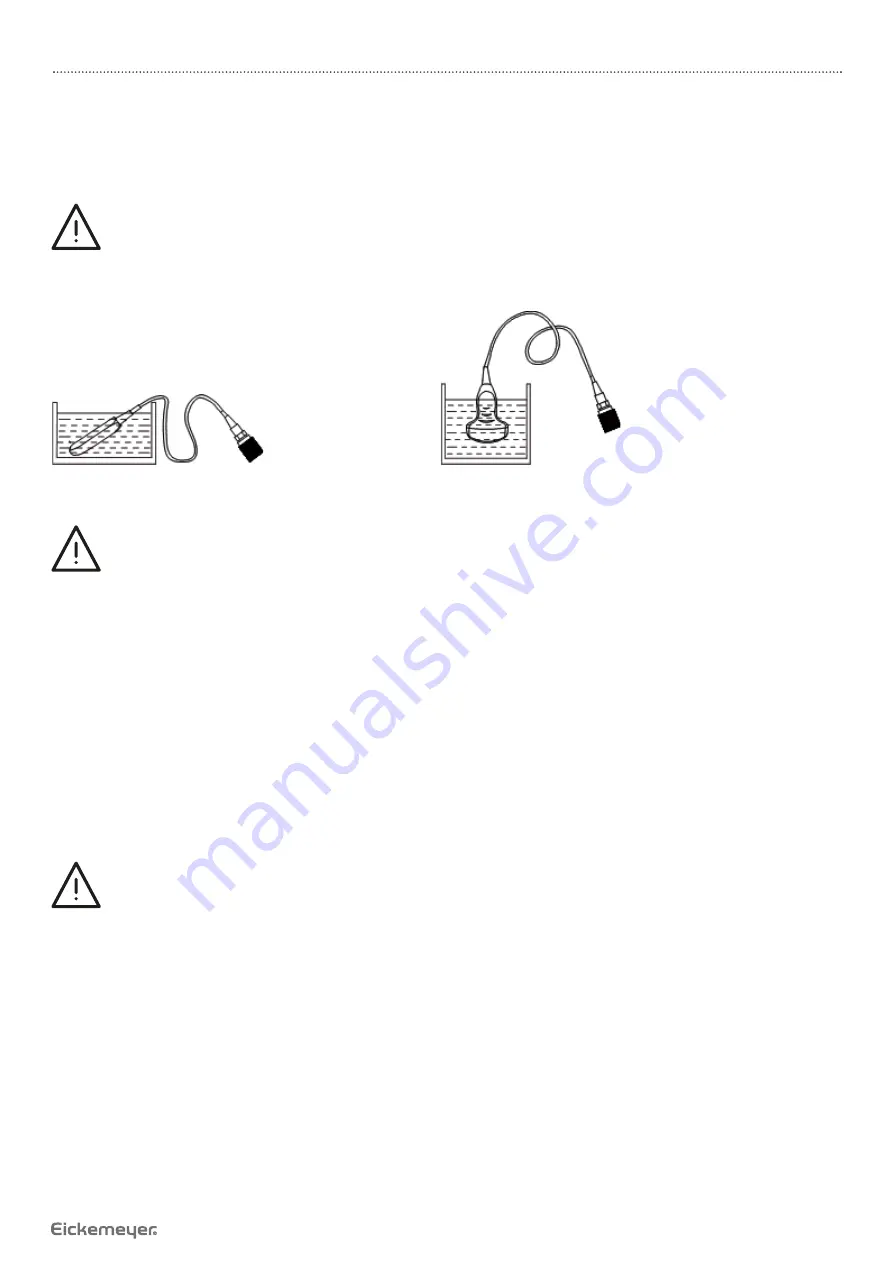
The waterproof grade of intra-cavity probe is IPX7, immersion depth from probe’s acoustic head to the sheath of
probe handle; the waterproof grade for other probes is IPX4.
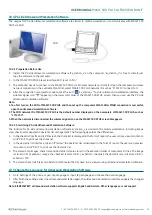
Fig. Immersion disinfection of intra-cavity probe
(sketch map)
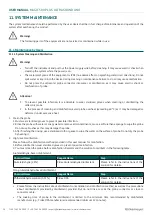
Fig. Immersion disinfection of probe
(except intra-cavity probe)
Attention!
1. It is a normal phenomenon that the color of the acoustic lens may change and the text of the probe label may
fade away.
2. The regular disinfection times should be minimized as it may lead to degrade of the probe safety and performance.
3. Check the probe after cleaning and disinfection
1. Check the probe enclosure and its cable to ensure they are free of abnormity (such as scuffi ng, cracks or drop-off).
2. The sound window of probe is thin; ensure that there are no any abnormity on the sound window, such as scuffi ng,
cracks, peeling, bulge and drop-off.
4. Clean the probe cable and its connector
1. Clean the probe cable and its connector with soft, dry cloth.
2. In case of die-hard blots, clean with soft cloth dipped in moderate detergent and then air-dry it.
5. Clean the LED screen
Use a soft cloth dipped in glass cleaner to clean the LED screen, and then air-dried.
Attention!
• Do not clean the screen with hydrocarbon detergent for example alcohol etc or OA equipment cleaning media.
• Do not use sharp objects to touch the LED screen, and do not press or squeez against the LED screen.
6. Clean the control panel, shell
Clean the instrument surface with a soft, dry cloth or with a soft cloth dipped in moderate water cleaning media to
remove the blots, and then dry the instrument with a soft, dry cloth or with air.
7. Clean the video recorder, shutter release
1. Use the soft dry cloth to wipe the video recorder, shutter release.
2. If it is diffi cult to wipe away the blemish, clean with a soft cloth dipped in moderate detergent and then air-dry it.
11.1.2 Use and Maintenance for the Rechargeable Battery
1. Plug the output port of power adapter into the DC power input port on the right side of main unit to charge. When
charging, the battery charge indicator fl ashes orange and green alternately; when fully charged, the indicator is in a
orange no-fl ashing state.


