-15-
Mechanical Disassembly
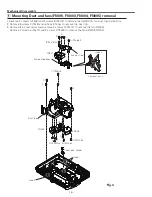
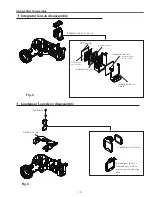
1. Remove the Lens spacer sheet-top.
2. Loose 3 screws A(M3x7) to remove the Lamp Ass'y. Remove 5 screws B(T3x8)
to remove the Optical Unit, Remove 4 screws C(T3x8) and 1 screw D(T3x8) to
remove the Lamp holder and Ballast socket.
3. Remove the lamp cover switch(SW902).
4. Remove 4 screws E(T3x8) to remove the Iris Ass'y.
Fig.3
c
optical unit, Lamp Ass'y, SW902 and Iris Ass'y removal
Optical Unit
Ballast socket
A (M3x7)x3
Lamp holder
B (T3x8)X5
E(T3x8)x4
Lens spacer
sheet-top
B
B
B
A
C
C
C (T3x8)x4
C
A
Lamp Ass'y
SW902
E
E
E
Iris Ass'y
D (T3x8)
B
Summary of Contents for LC-XBM31
Page 67: ...67 IC Block Diagrams PW190 Scaler IC301 MR4010 Power OSC IC631...
Page 69: ...69 IC Block Diagrams TB6608FNG IRIS Control IC601 TLV320AIC3105 Audio Control IC5002...
Page 74: ...74 Parts Location Diagrams KT8 XBM3100 S03 L05 Relay out M03 Relay lens Out assembly...
Page 95: ...Key No Part No Description Key No Part No Description 95 Electrical Parts List KT8 XBM3100...
Page 96: ...KT8BE November 2010 Printed in Japan 2010 Eiki Internatinal Inc A key to better communications...


