background image

17

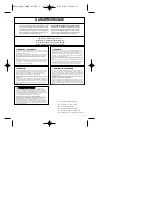
GARANTIEURKUNDE

Auf das in der Anleitung bezeichnete Gerät geben wir 2 Jahre
Garantie, für den Fall, dass unser Produkt mangelhaft sein sollte.
Die 2-Jahres-Frist beginnt mit dem Gefahrenübergang oder der
Übernahme des Gerätes durch den Kunden. Voraussetzung für
die Geltendmachung der Garantie ist eine ordnungsgemäße
Wartung entsprechend der Bedienungsanleitung sowie die be-
stimmungsgemäße Benutzung unseres Gerätes.

Selbstverständlich bleiben Ihnen die gesetzlichen Gewähr-
leistungsrechte innerhalb dieser 2 Jahre erhalten. 

Die Garan-

tie gilt für den Bereich der Bundesrepublik Deutschland oder der
jeweiligen Länder des regionalen Hauptvertriebspartners als Er-
gänzung der lokal gültigen gesetzlichen Vorschriften. Bitte be-
achten Sie Ihren Ansprechpartner des regional zuständigen Kun-
dendienstes oder die unten aufgeführte Serviceadresse.

ISC GmbH · International Service Center

Eschenstraße 6 · D-94405 Landau/Isar (Germany)

Info-Tel. 0180-5 120 509 • Telefax 0180-5 835 830

Service- und Infoserver: http://www.isc-gmbh.info


Technische Änderungen vorbehalten


Technical changes subject to change


Sous réserve de modifications


Technische wijzigingen voorbehouden


Con riserva di apportare modifiche tecniche

Сохpaняeтcя прaво на тeхничeскиe изменения


GARANTIE

Op het in de handleiding genoemde toestel geven wij 2 jaar garantie voor het
geval dat ons product gebreken mocht vertonen. De periode van 2 jaar gaat in
met de gevaarovergang of de overname van het toestel door de klant.
De garantie kan enkel worden geclaimd op voorwaarde dat het toestel naar
behoren is onderhouden en gebruikt conform de handleiding.

Vanzelfsprekend blijven u de wettelijke garantierechten binnen deze 2 jaar
behouden.

De garantie geldt voor het grondgebied van de Bondsrepubliek Duitsland of van
de respectievelijke landen van de regionale hoofdverdeler als aanvulling van de
ter plaatse geldende wettelijke voorschriften. Gelieve zich tot uw contactpersoon
van de regionaal bevoegde klantendienst of tot het hieronder vermelde service-
adres te wenden.


CERTIFICATO DI GARANZIA 

Per l’apparecchio indicato nelle istruzioni concediamo una garanzia di 2 anni,
nel caso il nostro prodotto dovesse risultare difettoso. Questo periodo di 2 anni
inizia con il trapasso del rischio o la presa in consegna dell’apparecchio da parte
del cliente. Le condizioni per la validità della garanzia sono una corretta manu-
tenzione secondo le istruzioni per l’uso così come un utilizzo appropriato del
nostro apparecchio.

Naturalmente in questo periodo di 2 anni continuiamo ad assumerci gli
obblighi di responsabilità previsti dalla legge.

La garanzia vale per il territorio della Repubblica Federale Tedesca o dei rispet-
tivi paesi del principale partner di distribuzione di zona a completamento delle
norme di legge in vigore sul posto. Rivolgersi all’addetto del servizio assistenza
clienti incaricato della rispettiva zona o all’indirizzo di assistenza clienti riportato
in basso.


WARRANTY CERTIFICATE

The product described in these instructions comes with a 2 year warranty cove-

ring defects. This 2-year warranty period begins with the passing of risk or when

the customer receives the product.

For warranty claims to be accepted, the product has to receive the correct main-

tenance and be put to the proper use as described in the operating instructions.

Your statutory rights of warranty are naturally unaffected during these 2

years.

This warranty applies in Germany, or in the respective country of the manufactu-

rer’s main regional sales partner, as a supplement to local regulations. Please

note the details for contacting the customer service center responsible for your

region or the service address listed below.


GARANTIE

Nous fournissons une garantie de 2 ans pour l’appareil décrit dans le mode
d’emploi, en cas de vice de notre produit. Le délai de 2 ans commence avec la
transmission du risque ou la prise en charge de l’appareil par le client.
La condition de base pour le faire valoir de la garantie est un entretien en bonne
et due forme, conformément au mode d’emploi, tout comme une utilisation de
notre appareil selon l’application prévue.

Vous conservez bien entendu les droits de garantie légaux pendant ces 2
ans.

La garantie est valable pour l’ensemble de la République Fédérale d’Allemagne

ou des pays respectifs du partenaire commercial principal en complément des

prescriptions légales locales. Veuillez noter l’interlocuteur du service après-

vente compétent pour votre région ou l’adresse mentionnée ci-dessous.

Г

Га

ар

ра

ан

нт

ти

ий

йн

но

ое

е  у

уд

до

ос

ст

то

ов

ве

ер

ре

ен

ни

ие

е

На тот случай, если описанное в руководстве по эксплуатации
устройство выйдет из строя мы даем на нашу продукцию 2-х летнюю
гарантию. 2-х летний срок гарантии начинается с момента перенятия
ответственности за продукт или приобретения устройства клиентом.
Обязательным условием соблюдения гарантийных обязательств являет-
ся надлежащий технический уход за устройством, а также
использование нашей продукции согласно назначения.

В течении 2-х лет за вами также сохраняется права на
предусмотренное законодательством гарантийное обслуживание.

Гарантийное обязательство распространяется на территорию
Федеративной Республики Германии, а в странах, где существуют
региональные центры сбыта это обязательство является дополнением к
местным, действующим законодательным предписаниям. Пожалуйста,
по всем вопросам обращайтесь в службу сервиса Вашего региона или по
указанному ниже адресу.

Anleitung BABH 24 SPK 1  27.07.2005  8:31 Uhr  Seite 17

Summary of Contents for BABH 24

Page 1: ...Hammer Drill Mode d emploi Marteu perforateur à accumulateur Gebruiksaanwijzing Accuboorhamer Istruzioni per l uso Trapano battente a batteria Руководство по эксплуатации Аккумуляторный перфоратор Art Nr 45 195 90 I Nr 01015 Anleitung BABH 24 SPK 1 27 07 2005 8 31 Uhr Seite 1 ...

Page 2: ...en Wear goggles F Portez une protection des yeux Oogbeschermer dragen I Portare occhiali protettivi Используйте защитные очки D Bei Staubentwicklung Atemschutz tragen Wear a breathing mask F En cas de dégagement de poussière Bij het vrijkomen van stof I In caso di sviluppo di polvere При образовании пыли используйте респиратор 2 Anleitung BABH 24 SPK 1 27 07 2005 8 31 Uhr Seite 2 ...

Page 3: ...3 1 2 햺 햴 3 햺 6 I 0 4 5 Anleitung BABH 24 SPK 1 27 07 2005 8 31 Uhr Seite 3 ...

Page 4: ...se 3 Schieben Sie den Akku auf das Ladegerät Die rote LED leuchtet Drücken Sie die Taste Button um den Akku zu laden Die grüne LED signalisiert daß der Akku geladen wird Nach beendetem Ladevorgang erlischt die grüne LED Die Ladezeit beträgt bei leerem Akku ca 1 Stunde Während des Ladevorgangs kann sich der Akku Pack etwas erwärmen dies ist jedoch normal 4 Zum Entnehmen des Akku Packs vom Ladegerät...

Page 5: ...t gegen dem Uhrzeigersinn lösen und drehen Danach Zusatzgriff wieder festziehen 7 4 Tiefenanschlag 6 Schraube am Zusatzgriff lösen und den Tiefenan schlag in die Bohrung des Zusatzgriffes einsetzen Tiefenanschlag einstellen und Schraube am Zusatz griff wieder anziehen 7 5 Schlagstop Abb 6 Zum sanften Anbohren ist der Bohrhammer mit einem Schlagstop ausgestattet 앬 Schalthebel 7 nach rechts auf Posi...

Page 6: ...the pushlock button at the side to do so 2 Check that your mains voltage is the same as that marked on the rating plate of the battery charger Plug the battery charger in the socket 3 Push the battery pack onto the battery charger The red LED will come on Press the Button button to charge the battery pack The green LED will come on to indicate that the battery pack is being charged When charging h...

Page 7: ...ditional handle For a secure posture during work you should turn the additional handle Twist the additional handle anti clockwise and turn Then fix the additional handle by twisting again 7 4 Depth stop 6 Undo the screw on the additional handle and insert the depth stop in the hole of the additional handle Set the depth stop and retighten the screw on the additional handle 7 5 Hammer stop Fig 6 Th...

Page 8: ...ulateur de la poignée figure 2 en appuyant sur la touche à cran 2 Comparez si la tension du secteur indiquée sur la plaque signalétique correspond à la tension du bloc du serveur disponible Enfichez le chargeur dans la prise 3 Poussez l accumulateur sur le chargeur La DEL rouge brille Appuyez sur la touche bouton pour charger l accumulateur La DEL verte indique que l accumulateur est en cours de r...

Page 9: ...iendrez une tenue corporelle bien sûre en tournant la poignée supplémentaire Desserrez la poignée supplémentaire en la tournant dans le sens contraire aux aiguilles d une montre Fixez ensuite à nouveau la poignée supplémen taire 7 4 Butée en profondeur 6 Desserrez la vis à oreilles sur la poignée supplémen taire et placez la pièce droite de la butée en profondeur dans le trou de la poignée supplém...

Page 10: ...gaat branden Druk op de knop button om de accu te laden De groene LED signaleert dat het laden van het accupack bezig is Aan het einde van een laadbeurt gaat de groene LED uit De laadduur bedraagt ca 1 uur als de accu leeg is Tijdens het laden kan het accupack wat warm worden dat is echter normaal 4 Om het accupack van de lader te nemen drukt u op de grendelknop 9 en trekt u er het accupack naar b...

Page 11: ...klok in loszetten en draaien Vervolgens extra handgreep terug aanhalen 7 4 Diepteaanslag 6 De schroef op de extra handgreep losdraaien en de diepteaanslag het boorgat van de extra handgreep in zetten Diepteaanslag afstellen en de schroef op de extra handgreep terug aanhalen 7 5 Klopstop fig 6 Voor het zacht aanzetten is de boorhamer voorzien van een klopstop 앬 Schakelhefboom 7 naar rechts naar de ...

Page 12: ...a sulla targhetta corrisponda alla tensione di rete a disposizione Inserite il carica batteria nella presa di corrente 3 Spingete la batteria sul carica batteria La spia rossa si illumina Premete il tasto Button per caricare la batteria La spia verde segnala che la batteria viene ricaricata Al termine della ricarica si spegne la spia verde Con la batteria scarica il tempo di ricarica è di ca 1 ora...

Page 13: ...n perfetto equilibrio in qualsiasi posizione di lavoro Ruotare l impugnatura in senso antiorario per sbloccarla Dopodiché ribloccare l impugnatura 7 4 Asta di profondità 6 Svitare la vite dell impugnatura supplementare ed inserire l asta nel foro dell impugnatura Riavvitare la vite dell impugnatura dopo aver posizio nato l asta 7 5 blocco della percussione fig 6 Il trapano è dotato di blocco della...

Page 14: ...ожно что он не будет заряжаться в течении длительного времени 1 Вынуть аккумуляторный блок из рукоятки наружу рисунок 2 нажав при этом фиксирующую клавишу 2 Проконтролируйте соответствие указанного на типовой табличке напряжения электросети напряжению Вашей электросети 3 Вставьте аккумулятор в зарядное устройство Красный светодиод светится Нажмите кнопку Button для того чтобы зарядить аккумулятор ...

Page 15: ...тель включить выключить заблокирован 7 3 Дополнительная рукоятка 4 Используйте дрель с перфорацией по условиям техники безопастности только с дополнительной рукояткой Устойчивое положение тела достигается перестановкой дополнительной рукоятки Вращая дополнительную рукоятку против часовай стрелки ослабить ее крепление и затем переставить рукоятку В заключение вновь затянуть дополнительную рукоятку ...

Page 16: ... ÌÂ ÙËÓ ËÁ Î È Ù ÚfiÙ Ô ÁÈ ÙÔ ÚÔ fiÓ I dichiara la seguente conformità secondo la direttiva UE e le norme per l articolo attesterer følgende overensstemmelse i henhold til EU direktiv og standarder for produkt prohlašuje následující shodu podle směrnice EU a norem pro výrobek H a következő konformitást jelenti ki a termékek re vonatkozó EU irányvonalak és normák szerint pojasnjuje sledečo skladnost ...

Page 17: ...a Federale Tedesca o dei rispet tivi paesi del principale partner di distribuzione di zona a completamento delle norme di legge in vigore sul posto Rivolgersi all addetto del servizio assistenza clienti incaricato della rispettiva zona o all indirizzo di assistenza clienti riportato in basso WARRANTY CERTIFICATE The product described in these instructions comes with a 2 year warranty cove ring def...

Page 18: ...ative to returning the electrical device the owner is obliged to cooperate in ensuring that the device is properly recycled if ownership is relinquished This can also be done by handing over the used device to a returns center which will dispose of it in accordance with national commercial and industrial waste management legislation This does not apply to the accessories and auxiliary equipment wi...

Page 19: ...ell apparecchio elettrico è tenuto in alternativa invece della restituzione a collaborare in modo che lo smaltimento venga eseguito correttamente in caso ceda l apparecchio L apparecchio vecchio può anche venire consegnato ad un centro di raccolta che provvede poi allo smaltimento secondo le norme nazionali sul riciclaggio e sui rifiuti Non ne sono interessati gli accessori e i mezzi ausiliari sen...

Page 20: ... est autorisée qu avec l agrément exprès de l entreprise ISC GmbH Nadruk of andere reproductie van documentatie en geleidepapieren van de producten geheel of gedeeltelijk enkel toegestaan mits uit drukkelijke toestemming van ISC GmbH La ristampa o l ulteriore riproduzione anche parziale della documen tazione o dei documenti d accompagnamento dei prodotti è consentita solo con l esplicita autorizza...

Reviews: