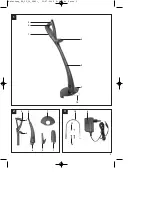
to be introduced for the user. The machineʼs noise
was measured in accordance with prEN ISO 10518.
The level of vibrations emitted from the handle is
≤ 2,5 m/s
2
. Measurements were taken in accordance
with prEN ISO 10518.
5. Before starting the equipment
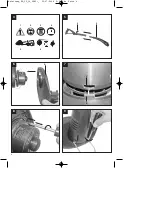
Assembling the grass trimmer (Fig. 5-9)
Assemble the appliance as shown in Figs. 5-9.
When mounting the safety guard Fig. 6/A), make
sure that the front positioner (Fig. 7/B) is inserted into
the opening provided (Fig. 7/C).
Recharging the rechargeable battery
앬
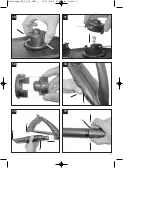
You can remove the rechargeable battery by
firmly pressing both locking tabs (Fig. 13/Item A)
while pulling out the battery (Fig. 13 and 14).
앬
Check to see if the voltage specified on the
rating plate of the charging unit matches the
mains voltage. Connect the power supply unit
(Fig. 18/ItemA) with the charging adapter (Fig.
18/Item B). Plug the power supply unit into the
socket outlet. The green LED on the charging
adapter lights up (Fig. 18/Item C).
앬
Plug the rechargeable battery (Fig. 18/Item E)
into the charging adapter. The red and green
LEDs on the charging adapter light up and
indicate the charging process (Fig. 18/Item
C+D). The time it takes to fully recharge an
empty battery is approximately 3 to 5 hours.
As soon as the battery is fully charged, the red
LED extinguishes and the green LED remains on.
The rechargeable battery can become a little
warm during the charging process. This is
normal.
Note:
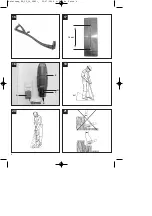
The openings (Fig. 17) provided on the rear side of
the grass trimmer allow you to use the charging
adapter as a wall holder.
When you reinsert the rechargeable battery (Fig. 14),
make sure that the battery engages securely in the
mount (Fig. 14/Item C) with the opening at the rear
end (Fig. 14/Item B).
If the battery pack fails to charge, please check
앬
whether there is voltage at the socket-outlet
앬
whether there is good contact at the charging
contacts
If the battery pack still fails to charge, send
앬
the battery charger with charging adapter
앬
and the battery pack
to our customer services department.
To ensure that the NC battery pack provides long
service you should take care to recharge it promptly.
Recharging is always necessary when you notice a
drop in the performance of your cordless grass
trimmer.
Never fully discharge the battery pack. This will
cause it to develop a defect.
6. Operation
IMPORTANT! Make sure that you unplug the
rechargeable battery before adjusting the line
length (Fig. 13+14)!
The grass trimmer has a semi-automatic line
extension system. Each time you activate the semi-
automatic line extension system, the line will be
extended to ensure that you can cut your lawn with
the perfect cutting width at all times.
Please note that the wear on the line will be
increased if you activate the semi-automatic line
extension system frequently.
Note
If the line is too long when you use the machine
for the first time, the surplus end of it will be cut
by the blade on the safety hood.
If the line is too short when you start the machine
for the first time, press the knob on the line spool
and pull the line hard. When you then start the
machine for the first time the line will be cut to
the perfect length automatically.
Remove the knife guard. Caution: Risk of injury!
Now insert the rechargeable battery (Fig. 14). The
line will be cut to the correct length when the cutting
head starts up again. A short or worn nylon line
produces poor cutting results.
Your grass trimmer will work at its best if you
observe the following instructions:
앬
Never use the grass trimmer without its safety
devices.
앬
Do not cut grass when it is wet. The best results
are had on dry grass.
12
GB
Anleitung_RG_CT_14_SPK1:_ 30.07.2008 9:58 Uhr Seite 12
Summary of Contents for 34.111.01
Page 4: ...4 5 6 7 8 9 4 1 2 3 5 6 4 4 A C 5 B Anleitung_RG_CT_14_SPK1 _ 30 07 2008 9 58 Uhr Seite 4 ...
Page 5: ...5 10 11 12 13 14 15 B C A A A Anleitung_RG_CT_14_SPK1 _ 30 07 2008 9 58 Uhr Seite 5 ...
Page 6: ...6 16 17 18 B A 12 cm E D C 19 20 21 Anleitung_RG_CT_14_SPK1 _ 30 07 2008 9 58 Uhr Seite 6 ...


