background image

GB

- 26 -

7.2.5 Inspecting the V-belt

Check the V-belt at regular intervals (after every 

25 hours in operation). To do so, remove the V-

belt cover. Have the belt replaced if it shows visib-

le signs of wear. The belts should not be replaced 

by anyone but a specialist.

Use only original replacement parts.

7.2.6 Moving parts

Maintain the moving parts and bearings at regular 

intervals (after every 25 hours in operation). Pro-

ceed as illustrated in Fig. 55-57, in order to provi-

de the moving parts and bearings with optimum 

protection against wear.

7.2.7 Repair

After carrying out repair or maintenance work, en-

sure that all safety parts are installed and in per-

fect condition. Store potentially hazardous parts 

out of the reach of other persons and children.

Important: In accordance with the German 

Product Liability Act, we are not liable for any 

damages if they result from improper repairs 

to the product or if parts are replaced by items 

other than genuine parts or parts approved by us. 

Furthermore, we are not liable for any damages if 

they result from improper repairs to the product. 

Arrange for your customer service or an autho-

rized workshop to do the work. The same applies 

to accessory parts.

7.2.8 Operating times

Please note that the statutory regulations may 

di

 er from town to town.

7.3 Preparing the mower for long-term sto-

rage

Warning:

 Do not empty the petrol tank in enc-

losed areas, near 

fi

 re or when smoking. Petrol 

fumes can cause explosions and 

fi

 re.

1.  Drain the petrol tank using a petrol extraction 

pump.

2.  Start the engine and run it until the tank and 

fuel line are completely empty and the engine 

stalls.

3.  Be sure to clean the entire equipment to pro-

tect the paint.

4.  Store the equipment in a well-ventilated place 

or location.

7.4 Preparing the mower for transport

1.  Drain the petrol tank using a petrol extraction 

pump.

2.  Always let the engine run until it has used up 

the remainder of petrol in the tank.

3.  Empty the engine oil from the warm engine.

4.  Remove the spark plug boot from the spark 

plug.

5.  Clean the housing and mower unit.

8. Disposal and recycling

The equipment is supplied in packaging to pre-

vent it from being damaged in transit. The raw 

materials in this packaging can be reused or 

recycled. The equipment and its accessories are 

made of various types of material, such as metal 

and plastic. Never place defective equipment in 

your household refuse. The equipment should 

be taken to a suitable collection center for proper 

disposal. If you do not know the whereabouts of 

such a collection point, you should ask in your 

local council o

  ces.

Anl_GE_TM_102_BS_SPK8.indb   26

Anl_GE_TM_102_BS_SPK8.indb   26

27.11.12   12:38

27.11.12   12:38

Summary of Contents for 3400622

Page 1: ... B S 8 E Manual de instrucciones original Tractor cortacésped GB Original operating instructions Lawn Tractor South America Anl_GE_TM_102_BS_SPK8 indb 1 Anl_GE_TM_102_BS_SPK8 indb 1 27 11 12 12 38 27 11 12 12 38 ...

Page 2: ... 2 8 2 1 3 4 5 6 7 9 Anl_GE_TM_102_BS_SPK8 indb 2 Anl_GE_TM_102_BS_SPK8 indb 2 27 11 12 12 38 27 11 12 12 38 ...

Page 3: ...iento de conductor Saber que no es posible controlar una máquina con asiento de conductor que se desvía por una pendiente accionando el freno Los motivos principales que causan el descontrol de la máquina son a Falta de adherencia en las ruedas b Conducir demasiado rápido c Frenar de forma incorrecta d Cuando no se utiliza el equipo de trabajo adecuado para la tarea a desempeñar e Falta de conocim...

Page 4: ... ni so brecargarlo No poner la máquina en funcion amiento a una velocidad excesiva puesto que se aumenta el peligro de sufrir accidentes 14 Antes de abandonar el asiento del conductor Desacoplar la toma de fuerza que va al equipo accesorio y bajarlo Poner el cambio en punto muerto y accionar el freno inmovilizador Parar el motor y quitar la llave 15 Desacoplar la toma de fuerza que va al equipo ac...

Page 5: ...on agua en menos de 15 min y consultar a un médico No cargar baterías no recargables Al cargar una batería se tendrán en cuenta las instrucciones del fabricante de la misma No cargar varias baterías a la vez El cable de conexión a red y los cables deben estar en perfecto estado Mantener el cargador y la batería fuera del alcance de los niños Atención Si se percibe un olor fuerte de gas existe peli...

Page 6: ...strucciones 2 Atención Peligro por piezas que pueden salir despedidas No utilizar nunca máquinas con dispositivos de protección dañados o no incorporados Atención Peligro por piezas que pueden salir despedidas Mantener la distancia de seguridad 3 Cuidado con las cuchillas afiladas Antes de efectuar cualquier tipo de trabajo de man tenimiento reparaciones limpieza o ajustes apagar el motor y desenc...

Page 7: ...o de la bolsa de reco gida Estribo 2 enchufes de la bujía Tornillo ranura en cruz Batería Tuerca Arandela Tornillo hexágono interior Manual de instrucciones original Imágenes del producto del manual de inst rucciones original Herramientas Llave fija de 8 10 mm Llave fija de 13 15 mm Llave multiusos de 10 12 mm Llave multiusos de 13 19 mm Llave de hexágono interior de 5 mm Destornillador para torni...

Page 8: ...Poner en funcionamiento el cortacés ped solo con una batería de 12 V que no precise mantenimiento Poner la batería pos 37 sobre la base Conectar primero el cable rojo a y luego el cable negro a Asegurar la batería con el resorte de tensión fig 15 El desmontaje se realiza siguiendo el mismo orden pero a la inversa Atención Durante el funcionamiento no se debe desconectar la batería de la red de a b...

Page 9: ...instrucciones de Briggs Stratton adjun tas se describe el proceso de arranque exacto del motor Atención El motor se suministra sin aceite Antes de la pri mera puesta en marcha es imprescindible llenar de aceite También es preciso llenar el motor de gasolina ya que se suministra sin ella Siempre que tenga que efectuar trabajos de ajus te y o reparaciones en su cortacésped espere a que la cuchilla s...

Page 10: ...el motor Cambiar la bombilla 18 W girando el portalámparas pos m en sentido contrario a las agujas del reloj 6 1 Cómo cortar el césped Cortar el césped empleando únicamente cuchil las afiladas y en perfecto estado con el fin de que los tallos no se deshilachen provocando así un amarilleamiento del césped Para conseguir un corte limpio del césped es necesario que los recorridos del cortacésped sean...

Page 11: ...se por completo 5 Deslizar de nuevo la palanca de desbloqueo en el soporte 6 Seguir cortando el césped teniendo en cuen ta las normas de seguridad Limpieza del expulsor Al cortar el césped mojado o al cortarlo a alta velocidad de desplazamiento el expulsor fig 25 pos 18 puede atascarse Tener en cuenta los puntos siguientes para solucionar el atasco 1 Desacoplar la toma de fuerza que va a los equip...

Page 12: ...e césped que se encuentren adheridos al chasis y en la herramienta de trabajo utilizar siempre un objeto adecuado por ejemplo cepil los o escobillas 7 2 Mantenimiento Atención El manual de instrucciones adjunto del motor de Briggs Stratton incluye información sobre el mantenimiento y los intervalos de mante nimiento del motor Los materiales de producción y mantenimiento contaminados han de ser eli...

Page 13: ...de que el circlip está colocado de forma correcta No utilizar circlips desgastados la rueda podría soltarse Aviso Dado que se trata de neumáticos sin cámara la reparación de los mismos debería rea lizarla un profesional Desmontar el capó del motor fig 49 52 Fig 49 Desenchufar los cables pos u Fig 50 51 Quitar los pasadores pos v y los pernos pos w Fig 51 Quitar el capó del motor El montaje se real...

Page 14: ...con una bom ba de extracción de gasolina 2 Dejar funcionar el motor hasta que se haya gastado el resto de la gasolina 3 Vaciar el aceite del motor estando éste toda vía caliente 4 Extraer el enchufe de la bujía de encendido 5 Limpiar la carcasa y el plato de corte 8 Eliminación y reciclaje El aparato está protegido por un embalaje para evitar daños producidos por el transporte Este embalaje es mat...

Page 15: ...n y documentos anexos del producto o extractos de los mismos con autorización expresa de iSC GmbH Nos reservamos el derecho a realizar modificaciones técnicas Anl_GE_TM_102_BS_SPK8 indb 15 Anl_GE_TM_102_BS_SPK8 indb 15 27 11 12 12 38 27 11 12 12 38 ...

Page 16: ...o gain an appreciation of the need for care and concentration when using machines with driver s seats To understand that if a machine with a driver s seat starts slipping down a slope control cannot be regained by applying the brake The main reasons for uncontrolled handling are a Inadequate wheel grip b Driving too fast c Inappropriate braking d Tool unsuited to task at hand e Lack of knowledge a...

Page 17: ...chments switch off the engine and pull out the spark boot plug and the ignition key Before you dislodge any blockages or clogs in the chute Before carrying out any checks cleaning or other work on the machine If you have struck a foreign object Examine the machine for signs of damage and carry out any necessary repairs before restarting and continuing to work with the machine If the machine begins ...

Page 18: ...taff Do not use the cable for purposes other than that for which it is designed Do not carry the charger by its cable and do not use the cable to pull the plug out of the socket Protect the cable from heat oil and sharp edges Check the equipment for damage Unless otherwise stated in the operating inst ructions defective or damaged parts must be repaired or replaced by a customer service workshop O...

Page 19: ...l the spark plug boot before doing any maintenance repair cleaning or adjustment work 4 Fill with oil and fuel before starting 5 Caution Wear ear protection and safety gog gles 6 Risk of cut injuries Caution rotating cutters Never use the mower unit as a step 7 Important Switch off the engine for refueling 8 Accelerator pedal forward 9 Accelerator pedal reverse 2 Layout and items supplied Figures 1...

Page 20: ...tions Product illustrations for the Original Operating Instructions Tools 8 10mm open ended wrench 13 15 mm open ended wrench 10 12mm multi functional wrench 13 19 mm multi functional wrench 5 mm Allen key Philips screwdriver 3 Intended use The petrol lawn mower is suitable for use in public facilities parks and sports centers on farms or in the forestry sector The lawn mower is designed to be use...

Page 21: ...ystem during operation Charging the battery with the charger If the battery has lost its charge it can be charged up with a charger not included in delivery via the household mains system Disconnect the battery from the electrical system as described in the section Inserting and removing the battery We recommend that you use an Einhell charger Important Explosive gas is generated during the chargi...

Page 22: ... seat Each time before use check the tire pressure and oil level Speed lever Fig 30 Move the throttle lever Item 14 in order to incre ase or decrease the engine speed For optimum mowing results we recommend that the throttle lever should be set to the Hare position Tortoise Slow Hare Fast Choke enables a quick cold start Lights Fig 30 Vehicle lights ON OFF Item 15 Note The lights only work if the ...

Page 23: ...ct the condition of the blade and the blade mount Replace any parts that are damaged Starting mowing Important Be sure to observe the safety ins tructions 1 Start the engine Important Observe all the information on operation contained in this ma nual Note For detailed information on starting the engine refer to the enclosed manual from Briggs Stratton Important If you actuate the ignition key agai...

Page 24: ...nance informa tion and maintenance interval information on the engine Important Never work on or touch any current conducting parts of the ignition system while the engine is running Pull the spark plug boot from the spark boot before doing any maintenance or assembly work Never carry out any work on the equipment while the engine is running Work that is not de scribed in these operating instructi...

Page 25: ...ven in height 1 Place the machine on a firm and level surface 2 Check the tire pressure and adjust it if neces sary 3 Set the cutting height lever Fig 1 Item 3 to level 1 4 To set the correct height place blocks with a height of 25 mm beneath the front edge of the mower unit Item f and blocks with a height of 30 mm beneath the rear edge Item h 5 Adjust the 3 nuts Item i so that the mower unit just...

Page 26: ...hat the statutory regulations may differ from town to town 7 3 Preparing the mower for long term sto rage Warning Do not empty the petrol tank in enc losed areas near fire or when smoking Petrol fumes can cause explosions and fire 1 Drain the petrol tank using a petrol extraction pump 2 Start the engine and run it until the tank and fuel line are completely empty and the engine stalls 3 Be sure to ...

Page 27: ...eans in whole or in part of documentation and papers accompanying products is permitted only with the express consent of the iSC GmbH Subject to technical changes Anl_GE_TM_102_BS_SPK8 indb 27 Anl_GE_TM_102_BS_SPK8 indb 27 27 11 12 12 38 27 11 12 12 38 ...

Page 28: ...do del gabinete roturas golpes rayaduras etc como así tam poco las baterías ni los daños ocasionados por deficiencias o interrupciones que afecten el circuito eléctrico de conexión o si los daños fueran producidos por causas de fuerza mayor o caso fortuito y los ocasionados por mudanzas o traslados Valido si el cliente realiza la Puesta en Marcha gratuita para los productos con motor a explosión e...

Page 29: ...especto del comprador o de cualquier otra parte como eventual consecuencia de un reclamo fundado en contrato o en obligaciones extracontractuales podrá exceder un monto total equivalente al pre cio de compra del producto IMPORTANTE El presente certificado anula cualquier otra ga rantía implícita o explícita por la cuál y expresa mente no autorizamos a ninguna otra persona sociedad o asociación a a...

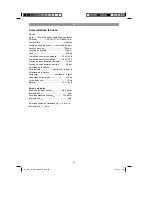
Page 30: ... neumáticos delante 1 0 bar Presión de aire neumáticos detrás 0 8 bar Velocidad de la marcha hacia delante continua 0 8 8 km h Velocidad de la marcha hacia atrás continua 0 5 km h Capacidad de remolque 300 kg Carga de apoyo 75 kg Batería 12 V 18 Ah Ruido y vibración Nivel de presión acústica LpA 86 9 dB A Imprecisión KpA 3 dB Nivel de potencia acústica LWA 100 dB A Imprecisión KWA 3 dB Valor de em...

Page 31: ...mantenimiento y seguridad introducción de cuerpos extraños en el aparato como p ej arena piedras o polvo uso violento o influencias externa como p ej daños por caídas así como por el desgaste habitu al por el uso Esto se aplica especialmente en aquellas baterías para las que ofrecemos un plazo de garantía de 12 meses El derecho a garantía pierde su validez cuando ya se hayan realizado intervencion...

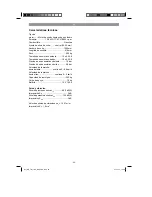
Page 32: ... neumáticos delante 1 0 bar Presión de aire neumáticos detrás 0 8 bar Velocidad de la marcha hacia delante continua 0 8 8 km h Velocidad de la marcha hacia atrás continua 0 5 km h Capacidad de remolque 300 kg Carga de apoyo 75 kg Batería 12 V 18 Ah Ruido y vibración Nivel de presión acústica LpA 86 9 dB A Imprecisión KpA 3 dB Nivel de potencia acústica LWA 100 dB A Imprecisión KWA 3 dB Valor de em...

Page 33: ... 33 Anl_GE_TM_102_BS_SPK8 indb 33 Anl_GE_TM_102_BS_SPK8 indb 33 27 11 12 12 38 27 11 12 12 38 ...

Page 34: ... 34 Anl_GE_TM_102_BS_SPK8 indb 34 Anl_GE_TM_102_BS_SPK8 indb 34 27 11 12 12 38 27 11 12 12 38 ...

Page 35: ... 35 Anl_GE_TM_102_BS_SPK8 indb 35 Anl_GE_TM_102_BS_SPK8 indb 35 27 11 12 12 38 27 11 12 12 38 ...

Page 36: ...EH 11 2012 01 Anl_GE_TM_102_BS_SPK8 indb 36 Anl_GE_TM_102_BS_SPK8 indb 36 27 11 12 12 38 27 11 12 12 38 ...

Reviews: