GB
- 24 -
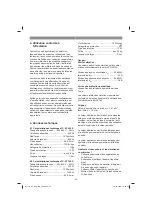
B: horizontal fan
-> for vertical surfaces
C: Round fan
-> for corners, edges and surfaces that are dif-
fi
cult to access
Risk of injury!
Never press the trigger while you are adjusting
the jet.
6.4 Adjusting the material
fl
ow (Fig. 8)
You can rotate the max. paint volume control to
regulate the material
fl
ow.
- direction-> lower material
fl
ow
+ direction-> higher material
fl
ow
6.5 Spraying techniques
•
The results you get depend on how smooth
and clean the surface is. The surface must be
carefully prepared and free of dust.
•
Surfaces, threads, etc. which should not be
sprayed must be covered.
•
Always set the spray gun down on cardboard
or something similar. You can use the card-
board as a target to properly adjust the spray
gun.
Important:
Always begin spraying outside of the area to be
sprayed and avoid interrupting spraying inside the
area to be sprayed.
•
Wrong (Fig. 9): If you only rotate the spray
gun from side to side, the gun will produce a
heavy mist and the coverage will be uneven.
•
Right (Fig. 10): Always hold the spray gun at
the same distance (about 5-15 cm) from the
surface you are working on.
•
Move the spray gun uniformly laterally or up
and down depending on the fan pattern.
•
Uniform motion of the spray gun produces
uniform finish quality.
•
If material residue is deposited on the nozzle
(3) and the air cap (2), clean both parts with
solvent or water.
6.6 Transport
Carry the spray gun by the handle (9) or the
shoulder strap (17).
7. Replacing the power cable
Danger!
If the power cable for this equipment is damaged,
it must be replaced by the manufacturer or its
after-sales service or similarly trained personnel
to avoid danger.
8. Cleaning, maintenance and
ordering of spare parts
Danger!
Always pull out the mains power plug before star-
ting any cleaning work.
8.1 Cleaning
•
Keep all safety devices, air vents and the
motor housing free of dirt and dust as far as
possible. Wipe the equipment with a clean
cloth or blow it with compressed air at low
pressure.
•
We recommend that you clean the device
immediately each time you have finished
using it.
•
Clean the equipment regularly with a moist
cloth and some soft soap. Do not use
cleaning agents or solvents; these could at-
tack the plastic parts of the equipment. Ensu-
re that no water can seep into the device. The
ingress of water into an electric tool increases
the risk of an electric shock.
8.1.1 Disconnecting and cleaning the gun
(Fig. 1-2, 11-15)
1. Unplug the spray gun from the mains power.
Press the trigger (5), so that the residual ma-
terial
fl
ows back into the container (12).
2. Unscrew the container (12) and empty the
residual material back into the material tin.
3. Clean the container (12) and the material
tube (11) with a bristle brush.
4. Pour solvent or water into the container.
Screw the container back on. Solvents with a
fl
ash point above 55°C may not be used.
5. Reinsert the mains plug into the mains outlet
and turn on the paint spray gun. Set the max.
paint volume control (6) to the maximum
fl
ow
setting. Spray the solvent or water into a con-
tainer or rag, but never into the surroundings.
6. Repeat the procedure above until the clear
solvent or water exits from the nozzle (3).
7. Turn the paint spray gun o
ff
again and unplug
it from mains power.
Anl_TC_SY_600_700_SPK9.indb 24
Anl_TC_SY_600_700_SPK9.indb 24
16.07.2018 16:56:23
16.07.2018 16:56:23


