background image

Cutting line diameter:

2.0 mm

Tank capacity

0.8 l

Spark plug

Champion RCJ6Y

Vibration a

hv

Idling speed (max.)

5.8 m/s

2

Idling speed (max.)

7.9 m/s

2

L

pA

sound pressure level

100 dB (A)

L

WA

sound power level

108 dB (A)

Sound and vibration were measured in accordance
with DIN EN 11806.

5. Before starting the machine

5.1 Montage

Assembling the long handle (Fig. D1 – D3)

Slacken the star grip screw (Fig. D1/Item 1) on the
connecting piece on the upper long handle (Fig.
D1/Item 3). Then press the lever catch (Fig. D1/Item
2) and carefully slide the lower long handle (Fig.
D1/Item 4) into the connecting piece on the upper
long handle. When doing so, take care to ensure that
the drive shafts on the insides of the long handles
slide into each other (turn the spool head gently, if
required) and that the front lug on the lever catch (Fig.
D2/Item 6) locks into the corresponding hole in the
lower long handle (Fig. D2/Item 5). Then retighten the
star grip screw (Fig. D1/Item 1) (Fig. D3). To
dismantle, proceed in reverse order.

Fitting the additional handle (Fig. E1 – E3)

Slacken the wing nut on the fastening screw on the
handle (Fig. E1/Item 1). Remove the wing nut, washer
(Fig. E1/Item 2) and fastening screw (Fig. E1/Item 3)
from the handle and insert them in the long handle
(Fig. E2). Then screw the handle to the long handle
(Fig. E3).

Fitting the guard hood (Fig. F1 – F3)

Slacken the fastening screw on the guard hood (Fig.
F1/Item 1) with the help of the Allen key provided and
then remove (Fig. F1). Then attach the guard hood to
the lower long handle (Fig. F2). Screw the guard hood
tightly in position with the fastening screw (Fig. F3).

Fitting the carrying strap (Fig. G)

The carrying strap is intended to help you work safely
and ergonomically with the power trimmer. Hook the
carrying strap into the fastening eyelet (Fig. G/ Item
A).

Check that all moving parts move smoothly
before you start using the machine. Check that
all screws are securely fastened and also check
all the safety devices.

5.2 Setting the cutting height

Slip the shoulder strap (Fig. A/17) over the left
shoulder.

Set the length of the shoulder strap in such a way
that the cutting head runs parallel to the ground.
In order to establish the optimum length of the
shoulder strap, you should then make a few
swinging movements without starting the engine
(Fig. I).

Please note:

Always use the shoulder strap when

using the appliance. Attach the strap as soon as you
have started the engine and the engine is running in
idle mode. Switch off the engine before you take off
the shoulder strap.

Check the machine for the following each time before
use:

That there are no leaks in the fuel system

That the cutting unit and all safety devices are in
perfect condition

That all screws are securely fastened

5.2 Fuel and oil

Recommended fuels
Use only a mixture of normal unleaded petrol and
special 2-stroke engine oil. Mix the fuel mixture as
indicated on the fuel mixing table.

Please note:

Do not use a fuel mixture which has

been kept for longer than 90 days.

Please note:

Do not use 2-stroke oil with a

recommended mixing ration of 100:1. If inadequate
lubrication causes engine damage, the
manufacturer’s engine warranty will be voided.

Please note:

Only use containers designed and

approved for the purpose to transport and store fuel.

Pour the correct quantities of petrol and 2-stroke oil
into the mixing bottle (see scale printed on the bottle).
Then shake the bottle well.

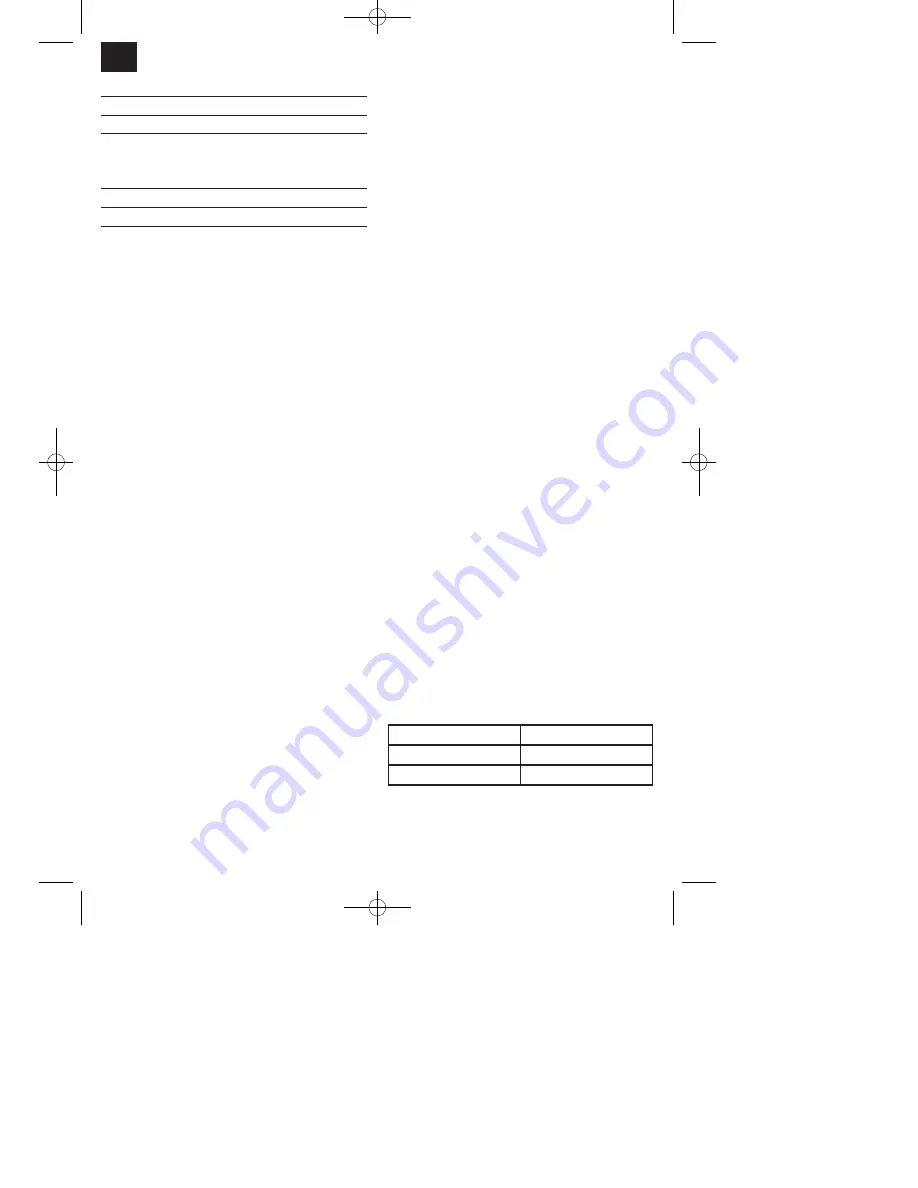
5.3 Fuel mixture table

Mixing procedure: 40 parts petrol to 1 part oil

18

GB

Petrol

2-stroke oil

1 liters

25 ml

2 liters

125 ml

Anleitung_BG_PT_3041_SPK1:_  17.06.2008  11:02 Uhr  Seite 18

Summary of Contents for BG-PT 3041

Page 1: ...r Operating Instructions Petrol Power Trimmer Mode dʼemploi de la Débroussailleuse à moteur à essence Istruzioni per lʼuso Tosaerba a filo con motore a benzina Használati utasítás Benzín motortrimmer BG PT 3041 Anleitung_BG_PT_3041_SPK1 _ 17 06 2008 11 01 Uhr Seite 1 ...

Page 2: ...e first time Avant la mise en service lisez le mode dʼemploi et les consignes de sécurité et respectez les Prima della messa in esercizio leggete e osservate le istruzioni per lʼuso e le avvertenze di sicurezza Üzembehelyezés előtt elolvasni és figyelembe venni a használati utasítást és a biztonsági utasításokat Anleitung_BG_PT_3041_SPK1 _ 17 06 2008 11 01 Uhr Seite 2 ...

Page 3: ...3 A B 3 1 13 17 4 5 18 6 2 8 14 10 16 5 3 17 18 11 C 20 20 21 23 19 22 1 4 9 7 12 15 Anleitung_BG_PT_3041_SPK1 _ 17 06 2008 11 01 Uhr Seite 3 ...

Page 4: ...4 D1 D3 D2 E1 E3 E2 F1 F3 F2 G H I 1 1 A 2 3 4 1 2 3 5 6 Anleitung_BG_PT_3041_SPK1 _ 17 06 2008 11 01 Uhr Seite 4 ...

Page 5: ...5 J1 J3 J2 K1 K3 K2 L M2 M1 1 2 M3 N1 M4 Anleitung_BG_PT_3041_SPK1 _ 17 06 2008 11 02 Uhr Seite 5 ...

Page 6: ...6 N2 N3 N7 N6 N5 O1 O3 O4 O2 N4 B C E D F 5 F E 1 3 4 2 Anleitung_BG_PT_3041_SPK1 _ 17 06 2008 11 02 Uhr Seite 6 ...

Page 7: ...supplied 3 Intended use 4 Technical data 5 Before starting the equipment 6 Operation 7 Cleaning maintenance storage transport and ordering of spare parts 8 Disposal and recycling 9 Troubleshooting 16 GB Anleitung_BG_PT_3041_SPK1 _ 17 06 2008 11 02 Uhr Seite 16 ...

Page 8: ...ilter housing cover 14 Petrol tank 15 Housing for engine cooler and starter 16 Fuel pump primer 17 Carrying strap 18 Connecting piece for long handle 19 Combined oil petrol cylinder 20 Spark plug wrench 21 Allen key 22 Open ended spanner size 8 10 23 2 stroke oil 3 Proper use The machine is designed for cutting lawns and grassed areas Important Due to the high risk of bodily injury to the user the...

Page 9: ...ically with the power trimmer Hook the carrying strap into the fastening eyelet Fig G Item A Check that all moving parts move smoothly before you start using the machine Check that all screws are securely fastened and also check all the safety devices 5 2 Setting the cutting height Slip the shoulder strap Fig A 17 over the left shoulder Set the length of the shoulder strap in such a way that the c...

Page 10: ...en pulled out This may also cause damage to the cable or the starter 6 2 Starting the engine when warm if the machine has not been switched off for more than 15 20 minutes 1 Set the machine down on a hard level surface 2 Switch the ON OFF switch to I 3 Secure the throttle lever in the same way as described in Starting the engine when cold 4 Hold the machine firmly and pull out the starter cable un...

Page 11: ... and windows 7 Cleaning maintenance storage transport and ordering of spare parts 7 1 Cleaning Keep all safety devices air vents and the motor housing free of dirt and dust as far as possible Wipe the equipment with a clean cloth or blow it with compressed air at low pressure We recommend that you clean the device immediately each time you have finished using it Clean the equipment regularly with ...

Page 12: ... 01 Item 1 rests against the stop Fig 01 Item 2 when the throttle is fully open Figure 16 shows the correct setting If the carburetor slide does not touch the stop it must be adjusted The following work is required to adjust the throttle cable Undo the lock nut Fig O2 Item 3 a few turns Undo the adjusting screw Fig O3 Item 4 until the carburetor slide rests against the stop when the throttle is fu...

Page 13: ... as described 5 1 7 5 Ordering replacement parts Please quote the following data when ordering replacement parts 앬 Type of machine 앬 Article number of the machine 앬 Identification number of the machine 앬 Replacement part number of the part required For our latest prices and information please go to www isc gmbh info 8 Disposal and recycling The unit is supplied in packaging to prevent its being da...

Page 14: ...ean the air filter Incorrect carburetor setting Contact an authorized customer service outlet or send the machine to ISC GmbH The engine does not run smoothly Incorrect electrode gap on the spark plug Clean the spark plug and adjust the electrode gap or fit a new spark plug Incorrect carburetor setting Contact an authorized customer service outlet or send the machine to ISC GmbH Engine smokes exce...

Page 15: ... prohlašuje následující shodu podle směrnice EU a norem pro výrobek A a következő konformitást jelenti ki a termékek re vonatkozó EU irányvonalak és normák szerint X pojasnjuje sledečo skladnost po smernici EU in normah za artikel deklaruje zgodność wymienionego poniżej artykułu z następującymi normami na podstawie dyrektywy WE W vydáva nasledujúce prehlásenie o zhode podľa smernice EÚ a noriem pr...

Page 16: ...ncomplète nʼest autorisée quʼavec lʼagrément exprès de lʼentreprise ISC GmbH La ristampa o lʼulteriore riproduzione anche parziale della documentazione o dei documenti dʼaccompagnamento dei prodotti è consentita solo con lʼesplicita autorizzazione da parte della ISC GmbH Az termékek dokumentációjának és kisérô okmányainak az utánnyomása és sokszorosítása kivonatosan is csak az ISC GmbH kifejezett ...

Page 17: ...into the device e g sand stones or dust effects of force or external influences e g damage caused by the device being dropped and normal wear resulting from proper operation of the device The guarantee is rendered null and void if any attempt is made to tamper with the device 3 The guarantee is valid for a period of 2 years starting from the purchase date of the device Guarantee claims should be s...

Reviews: