22
GB
any rotating parts. Keep clear of the chute
opening at all times.
17. Never lift or carry a lawn mower with the engine
running.
18. Switch off the engine and pull the spark plug
boot:
- before you dislodge any blockages or clogs in
the chute.
- before carrying out any checks, cleaning,
maintenance or other work on the lawn mower
- if the lawn mower strikes a foreign body,
examine it for signs of damage and carry out any
necessary repairs before restarting and
continuing to work with the mower. If the lawn
mower begins to experience exceptionally strong
vibrations, immediately switch it off and check it.
19. Switch off the engine:
- when you leave the lawn mower.
- before you refuel.
20. When you switch off the engine, move the speed
lever to the Off position. Close the petrol
stopcock.
21. Operation of the machine at higher than normal
speed can lead to an increased risk of accidents.
22. Take care when carrying out installation work on
the machine, and avoid trapping fingers between
the moving cutting tool and the fixed parts of the
machine.
Maintenance and storage
1. Make sure that all nuts, bolts and screws are
tightened securely and that the machine is in
safe working condition.
2. Never store the mower (with petrol in the tank)
inside a building in which petrol fumes could
come into contact with open flames or sparks.
3. Allow the motor to cool before you put the lawn
mower in an enclosed area.
4. In order to avoid fire hazards, keep the engine,
exhaust and the area around the fuel tank free
from grass, leaves and leaking grease (oil).
5. Routinely check the grass basket for signs of
wear and impaired functionality.
6. For your own safety, replace worn or damaged
parts without delay.
7. If the fuel tank should require emptying this
should only be done in the open air using a
petrol suction pump (available from DIY shops).
CAUTION!
Read all safety regulations and instructions.
Any errors made in following the safety regulations
and instructions may result in an electric shock, fire
and/or serious injury.
Keep all safety regulations and instructions in a
safe place for future use.
Explanation of the symbols on the machine (Fig
14):
1) Read the operating instructions
2) Important! Danger from catapulted parts. Keep a
safe distance.
3) Important! Switch off the engine and pull the
spark plug boot before doing any maintenance,
repair, cleaning or adjustment work.
4) Fill with oil and fuel before starting the mower.
5) Caution! Wear ear protection and safety goggles.
6) Engine start/stop lever (I=Engine on; 0=Engine
off)
7) Drive lever (clutch lever)
8) Risk of cut injuries. Caution: rotating cutters.
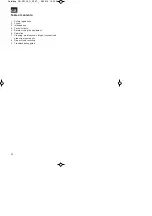
2. Layout (Fig. 1+2)
1. Engine start/stop lever – engine brake
2. Top push bar
3.
Choke lever / Throttle lever
4. Starter
cable
5. Lower push bar
6. Handle
7. Debris
bag
8. Ejector
flap
9. Cutting height adjustment
10. Tank filler cap
11. Oil-filler neck
12. Oil drainage screw
13. 2 x cable ties
14. Spark plug wrench
15. 2 x square head screws for top push bar
16.
2 screws for upper push bar (high speed
clamping function)
17. Side ejector cover
18. 4 x star nuts for push bar
19. Drive lever (clutch lever)
20. Drive wheel (left and right)
21. Side ejector adaptor
22. Mulching adaptor
23. Spark plug connector
24. Grass box filling level indicator
Items supplied
Please check that the article is complete as specified
in the scope of delivery. If parts are missing, please
contact our service center at the latest within 5 work
days after purchasing the article and upon
presentation of a valid bill of purchase. Also, refer to
Anleitung_GH_PM_56_S_SPK7__ 28.06.13 10:45 Seite 22
Summary of Contents for GH-PM 56 S HW
Page 5: ...5 7 5b 5c 6a 6b 22 21 8 9 Anleitung_GH_PM_56_S_SPK7__ 28 06 13 10 45 Seite 5 ...
Page 6: ...6 10b 11b 11c 11a 11 H L 10a 11 12 9 Anleitung_GH_PM_56_S_SPK7__ 28 06 13 10 45 Seite 6 ...
Page 7: ...7 12 23 14 1 2 3 4 5 6 7 8 13 Anleitung_GH_PM_56_S_SPK7__ 28 06 13 10 45 Seite 7 ...
Page 120: ...120 Anleitung_GH_PM_56_S_SPK7__ 28 06 13 10 46 Seite 120 ...
Page 121: ...121 Anleitung_GH_PM_56_S_SPK7__ 28 06 13 10 46 Seite 121 ...
Page 122: ...122 Anleitung_GH_PM_56_S_SPK7__ 28 06 13 10 46 Seite 122 ...

