EN
- 13 -
chip depth to position “0” for this purpose.
5.2 Chip extraction (Fig. 1)
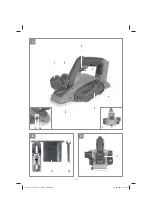
For optimum chip extraction you can connect the
equipment to a vacuum cleaner (not supplied).
To do so, insert the vacuum cleaner tube into the
chip discharge (2).
Important!
The vacuum cleaner you use for the vacuum ex-
traction must be suitable for the material you are
cutting.
5.3 Parallel stop (Fig. 4)
Use the parallel stop (11) when you want to plane
parallel to the edge of the workpiece.
Installing the parallel stop
•
Fasten the mount (13) of the parallel stop
to the left side of the tool using the supplied
thumb screw (14).
•
Now connect the mount (13) to the slide of
the parallel stop (11).
•
The guide rail must always be aligned in
downward direction.
•
Fix the distance required between the parallel
stop and the edge of the workpiece.
•
Fasten the parts with the lock bolt (15) and
the wing nut (16).
6. Operation
6.1 ON/OFF switch (Fig. 5)
•
The plane comes with a safety switch which
is designed to prevent accidents.
•
To switch on the plane, press the side safety
lock-off (3) and press the ON/OFF switch (4).
•
To switch off the plane, release the ON/OFF
switch (4). The ON/OFF switch (4) will return
to its starting position.
6.2 Practical tips
Warning! Only ever move the plane against the
workpiece while the plane is switched on.
6.2.1 Planing surfaces
Set the desired chip depth. Place the plane by its
front base plate onto the piece of wood you want
to machine and switch on the plane. Holding the
plane with both hands, push it over the surface
making sure that the front and the rear base plate
both lie fully on the workpiece. For the
fi
nish-
machining of surfaces use a small chip depth and
make several passes over the surface.
6.2.2 Chamfering edges (Fig. 6-7)
•
There is a V-shaped groove (17) in the front
base plate that enables you to plane edges at
an angle of 45° for a smooth finish.
•
Switch on the tool and wait for it to reach full
speed. Place the V-shaped groove (17) of the
plane against the edge of the workpiece at an
angle of 45°.
•
Now move the plane along the edge of the
workpiece.
•
To achieve high-quality results you should
keep the feed speed and angle constant.
6.2.3 Planing steps (Fig. 4/8)
•
The planing of steps is possible with the help
of the parallel stop (11).
•
Mount the parallel stop (11) on the left side of
the tool (see section 5.3).
•
To mount the depth stop, use the locking
screw (9) to fasten the step depth scale (10)
to the front right side of the plane housing
(see Fig. 8).
•
Release the locking screw (9) and position
the step depth scale (10) so that the required
step depth is displayed. Retighten the locking
screw (9).
Width of step:
You can set the width of the step with the parallel
stop (11).
Depth of step:
We recommend you to set a cutting depth of 2
mm and to keep planing the workpiece until the
required depth of step is reached.
6.3 Charging the Li battery pack
The corresponding instructions can be found in
the original operating instructions for your char-
ger.
6.4 Battery capacity indicator
(Fig. 13 / item 23)
Press the battery capacity indicator switch (24).
The battery capacity indicator (23) shows the
charge status of the battery using 3 LEDs.
All 3 LEDs lit:
The battery is fully charged.
2 or 1 LED(s) lit:
The battery has an adequate remaining charge.
Anl_TE_PL_18_82_Li_SPK7_USA.indb 13
Anl_TE_PL_18_82_Li_SPK7_USA.indb 13
31.03.2021 13:53:02
31.03.2021 13:53:02

