AFTER SALES SUPPORT
www.einhell.co.uk
30
Set up
75W DETAIL SANDER – WZDS 75 K
0151 649 1500
1890 94 62 44
2. Assembling the detail sander and accessories
WARNING!
Before start-up, ensure that any sanding/grinding pads, polishing
pads or the finger sanding attachment with finger sanding sheets
are fitted and secured properly and completely, with the correct
grade of sanding sheet fitted to suit the work material.
- Only once you have removed the screw from the oscillating
plate and fitted a grinding/sanding sheet/rust-removing pad/
polishing, or completed the assembly of the sanding finger and
fitted a sanding finger piece, may you insert the mains plug in
the socket.
You will also need the following tools for assembly:
- PH2 star-headed screwdriver
Before starting the equipment
- Before you connect the equipment to the mains supply make sure that the data on the
rating plate matches that of your local supply.
- Always pull out the power plug before making adjustments to the equipment.
WARNING!
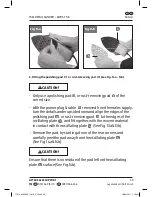
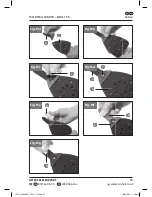
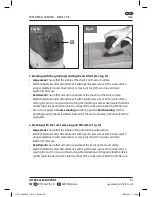
- The delta sander is supplied with the screw
7
already fitted in
the threaded hole in the oscillating plate
4
. Ensure that you
use a PH2 star-headed screwdriver (not supplied) to remove the
screw (see Figs. 10a - 10b), before:
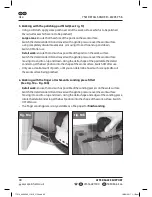
1. Fitting any of the grinding/sanding sheets
5
, rust-removal
pad
11
or polishing pad
10
.
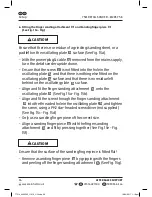
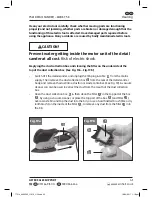
2. Fitting the finger sanding attachment
6
, securing it with
the screw
7
, and then fitting a sanding finger piece
8
.
When the screw
7
is loose, be careful is does not become
lost. (Keeping it together with the sander accessories is a
good idea).
77014_4460595_11016_UG.indd 32
18/04/2017 1:18 pm


