background image

INSTALLATION INSTRUCTIONS

Preliminary Notes Before Installation

This appliance is a high efficiency, flueless, flame effect gas fire.  It provides
radiant and convected warmth both efficiently and safely utilising the latest
type catalytic convertor burner technology.

The appliance incorporates a combustion monitoring system (Oxygen
Depletion System). It must not be adjusted or put out of operation. If replaced
then manufacturers original parts must be used.

The appliance is designed to fit various types of situations as listed in the
Installation Requirements.  

This appliance must be installed in accordance with the rules in force and only
used in a sufficiently ventilated space.  A minimum of 100cm

(15.5in

2

) pur-

pose provided ventilation is required for this appliance. An openable window
or louvre is also required. This appliance is factory set for operation on the gas
type, and at the pressure stated on the appliance data plate.

The room size should be a minimum of 23m

3

(812ft

3

) to allow adequate circu-

lation of air and ensure the correct operation of the fire. This volume may
include adjacent spaces but these spaces must not be separated by a door. In
order to convert from cubic feet (ft

3

) to cubic metres (m

3

) divide the room vol-

ume (in ft

3

) by 35.3. This appliance is intended as a secondary source of heat

only and should not be used in a room without some form of background heat-
ing present.

The appliance must not be installed in a bedroom, bathroom or any sleeping
area.  The appliance does not require a flue system of any type as the catalytic
converter cleans the flue products to provide a complete combustion system,
which is intrinsically safe.

The appliance must be installed by a competent

[1]

person in accordance with

Gas Safety (Installation and Use) Regulations 1998.

On initial lightup of a new appliance, the ‘newness’ will burn off within the first
few hours of operation. During this period some smoke may be emitted from
outlet grille, this should be no cause for concern.  Accordingly, the room
should be well ventilated with all windows and doors open during this period.

Read all these instructions before commencing installation.

Manufactured by :

Focal Point Fires plc.
Christchurch, Dorset BH23 2BT
Tel: 01202 588 638   Fax: 01202 588 639
www.ekofires.co.uk
e-mail: sales@ekofires.co.uk

[1] GB - Gas Safe

TM

registered operatives (Northern Ireland only- CORGI registered operatives) are the only class of person considered as competent by the HSE under the Gas Safety (Installation and Use)

Regulations 1998.

©

2009 Focal Point Fires plc.

Summary of Contents for eko 5010

Page 1: ...user instructions All instructions must be handed to user for safekeeping Revision A 06 09 Country s of destination GB IE eko 5010 eko 5020 eko 5030 eko 5040 fuel effect gas fire manual remote contro...

Page 2: ...Eko 5010 Eko 5020 Eko 5030 Eko 5040 2009 Focal Point Fires plc...

Page 3: ...convert from cubic feet ft3 to cubic metres m3 divide the room vol ume in ft3 by 35 3 This appliance is intended as a secondary source of heat only and should not be used in a room without some form...

Page 4: ...background heat ing present If the appliance is used in a room as the sole source of heat then condensation may occur on colder surfaces within the room On first light up of a new appliance burning o...

Page 5: ...om size in cubic metres m3 divide the room volume in cubic feet ft3 by 35 3 SITE REQUIREMENTS This appliance is designed to be wall hung Do not recess any part of the appliance into the wall This appl...

Page 6: ...s should be positioned on the wall above the appliance It should be established that any mirrors or picture frames etc to be positioned on the wall above the appliance are able to withstand prolonged...

Page 7: ...connections may be made using the entry points in the bottom or sides of the firebox A concealed gas connection may be made using the knock out hole in the centre back of the firebox Select the most...

Page 8: ...For further guidance for wall fixing in tim ber framed buildings refer to any relevant local codes of practice Flat Wall Fixing All Models To assist with fixing the appliance a template is provided a...

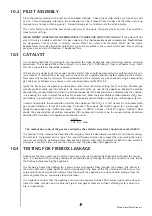
Page 9: ...spark There should be no need to adjust this If under any circumstances the piezo electric spark fails the pilot cannot be lit manually SETTING PRESSURE The pressure test point is located on the left...

Page 10: ...g Ensure each screw is u n s c r e w e d approximate ly one turn from the fully screwed in position in order to cre ate a 2mm gap shown in figure 10 Simply hang the facia panel onto the outer casing f...

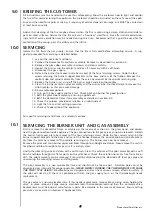
Page 11: ...13 Check the purpose provided ventilation is un obstructed 14 Light the fire and test setting pressures 15 Check safe operation of the appliance For specific servicing instructions see relevant sectio...

Page 12: ...noting the units in which the values are expressed Most analysers display carbon dioxide CO2 con centrations in percentage terms and carbon monoxide concentration in parts per million ppm terms In ord...

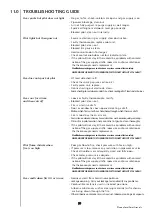
Page 13: ...as a hole holes through which there is a draft Fire is too close the an air vent Fire is sited on disused chimney breast which has not been adequately sealed up Dirt or lint in pilot aeration hole or...

Page 14: ...als or flooring should protrude onto the hearth if fitted This appliance incorporates a combustion monitoring system ODS DO NOT burn any foreign material on this fire Under no circumstances shall the...

Page 15: ...local Codes and or Regulations Ventilation fitted under or within immediate vicinity of the appliance must not be used as it may adverse ly effect performance of the combustion monitoring system ODS...

Page 16: ...ass cleaner Test on a small area first PAINTED AREAS These can be cleaned using a dry cloth STAINLESS STEEL AREAS These can either be cleaned using a proprietary stainless steel metal cleaner or baby...

Reviews: