background image

Note: All information is subject to change without prior notice.

IMPORTANT

In order to optimize the recovery and recycling of the materials that old appliances contain 

and reduce the impact on human health and the environment, please make sure that this 

product is recycled at the end of its life.

Importer:

ACSON COMERCIAL

C/Pallars, 405

08019 Barcelona

www.acson.com

acson@acson.com

Summary of Contents for CAB-330-BEAM-IP

Page 1: ...age that may have occurred during shipping If the carton appears to be damaged carefully inspect your unit for any damage and be sure all accessories necessary to operate the unit has arrived intactly In the case damage has been found or parts are missing please contact Acson Comercial or your local supplier for further instructions Do not return this unit without any warning USER S MANUAL ...

Page 2: ...12 Connection 5 DMX 512 loop resistance terminal 5 AC Input Power 6 Input Voltage Power Consumption Fuse Standard 6 Lamp Info 6 7 Color and Gobo Wheels Info 7 8 Display Panel 7 9 LCD Menu 7 10 DMX Channel Data 10 11 Drive Board 14 12 Lamp Changing Method 14 Theory Changing Method 13 Body Covers Disassembling Method 15 14 Base Part Info and Installation 16 15 Belt Changing Method 16 13 Attention It...

Page 3: ...resh colors thanks to the the KUPO brand color wheel Two DMX channels mode is available in Chinese and English language versions for you to choose and the digits can cast upside down convenient to hang them on the truss Pan scans 540 and Tilt runs 270 There are 14 different colors plus open and 14 gobos plus open too There are two prisms one 8 facet and one 6 facet column which can controlled sepa...

Page 4: ...ice immediately once the surrounding temperature is over 40 Change the lens if there are cracks or dent on it Only the original brand lens is suitable to change Do not carry the device alone Make sure the facility can withstand ten times teh weight of the light before hanging Please make sure the mounting hardware is strong enough without any damage and using the safety chain together for secure L...

Page 5: ...xt device Do as above to connect other devices and finally coupled with a 120 Ω loop resistance terminal insertion Attention In order to fix the device securely use 2 omega holders and 4 quick lock fasteners correctly into the quick lock hole turned 90 clockwise is necessary Adding a safety chain to the base hole not the handle is extra and necessary safety method 1 2 Safety Chain Omega Bridge DMX...

Page 6: ...Lifespan Color Temperature Phoenix 330w 1800hrs 7200K Live Neutral Earth Red Blue Yellow green Attention Only a qualified electrician can operate the power related work Please make sure the voltage input complies with the specified standard The fixture must be grounded and equipped with overload and leakage protection Warning To avoid potential damages caused by lamp burst change the lamp before i...

Page 7: ...ts with 16 facet prism Function Key Touch Screen Display 2 1 Function Keys Return function Up Digit increase Next function Down Digit decrease Last function Mode choosing Confirm function Main Menu Submenu 1 Submenu2 Function SET Function description DMX Address 1 512 to address 1 address up address down to address 512 SAVE save and back ESC back FEATURES SETTING Run Mode DMX DMX Wire no function ...

Page 8: ... clear signal data Full color Off half color function On full color function Shortcut Off Shortcut off for color and gobo On Shortcut open for colors and gobo ADV Advanced function RST Re setting and back SAVE Save and back ESC Back ADVANCED FUNCTION Zero set ZEROSETTING Password1 1 Zero reset Password2 0 KEY Confirm Pan 0 255 Adjust the beginning state Tilt Fixed Gobos Rot Gobos Color Focus Zoom ...

Page 9: ...N AUTO NO back Auto SOUNO Sound ESC Back SIMULATE DMX CH1 CH32 0 255 Control Channel on display Numerical value increase Numerical value decrease ESC back ESC Back to main menu SYSTEM INFO DMX VALUE CH1 CH32 0 255 DMX value ESC back OTHER INTO Run Time 0 9999 Machine runing hours Run Count 0 9999 How many time of the Machine power on and off Residue T Most Running time adjust do not adjust Residue...

Page 10: ... after 30 second Off Ban the menu auto back function Flicker Off Back ground light flash function off On Back ground light flash function on SAVE Save and back ESC Back LAMP SETTING Default Off Lamp off On Lamp on Manual Off Lamp off by manual On lamp on by manual Electronic Off Lamp off On Lamp on Language Setting English Available languages Chineese Mode 1 Mode 2 Mode 3 Mode 4 DMX Value Details ...

Page 11: ...4 127 Color 14 Open 128 187 Color rotation clockwise fast slow 188 195 Rotation Halt 196 255 Color rotation anticlockwise slow fast 2CH 2CH 2CH 2CH 0 1 Close 2 7 Open 8 63 Strobe Slow Fast 64 71 Open 72 127 Pulse strobe Slow Fast 128 135 Open 136 160 Fade strobe Slow Fast 161 166 Open 167 191 Lightening strobe Slow Fast 192 199 Open 200 209 Strobe mode 1 210 219 Strobe mode 2 220 229 Random slow s...

Page 12: ...o5 shake Slow Fast 186 191 Gobo6 shake Slow Fast 192 198 Gobo7 shake Slow Fast 199 204 Gobo8 shake Slow Fast 205 211 Gobo9 shake Slow Fast 212 217 Gobo10 shake Slow Fast 218 223 Gobo11 shake Slow Fast 224 230 Gobo12 shake Slow Fast 231 236 Gobo13 shake Slow Fast 237 243 Gobo14 shake Slow Fast 244 349 Gobo15 shake Slow Fast 250 255 Gobo16 shake Slow Fast 5CH 5CH 5CH 5CH 0 127 Prism 1 Out 128 255 Pr...

Page 13: ...e tune 2 117 14CH 14CH 14CH 16CH 0 149 Empty 150 159 Built in program 1 160 169 Built in program2 170 179 Testing program 180 255 Empty 15CH 15CH 15CH 17CH 0 69 Empty 70 79 Effect motors reset wait 8 s 80 89 XY motors reset wait 8 s 90 99 All motors reset wait 8 s 100 255 Empty 16CH 16CH 16CH 18CH 0 49 Empty 50 59 Turn on the lamp wait 8 s 60 69 Turn off the lamp wait 8 s 70 255 Empty 17CH 17CH 19...

Page 14: ...Drive Board 12 Lamp Changing Method Drive board illustration 1 2 Lamp Fixed Position Press the Lamp to make it leave the fixed position then tilt it out Steel spring blade to hold the lamp from falling Theory ...

Page 15: ...15 13 Body Covers Disassembling Method Changing Method 1 Lamp Fixed Position 2 Remove the fan 3 Remove the lamp 1 Open both side axle covers 2 Remove head cover 3 Remove body cover ...

Page 16: ...crews and draw boards unit out 3 Open boards unit cover 1 Open basement plastic cover 2 Loosen screws and draw power supply unit out 3 Open power unit cover Power Board Basement Cover Power Supply Unit Basement Plastic Cover Sealing Rubber Strips Ignitor DC380 PFC below the ignitor 24V Power Supply Instructions 1 Open the arm covers 1 2 2 Remove the center cover 3 3 Remove the Y belt 4 4 Remove th...

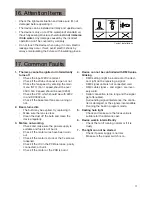
Page 17: ... Beam turns dim The bulb may be expired try replacing it Make sure the lens is clear Clean the dust off the bulb and clean the device regularly 3 Motors not working Check and make sure the power supply is suitable and fuse is not burnt Check if the motor wires have been worn out Check if the motor is stuck or the fix screws loosened Check if the IC on the PCB are loose poorly connected or burnt Ch...

Page 18: ...imize the recovery and recycling of the materials that old appliances contain and reduce the impact on human health and the environment please make sure that this product is recycled at the end of its life Importer ACSON COMERCIAL C Pallars 405 08019 Barcelona www acson com acson acson com ...

Reviews: