background image

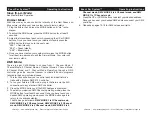
  Event Par System™                              Safety Precautions

©

Elation

®

  -  www.elationlighting.com  - Event Par System™ User Manual Page 4

©

Elation

®

  -  www.elationlighting.com  - Event Par System™ User Manual Page 3

•   To reduce the risk of electrical shock or fire, do not expose this unit  

   rain or moisture
•   Do not spill water or other liquids  into or on to your unit.
•   Be sure that the local power outlet match that of the required volt- 
   age for your unit.
•   Do not attempt to operate this unit if the power cord has been   
   frayed or broken. Do not attempt to remove or break off the ground 
   prong from the electrical cord. This prong is used to reduce the risk  

   of electrical shock and fire in case of an internal short.

•   Disconnect from main power before making any type of connection.
•   Do not remove the cover under any conditions. There are no user  
   serviceable parts inside.
•   Never operate this unit when it’s cover is removed.
•   Never plug this unit in to a dimmer pack
•   Always be sure to mount this unit in an area that will allow proper  

   ventilation. Allow about 6” (15cm) between this device and a wall.

•   Do not attempt to operate this unit, if it becomes damaged.
•   This unit is intended for indoor use only, use of this product out`  
   doors voids all warranties.
•   During long periods of non-use, disconnect the unit’s main power.
•   Always mount this unit in safe and stable matter.
•   Power-supply cords should be routed so that they are not likely to  
   be walked on or pinched by items placed upon or against them,  

   paying particular attention to the point they exit from the unit. 
• Cleaning -The fixture should be cleaned only as recommended by  
  t he manufacturer. See page 16 for cleaning details.

•   Heat -The appliance should be situated away from heat sources  
   such as radiators, heat registers, stoves, or other appliances (inclu-
   d ing amplifiers) that produce heat.

•   The fixture should  be serviced by qualified service personnel when:

    A. The power-supply cord or the plug has been damaged.
    B. Objects have fallen, or liquid has been spilled into the appliance.

    C. The appliance has been exposed to rain or water.
    D. The appliance does not appear to operate normally or exhibits a  

       marked change in performance.

  Event Par System™ 


         Warranty Registration

The Event Par System™ carries a 2 year (730 days) limited warranty. 
Please  fill  out  the  enclosed  warranty  card  to  validate  your  purchase 
and warranty. You may also register your product online at www.ela-
tionlighting.com. All returned service items whether under warranty or 
not,  must  be  freight  pre-paid  and  accompany  a  return  authorization 
(R.A.) number. If the unit is under warranty you must provide a copy 
of your proof of purchase invoice. Please contact Elation® customer 
support for a R.A. number.

  Event Par System™  


                    Features

To  optimize  the  performance  of  this  product,  please  read  these 
operating  instructions  carefully  to  familiarize  yourself  with  the  basic 
operations  of  this  unit.  These  instructions  contain  important  safety 
information  regarding  the  use  and  maintenance  of  this  unit.  Please 
keep this manual with the unit, for future reference.

  Event Par System™  


           General Instructions

•  Battery Pack/Charger

•  288 Ultra Bright LEDs
•  Mulit-Colors
•   Color Strobe

•  Electronic Dimming 0-100%

•   Built in Microphone

•   DMX-512 protocol
•   7 DMX Channel Modes: 1, 2, 3, 4, 5, 6, & 7 DMX Channels

Summary of Contents for Event Par System

Page 1: ... are able to take it on the go and not worry about a power outlet This wash can be used in a stand alone mode or connected in a Master Slave configuration The unit can also be controlled via DMX controller This wash has four operating modes Sound Active mode Auto mode Program mode RGB mode and DMX control mode Customer Support Elation provides a toll free customer support line to provide set up he...

Page 2: ...eaning The fixture should be cleaned only as recommended by the manufacturer See page 16 for cleaning details Heat The appliance should be situated away from heat sources such as radiators heat registers stoves or other appliances inclu ding amplifiers that produce heat The fixture should be serviced by qualified service personnel when A The power supply cord or the plug has been damaged B Objects...

Page 3: ...et Up Elation www elationlighting com Event Par System User Manual Page 6 Figure 1 Notice Be sure to follow figures two and three when making your own cables Do not use the ground lug on the XLR connector Do not con nect the cable s shield conductor to the ground lug or allow the shield conductor to come in contact with the XLR s outer casing Grounding the shield could cause a short circuit and er...

Page 4: ...the Master Master Slave Connections and Settings 1 Daisy chain your units via the XLR connector on the rear of the unit Use approved DMX 512 data cables to link your units to gether Remember that the Male XLR connector is the input and the Female XLR connector is the output The first unit in the chain master will use the female XLR connector only The last unit in the chain will use the male XLR co...

Page 5: ...ode 3 Channel Mode 4 Channel Mode 5 Channel Mode 6 Channel Mode and 7 Channel Mode Operating through a DMX controller gives the user the freedom to create their own programs tailored to their own individual needs 1 This function will allow you to control each individual fixture s traits with a Elation DMX 512 Controller 2 To run your fixture in DMX mode plug in the fixture via the XLR connections ...

Page 6: ...ttery pack to keep track of the battery pack charge level Connecting the Event Panel to the Battery Pack Connect the Event Panel to the battery pack using the included trig ger pins Line up the trigger pins with the holes and rotate the pins unil you feel them slide easily into the holes To lock the pins into place apply pressure and rotate turn the pins clockwise to lock them into place Test the ...

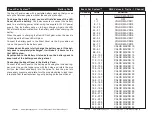
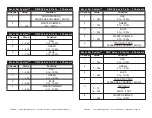
Page 7: ...ER 1 255 0 100 Event Par System DMX Values Traits 4 Channels Channel Value Function 1 RED 1 255 0 100 2 GREEN 1 255 0 100 3 BLUE 1 255 0 100 4 MASTER DIMMER 1 255 0 100 Event Par System DMX Values Traits 5 Channels Channel Value Function 1 RED 1 255 0 100 2 GREEN 1 255 0 100 3 BLUE 1 255 0 100 4 MASTER DIMMER 1 255 0 100 5 COLOR MACROS PLEASE SEE CHANNEL 1 MODE Event Par System DMX Values Traitss ...

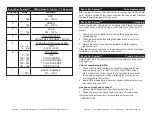
Page 8: ...completely before plugging the unit back in Cleaning frequency depends on the environment in which the fixture operates i e smoke fog residue dust dew First unplug the power The fuse holder is located next to the power cord Using a phillips screw driver unscrew the fuse holder Remove the bad fuse and replace with a new one Event Par System Fuse Replacement Event Par System Trouble Shooting Listed ...

Page 9: ...d this warranty does not include maintenance cleaning or periodic check up During the period specified above Elation Profession als will replace defective parts at its expense and will absorb all expenses for war ranty service and repair labor by reason of defects in material or workmanship The sole responsibility of Elation Professionals under this warranty shall be limited to the repair of the p...

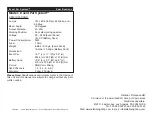
Page 10: ... x 280 W x 101 H mm Battery Pack 10 6 L x 9 1 W x 4 8 H 270 L x 233 W x 123 5 H mm Colors RGB Color Mixing DMX Channels 1 2 3 4 5 6 7 Warranty 2 Year 730 days Please Note Specifications and improvements in the design of this unit and this manual are subject to change without any prior written notice Elation Professional A Division of the AmericanDJ Group of Companies World Headquarters 6122 S East...

Reviews: