background image

©

Elation

®

  -  www.elationlighting.com  - Event Par System™ User Manual Page 10

©

Elation

®

  -  www.elationlighting.com  - Event Par System™ User Manual Page 9

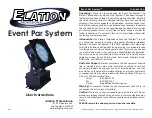
  Event Par System™                        Operating Instructions

Slave (S.L.A.) Mode: 

See Master/Slave Operation. 

Dimmer Mode:

With  this  mode  you  can  control  the  intensity  of  the  Red,  Green  and 
Blue colors, creating your own custom color to remain static.

1. Plug the fixture in and press the MODE button until “din” is dis-  

  played. 
2. To adjust the RGB colors, press the MODE button for at least 2 
  seconds. 
3. Adjust the intensities of each color by pressing the UP or DOWN  
  buttons. Once you have found your desired intensity press the    

  MODE button to move on to the next color. 
   “XXX.” = Red Intensity
  “XX.X” = Green Intesity
  “X.XX” = Blue Intesity
4. Once you have created your custom color press the MODE button  
  for at least two seconds to exit the Dimmer Mode. Your color will  

  now remain static.

DMX Mode: 

There  are  eight  DMX  Modes  to  choose  from:  1  Channel  Mode,  2 
Channel Mode, 3 Channel Mode, 4 Channel Mode, 5 Channel Mode, 

6  Channel  Mode,  and  7  Channel  Mode, 

Operating  through  a  DMX 

controller  gives  the  user  the  freedom  to  create  their  own  programs 
tailored to their own individual needs. 

1. 


This function will allow you to control each individual fixture’s 


traits with a Elation

®

 DMX 512

 Controller.

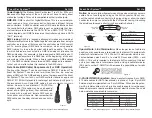
2.  To run your fixture in DMX mode, plug in the fixture via  the XLR  
 

connections to any standard DMX controller.  

3.   Press the MODE button until the DMX Address is displayed.    
4.  To select your desired DMX Channel operating mode, press the  


MODE button for at least 2 seconds. Once you have found your  


desired DMX operating mode, press the MODE button again to  


return to the address display. 


The Modes go as follows:

 DMX MODE 1 is 1 Channel mode, 


DMX MODE 2 is 2 Channel mode, DMX MODE 3 is 3 Channel  


mode, DMX MODE 4 is 4 Channel mode, DMX MODE 5 is 5  


Channel mode, DMX MODE 6 is 6 Channel mode, and DMX  


MODE 7 is 7 Channel mode.

5.  Press the UP or DOWN buttons to select your desired address.  


Once you have set your desired DMX address connect your DMX  


controller.


6.  Please see pages 12-15 for DMX values and traits.

  Event Par System™                        Operating Instructions

Summary of Contents for Event Par System

Page 1: ... are able to take it on the go and not worry about a power outlet This wash can be used in a stand alone mode or connected in a Master Slave configuration The unit can also be controlled via DMX controller This wash has four operating modes Sound Active mode Auto mode Program mode RGB mode and DMX control mode Customer Support Elation provides a toll free customer support line to provide set up he...

Page 2: ...eaning The fixture should be cleaned only as recommended by the manufacturer See page 16 for cleaning details Heat The appliance should be situated away from heat sources such as radiators heat registers stoves or other appliances inclu ding amplifiers that produce heat The fixture should be serviced by qualified service personnel when A The power supply cord or the plug has been damaged B Objects...

Page 3: ...et Up Elation www elationlighting com Event Par System User Manual Page 6 Figure 1 Notice Be sure to follow figures two and three when making your own cables Do not use the ground lug on the XLR connector Do not con nect the cable s shield conductor to the ground lug or allow the shield conductor to come in contact with the XLR s outer casing Grounding the shield could cause a short circuit and er...

Page 4: ...the Master Master Slave Connections and Settings 1 Daisy chain your units via the XLR connector on the rear of the unit Use approved DMX 512 data cables to link your units to gether Remember that the Male XLR connector is the input and the Female XLR connector is the output The first unit in the chain master will use the female XLR connector only The last unit in the chain will use the male XLR co...

Page 5: ...ode 3 Channel Mode 4 Channel Mode 5 Channel Mode 6 Channel Mode and 7 Channel Mode Operating through a DMX controller gives the user the freedom to create their own programs tailored to their own individual needs 1 This function will allow you to control each individual fixture s traits with a Elation DMX 512 Controller 2 To run your fixture in DMX mode plug in the fixture via the XLR connections ...

Page 6: ...ttery pack to keep track of the battery pack charge level Connecting the Event Panel to the Battery Pack Connect the Event Panel to the battery pack using the included trig ger pins Line up the trigger pins with the holes and rotate the pins unil you feel them slide easily into the holes To lock the pins into place apply pressure and rotate turn the pins clockwise to lock them into place Test the ...

Page 7: ...ER 1 255 0 100 Event Par System DMX Values Traits 4 Channels Channel Value Function 1 RED 1 255 0 100 2 GREEN 1 255 0 100 3 BLUE 1 255 0 100 4 MASTER DIMMER 1 255 0 100 Event Par System DMX Values Traits 5 Channels Channel Value Function 1 RED 1 255 0 100 2 GREEN 1 255 0 100 3 BLUE 1 255 0 100 4 MASTER DIMMER 1 255 0 100 5 COLOR MACROS PLEASE SEE CHANNEL 1 MODE Event Par System DMX Values Traitss ...

Page 8: ...completely before plugging the unit back in Cleaning frequency depends on the environment in which the fixture operates i e smoke fog residue dust dew First unplug the power The fuse holder is located next to the power cord Using a phillips screw driver unscrew the fuse holder Remove the bad fuse and replace with a new one Event Par System Fuse Replacement Event Par System Trouble Shooting Listed ...

Page 9: ...d this warranty does not include maintenance cleaning or periodic check up During the period specified above Elation Profession als will replace defective parts at its expense and will absorb all expenses for war ranty service and repair labor by reason of defects in material or workmanship The sole responsibility of Elation Professionals under this warranty shall be limited to the repair of the p...

Page 10: ... x 280 W x 101 H mm Battery Pack 10 6 L x 9 1 W x 4 8 H 270 L x 233 W x 123 5 H mm Colors RGB Color Mixing DMX Channels 1 2 3 4 5 6 7 Warranty 2 Year 730 days Please Note Specifications and improvements in the design of this unit and this manual are subject to change without any prior written notice Elation Professional A Division of the AmericanDJ Group of Companies World Headquarters 6122 S East...

Reviews: