13. DMX In - This 5-pin XLR jack is used to receive DMX signal from a DMX
controller.
14. DMX Out - This 5-pin XLR jack is used to send a DMX signal to a DMX
power pack or dimmer.
1
2
3
5
4
6
OUTPUTS 1-24
1
24
Earth
OUTPUTS 25-48
25
48
Earth
OUTPUTS 49-72
49
72
Earth
POWER INPUT
+
-
ANALOG OUTPUT
POLARITY
OUTPUT LEVEL
DIP Switch
Output
15V
12V
10V
on
on
on
on
on
on
off
off
off
off
off
off
4
3
2
1
N'OUVREZ PAS..RISQUE DE CHOCELECTRIQUE
CAUTION
RISK OF ELECTRIC SHOCK
DO NOT OPEN
WARNING:
THIS APPARATUS MUST BE EARTHED
Functions & Controls (Rear):
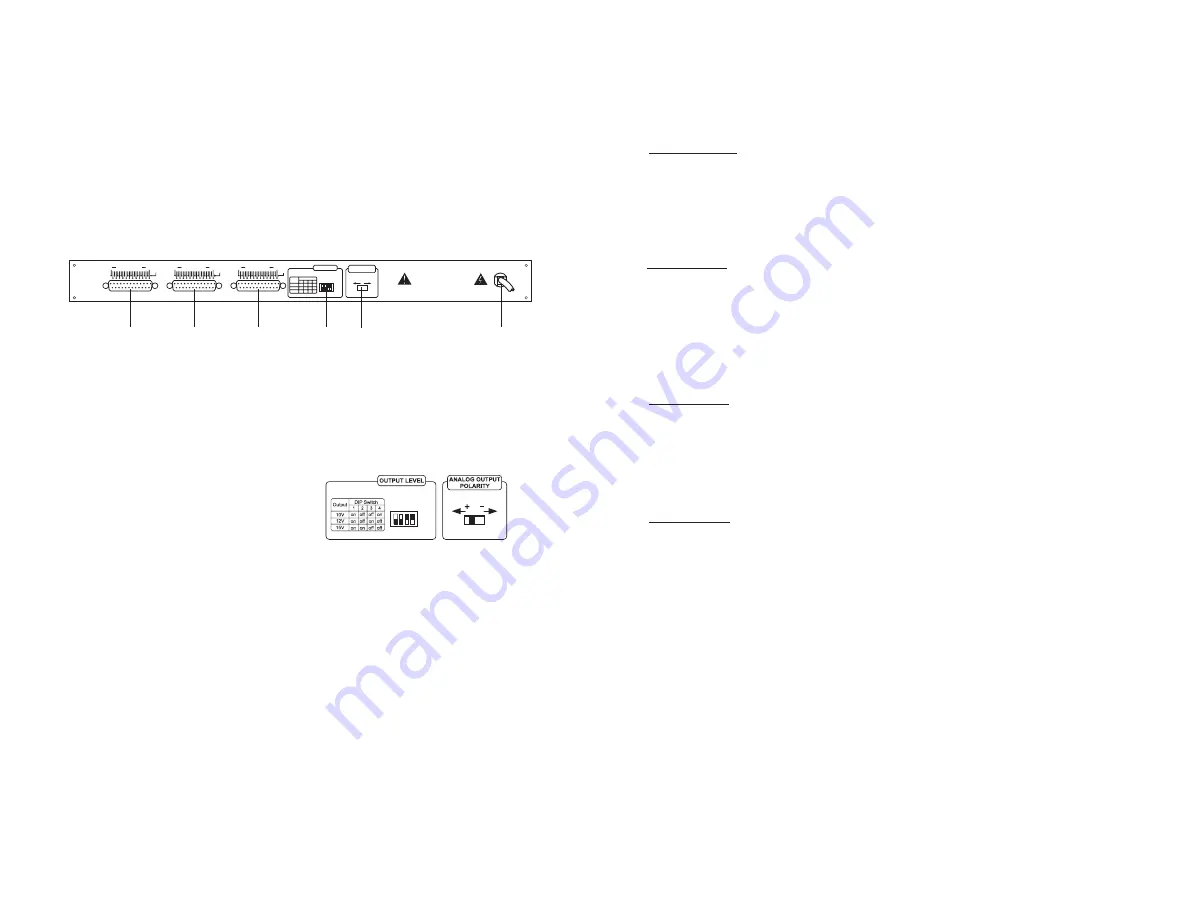
1. Channel 1-24 Output - This 25 pin "D" socket connector controls the
output signal for channels 1-24.
2. Channel 25-48 Output - This 25 pin "D" socket connector controls the
output signal for channels 25-48.
3. Channel 49-72 Output - This 25 pin "D" socket connector controls the
output signal for channels 49-72.
4. Output Level - 10V/ 12V/ 15V are available using these dip-switches.
Details refer to the figure.
5. Analogue Output Polarity - The left
is for po) output and the right
for negative(-) output.
6. Power Input Cord - Connect this cord to an AC 100V~50/60Hz electrical
outlet.
Multi-Data/Pak Instruction Manual Page 4
Set-Up:
1. With the main power off, connect either a DMX or MIDI controller.
2. Connect your output connections to the "D" sockets on the rear of the
unit. As an option, Elation makes a converter D type connector to din
plugs available as model number “Z-MDP/C”.
3. Connect the DJ Z-MDP/ C to convert the D type connectors
to din style plugs if required.
4. After you have made all your connections, turn the main power on and
follow the operating instructions on the next page.
Multi-Data/Pak Instruction Manual Page 5
Operating Instructions:
Mode Select:
To access the menu, you must hold down the MENU button for at least three
seconds. You will then have access to the MODE setting. Select the input type
being used, DMX or MIDI. If a DMX or MIDI signal is present, the
corresponding LED will begin to flash in the LED display. Press the MENU
button to store the mode.
DMX Mode :
When the unit is receiving DMX signal, the DMX LED will be flashing in
the LED display indicating that DMX signal is present. The unit will also
display the current DMX address in the LED Display. This unit can operate
between DMX channels 1-512 (A001 - A512). However, be aware that this
unit will only output a total of 72 DMX channels starting from the set address.
(See the Channel Setting section on page 6).
MIDI Mode :
When the unit is receiving a MIDI signal, the MIDI LED will be flashing in
the LED display indicating that MIDI signal is present. The unit will also display
a flashing MIDI channel number (CH01 - Ch16) in the LED display. This unit
can operate on MIDI channels 1-16. You may use the UP and DOWN buttons
to select a starting MIDI channel number.
Hold Mode :
This mode allows last DMX setting, if the DMX signal is interrupted, to hold.
For example, if the hold function is OFF and you have channels 1 & 4 on and
your DMX controller is turned OFF, DMX channels 1 & 4 will also turn OFF. If you
turn the HOLD function ON and disconnect DMX signal, channels 1 & 4 will re-
main ON until you disconnect the Multi-Data/Pak 's power or reconnect a DMX
controller. To turn this function ON or OFF, do the following:
1. Press and hold down the MENU Button for three seconds.
2. When the LED begins to flash, tap the MENU button twice to enter
HOLD mode. This will be indicated by a flashing LED next to "HOLD" in
the LED Display.
3. Use the UP and DOWN Buttons to select the ON or OFF settings.
4. When you have made your selection, tap the MENU button three times to
exit this function and store your setting.


