Euro-500TX Handy
© Elcom, s. r. o.
Service manual
Euro-500TX Handy
© Elcom, s. r. o.
Service manual
Fig. 3.6 Outer part of the head position sensor ..............................................................30
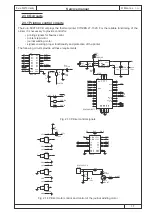
Fig. 3.7 Sensor circuit on the main PCB ........................................................................30
Fig. 3.8 External sensor circuit on the Interconnect PCB...............................................30
Fig. 3.9 Overall time diagram ........................................................................................30
Fig. 3.10 Placement of thermal head connector.............................................................31
Fig. 3.11 Sensor connexion to the connector .................................................................32
Fig. 4.1 Rough ECR cover disassembly chart................................................................33
Fig. 4.2 Releasing of the keyboard.................................................................................34
Fig. 4.3 Pulling out the middle cover ..............................................................................34
Fig. 4.4 Fixation and localisation of the accumulators....................................................35
Fig. 4.5 Printer reinstallation at segment LCD................................................................36
Fig. 4.6 Printer reinstallation at alphanumerical LCD .....................................................37
Fig. 4.7 Motor reinstallation ............................................................................................38
Fig. 4.8 Bottom view of motor cover...............................................................................38
Fig. 4.9 Fitting of the main PCB .....................................................................................39
Fig. 4.10 EPROM chip on the main PCB .......................................................................40
Fig. 4.11 NiCd accumulator on the main PCB................................................................41
Fig. 4.12 Keyboard disassembly ....................................................................................42
Fig. 4.13 Individual keyboard keys .................................................................................42
Fig. 4.14 Display reinstallation .......................................................................................43
Fig. 4.15 Display reinstallation in the Greek version of Euro-500TX Handy .................44
Fig. 4.16 ECR connectors ..............................................................................................45
Fig. 4.17 Connectors PCB placement ............................................................................45
Fig. 4.18 Segment LCD backlight installation.................................................................46
Fig. 4.19 Overlay for PCB for the LCD with backlight ....................................................46
Fig. 4.20 Connection of the external ECR drawer..........................................................47
Fig. 4.21 Modular jack 4×4 connexion............................................................................47
Fig. 4.22 Connection of the external keyboard...............................................................48
Fig. 4.23 Mini DIN PS/2 connector .................................................................................48
Fig. 4.24 PC communication cable connexion ...............................................................48
Fig. 4.25 Scanner/scales communication cable connexion............................................49
Fig. 5.1 The segment LCD area division ........................................................................50
Fig. 5.2 The keyboard keys arrangement.......................................................................52
Fig. 5.3 The correct sequence for pressing the keys at keyboard test 2........................53
Fig. 5.4 Modular jack 6×6 terminal connector ................................................................53
Fig. 5.5 Mini DIN PS/2 terminal connector .....................................................................54
Fig. 7.1 Main PCB top overlay........................................................................................66
Fig. 7.2 Main PCB bottom overlay..................................................................................67
Fig. 7.3 Keyboard PCB top overlay ................................................................................75
Fig. 7.4 Segment LCD module top and bottom overlay .................................................76
Fig. 7.5 Connectors PCB overlay ...................................................................................77
Fig. 7.6 Intercon PCB top and bottom overlay ...............................................................77


