R
29
Calibrating High Temperature PINIP™ Probes
Special thickness standards are supplied with
F1 2 High Temperature PINIP™ Probes - see
page 35. These thickness standards should be
used in place of the calibration standard in
Step 1
of “Calibration adjustment procedure” on page 24.
1.
Place appropriate thickness standard over end
of PINIP™ probe.
2.
Press
CAL
softkey.
3.
Place probe on hot
e
surface and take a
reading.
4.
Lift probe and then replace on hot surface to
take second reading.
5.
Repeat as necessary until reading is stable.
6.
Press
SET
to accept value.
7.
Remove thickness standard from end of
PINIP™ probe.
8.
Proceed with
Step 2
6 STATISTICS
The Elcometer 456
3
Basic has a Simple Statistics
feature (
STATS
) which calculates and displays a
statistical analysis of readings as they are taken.
When
EXTENDED MENU
is active, press
STATS
softkey to access
STATS MENU
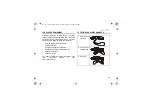
Figure 33. Stats menu
The statistics available are:
•
Number of Readings
•
Mean
•
Standard Deviation
•
Coefficient of Variation
•
Highest Reading
•
Lowest Reading
•
% greater to or equal to NDFT
•
% between 90% and 100% of NDFT
•
90/10 pass or fail
e.
The temperature of the surface used for calibration
should be equal to the temperature of the substrate
being measured.
Op_456_3_English.book Page 29 Thursday, January 22, 2009 7:58 PM


