15
en
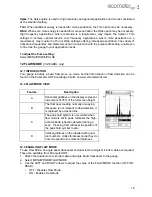
This mode increases the overall repetition rate to a maximum of 32 Hz with a high speed screen
refresh rate of 25 times a second.
This feature enables the user to make scanned passes over an arbitrary length of the test material
while still maintaining a reasonable representation of thickness over the scanned area or region.
This feature can be used in conjunction with High and Low alarm limits features to keep track of
both values dynamically.
To enable/disable the high speed Scan Mode:
1.
Select MENU/UTIL/SCAN MODE.
2.
Use the LEFT and RIGHT arrows to toggle the SCAN MODE on/off.
3.
Press MEAS to return to the measurement screen, ready to begin taking readings.
11.3 ALARM MODE
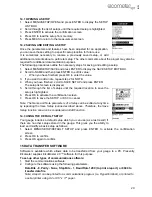
Your gauge includes an Alarm Mode. Set the limits, and if a measurement falls outside of these
limits your gauge will signal an alarm (a red light on the front panel of the instrument and/or an
audible beep).
This feature may be used for a variety of applications to verify the material is within the manufacturer
specifications.
There are two limit values, ALARM LOW and ALARM HIGH. You can choose to activate both or
just one of these values depending on your requirements.
To enable/disable Alarm Mode:
1.
Select MENU/UTIL/ALARM STATUS
2.
Use the LEFT and RIGHT arrows to toggle the ALARM on/off/audible.
3.
Press MEAS to return to the measurement screen, ready to begin taking readings.
To set the Alarm limits:
1.
Select MENU/UTIL/ALARM LO LIMIT or ALARM HI LIMIT and press ENTER to display the
DIGITS EDIT BOX.
2.
Adjust to suit the measurement application using the LEFT, RIGHT, UP and DOWN arrows.
3.
Press OK to set the alarm value and return to the menu screen, or ESC to cancel.
4.
Press MEAS to return to the measurement screen.
11.4 POLARITY
(CG70ABDL only)
The polarity that your gauge detects on can be set to either positive or negative to obtain the best
detection results depending on the specific measurement conditions of your application. Polarity
affects both the gate (above or below the x axis in the RF A-Scan) and the Rectified A-Scan display
(whether the top or bottom half of the RF display is shown).
For further information refer to the Elcometer NDT Knowledge Centre on www.elcometerndt.com.
To adjust POLARITY:
1.
Set the measurement screen view to RF, MENU/DISP/VIEW.
2.
Select MENU/TUNE/POLARITY.
11.5 PULSE WIDTH
(CG70ABDL only)
Your gauge has an adjustable pulse width option. Pulse width refers to the duration of time the
pulser is switched on. Pulse width determines the amount of energy transmitted into the material
being tested.
There are three pulse width options:


