14
2.
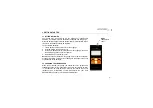
Place transducer onto the surface of the material to be measured
Press the transducer wearface into the couplant. Moderate pressure on the top of the transducer using
the thumb or index finger is sufficient; it is only necessary to keep the transducer stationary and the
wearface seated flat against the surface of the material.
3.
Read display
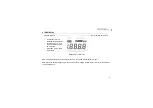
If six or seven bars of the stability indicator are showing, the display will be reading the correct sound-
velocity of the material directly beneath the transducer.
If the stability indicator has fewer than five bars showing, or the numbers on the display seem erratic,
check to make sure that there is an adequate film of couplant beneath the transducer, and that the
transducer is seated flat against the material.
The gauge will perform a number of measurements every second when the transducer is in contact
with the surface of the material. The display is updated as each reading is taken.
4.
Remove transducer from surface
The display will show the last measurement made.
Note: Occasionally, a small film of couplant will be drawn out between the transducer and the surface as
the transducer is removed. When this happens, the gauge may perform a measurement through this
couplant film, resulting in a measurement that is larger or smaller than it should be. This phenomenon can
be seen when one sound-velocity value is observed while the transducer is in place, and another value is
observed after the transducer is removed. If this happens, take the reading again using less couplant.


