background image

19

5

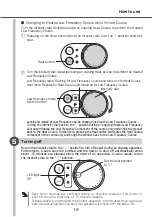
Turning off


■ Changing to Heated Low Frequency Course while in Heat Course

Turn the Intensity dial clockwise during an ongoing Heat Course to perform the Heated 

Low Frequency Course.


Pressing on the Heat button while the Intensity dial is at the "-" position starts by 
heat.


Turn the Intensity dial clockwise during an ongoing Heat Course to perform the Heated 
Low Frequency Course.

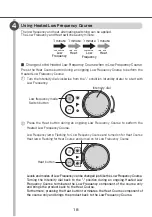
Levels and modes of Low Frequency can be changed just like the Low Frequency Course.

Turning the Intensity dial back to the "-" position during an ongoing Heated Low Frequency 

Course terminates the Low Frequency Component of the course only and brings the product 

back to the Heat Course. Furthermore, pressing the Heat button terminates the Heat Course 

component of the course only and brings the product back to the Low Frequency Course.

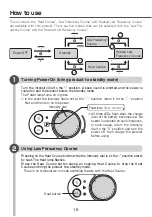
Return the Intensity dial to the " ○ " position to turn off power during an ongoing operation.

Furthermore, a beep sound is emitted and the power is shut off automatically when 

about 15 minutes are elapsed since the start of an operation. In such cases, return 

the Intensity dial to the " ○ " position.

・ Even when courses are switched during an ongoing operation, the power is 

shut off once the total time of 15 minutes elapses.

・  A beep sound is emitted and the product operation is terminated when a gel pad 

becomes detached from the body or a gel pad is removed from the base unit.

How to use

Heat button

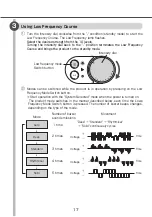
Low frequency mode
Switch button

LED light
Off

Set the dial position 
to "○"

Intensity dial

Low Frequency lamp: Flashing for Low Frequency Course and turned on for Heat Course
Heat lamp: Flashing for Heat Course and turned on for Low Frequency Course

Summary of Contents for ECLEAR refree on

Page 1: ...t Please read this manual before use After reading keep this manual in a safe location for future reference Instruction Manual HCM PH01 Series For use in Hong Kong and Philippines only If you made you...

Page 2: ...these precautions 4 Package contents 9 Part names 10 Pre use Preparation for Use 11 Placement of the gel pad 13 Example of gel pad attachment 14 In Usage How to use 16 After use Care of this equipment...

Page 3: ...ent releases low frequency current to the body through electrodes attached on the body which triggers vibration that is utilized to massage tired body parts What is heating instrument Applying heat on...

Page 4: ...ife such as artificial heart and lung machines This product may open such equipment to malfunctions and may lead to serious conse quences for your health WARNING Do not use the product near heart or o...

Page 5: ...when they are aware of any physical anomalies Persons with malignant tumours People who have an abnormality in their heart or cerebral nerve People who are confirmed to have lost temperature sensation...

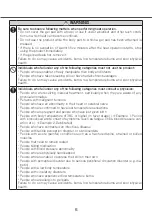
Page 6: ...bathroom Near water Locations with a lot of dust Places with a lot of vibration It will cause fire electric shock or malfunctions Do not use while sleeping Doing so can cause accidents burns low temp...

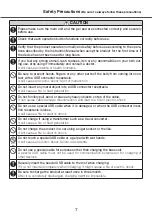
Page 7: ...y objects on top of the cable It can cause cable damage disconnection and lead to a fire or electric shock Do not use a special USB cable when it is damaged or when the USB connector inser tion recept...

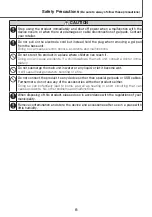
Page 8: ...r imme diately Do not submerge the main unit in water or any liquid or let it become wet It will cause heat generation bursting or a fire Do not connect the product to any devices other than special g...

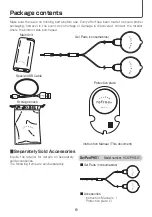
Page 9: ...re the product was purchased Separately Sold Accessories Inquire the retailer for details on separately sold accessories The following items are sold separately Main Unit Gel Pads consumables Special...

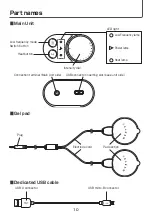
Page 10: ...frequency mode Switch button Heat button Connection terminal Main Unit side USB A connector USB micro B connector Electrode cord Plug Pad section Intensity dial USB connector inserting slot base unit...

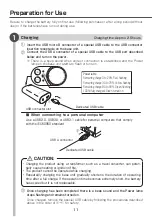
Page 11: ...n of fire The product cannot be operated while charging Repeatedly charging the base unit gradually shortens the duration of operating time after a full charge If the operation time becomes extremely...

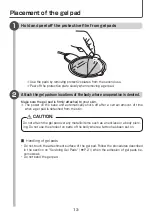
Page 12: ...nnect the product to any devices other than special gel pads When replacing a gel pad Verify that all LED lamps have turned off and that the power to the base unit has been shut off Remove the plug on...

Page 13: ...tain amount of time when a gel pad is detached from the skin Do not attach the gel pad over any metallic items such as a necklace or a body pierc ing Do not use the product on parts of the body where...

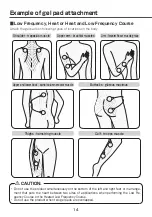
Page 14: ...scle group Upper and lower back spinal column erector muscle Buttocks gluteus maximus Thighs hamstring muscle Calf triceps muscle Do not use the product simultaneously on the bottom of the left and ri...

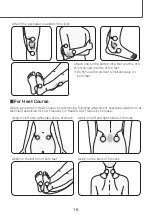
Page 15: ...imultaneously on both feet For Heat Course Attach gel pads for Heat Course by referencing following attachment examples aside from at tachment examples for Low Frequency or Heated Low Frequency Course...

Page 16: ...lash when the charge level of the battery becomes low No buzzer is sounded on such instances In such cases return the Intensity dial to the O position and turn the power off then charge the product be...

Page 17: ...requency Mode Switch button Start operation with the System Selected mode when the power is turned on The product mode switches in the manner described below each time the Lowe Frequency Mode Switch b...

Page 18: ...equency can be changed just like the Low Frequency Course Turning the Intensity dial back to the position during an ongoing Heated Low Frequency Course terminates the Low Frequency component of the co...
Page 19: ...ourse component of the course only and brings the product back to the Low Frequency Course Return the Intensity dial to the position to turn off power during an ongoing operation Furthermore a beep so...
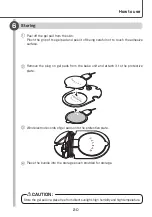
Page 20: ...plug on gel pads from the base unit and attach it to the protective plate Wind electrode cords of gel pads onto the protective plate Place the bundle into the storage pouch provided for storage Store...

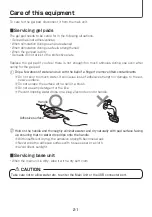
Page 21: ...contaminants Do not pour too much water It will cause loss of adhesive strength or damage to the ad hesive surface Do not scrape the surface with a nail or a brush Do not use any detergent or the lik...

Page 22: ...Fully charge the product and store it in a location with normal temperature 10 to 30 C as much as possible when not us ing the product for many hours Charge the product at least once in three months...

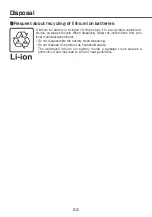
Page 23: ...valuable re source so please recycle When disposing follow the instructions from your local municipal government Do not disassemble the battery when disposing Do not dispose this product as household...

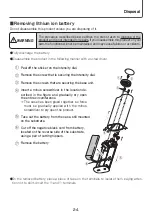
Page 24: ...that is securing the Intensity dial Remove the screws that are securing the base unit Insert a minus screwdriver in the location de scribed in the figure and gradually pry open the entire circumferen...

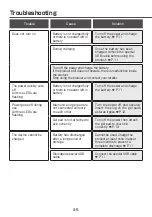
Page 25: ...e flashing Battery is not charged fully or there is no power left in battery Turn off the power and charge the battery P 11 Power goes off during use All three LEDs are flashing Main unit and gel pad...

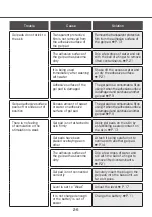
Page 26: ...s off or slides out of position Excess amount of sweat or water on adhesive surface of gel pad The gel pad is a consumable Stop using it when the adhesive surface is damaged and purchase another gel p...

Page 27: ...of the gel pad is dirty or dry Drip a few drops of water and rub with the ball of a finger to remove lifted contaminants P 21 Adhesive surface of the gel pad is damaged The gel pad is a consumable St...

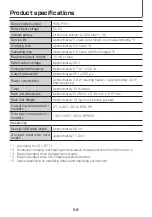
Page 28: ...mately 3 8 W heating heater Approximately 0 3 W low frequency Timer Approximately 15 minutes Main unit dimensions Approximately W 26mm x D 48 mm x H 97 mm Main Unit Weight Approximately 100 g not incl...

Page 29: ...l 137 862 Korea TEL 82 0 2 1588 9514 FAX 82 0 2 3472 5533 www elecom co kr ELECOM Sales Hong Kong Ltd 2 F Block A 2 8 Watson Road Causeway Bay Hong Kong TEL 852 2806 3600 FAX 852 2806 3300 email info...

Reviews: