background image


INSTALLATION AND USER MANUAL 


70CM COOKER HOOD 


Please read this manual before using or installing the cooker hood and 

keep it safe for future reference. 

Visit our page 

www.electriQ.co.uk

 for our entire range of electricals


eiQ70CURVBL 

Summary of Contents for eiQ70CURVBL

Page 1: ...USER MANUAL 70CM COOKER HOOD Please read this manual before using or installing the cooker hood and keep it safe for future reference Visit our page www electriQ co uk for our entire range of electri...

Page 2: ...5 INSTALLATION 6 EXHAUST DUCT INSTALLATION 11 OPERATION 12 BULB REPLACEMENT 13 FILTER INFORMATION 14 GLASS CANOPY MAINTENANCE 15 CLEANING AND MAINTENANCE 16 TROUBLESHOOTING 17 TECHNICAL SPECIFICATION...

Page 3: ...ttended as it can be a serious fire hazard If the supply cord is damaged it must be replaced by the manufacturer its service agent or a similarly qualified person in order to avoid a hazard The socket...

Page 4: ...ave to be fulfilled The minimum distance between the supporting surface for the cooking vessels on the hob and the lowest part of the hood must be at least 65 cm When the cooker hood is used in conjun...

Page 5: ...5 PARTS DESCRIPTION ILLUSTRATION QTY Cooker Hood 1 Chimney Sections 2 Chimney bracket 2 Hood Installation Plate 1 Screw ST5 50 7 Wall plug 7 Screw ST4 2 9 5 6 Exhaust adaptor 1...

Page 6: ...6 INSTALLATION DIAGRAM Upper Chimney Bracket Lower Chimney Bracket Hood Installation Plate...

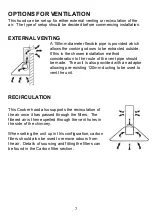
Page 7: ...to the route of the vent pipe should be made The unit is also provided with an adaptor allowing pre existing 120mm ducting to be used to vent the unit RECIRCULATION This Cooker hood also supports the...

Page 8: ...n plates are horizontal to prevent grease from accumulating within the hood Ensure the power has been turned off at the mains before starting installation Connection to the mains supply must be in an...

Page 9: ...he hood and keep the hood level The chimney bracket should be secured at the highest place of chimney Screw two 4 x 30mm screws on the wall with wall plugs to fix the hood then use two 4mm x 40mm scre...

Page 10: ...ith safety screws The two safety vents are positioned on the back housing with diameter of 6mm See Pic 5 Put the two chimneys together onto the cooker hood body meanwhile adjust the height of the insi...

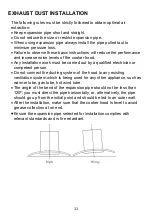
Page 11: ...ied out by a qualified electrician or competent person Do not connect the ducting system of the hood to any existing ventilation system which is being used for any other appliance such as warmer tube...

Page 12: ...ly 3 controls Power Off Fan Speed 3 separate buttons and Illumination BUTTON OPERATION Stop Stops operation of the currently selected fan speed Low Fan will run at low speed Mid Fan will run at medium...

Page 13: ...Removal and refitting of the glass canopy section 2 Locate the top of the light fitting and squeeze the spring clips while pushing the fitting out of the base of the hood 3 Follow the wire from the l...

Page 14: ...the filter clockwise onto the motor housing TO REMOVE Rotate the filter anti clockwise until it is unscrewed WARNING The carbon filter cannot be washed or recycled It should be replaced after approxi...

Page 15: ...sing four screws spacers and decorative washers Remove the four screws spacers and decorative washers from the glass canopy ensuring the canopy is suitably supported Two people should then lift the ca...

Page 16: ...leaning water must be kept away from the motor control switch and all electrical components GREASE FILTERS It is recommended that the grease filter is cleaned every two to three months by carrying out...

Page 17: ...damaged Switch off the unit Repair to be carried out by qualified service personnel only The fan motor is not fixed tightly Switch off the unit Repair to be carried out by qualified service personnel...

Page 18: ...re is efficient ventilation 2 Clean the cooker hood regularly so as not to block the airway 3 Remember to switch off the cooker hood light after cooking 4 Remember to switch off the cooker hood after...

Page 19: ...vailable for all customers at which you can deposit your old electrical products Customers will be able to take any old electrical equipment to participating sites run by their local councils Please r...

Page 20: ...rflow Qmax 270 6 m3 h Measured airflow rate at the best efficiency QBEP 133 7 m3 h Measured air pressure at best efficiency point PBEP 140 Pa Measured electric power input at best efficiency point WBE...

Reviews: