


7
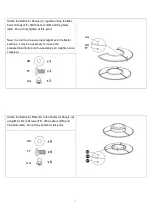
Attach the Reflector Plate (B) to the Reflector Panels (A)
using M6 x 8mm Screws (FF), Φ6 washers (DD) and
Cap Nuts (GG). Do not fully tighten at this point.
Attach the Reflector Panels (A) together using the M6 x
8mm Screws (FF), Φ6 Washers (DD) and Cap Nuts
(GG). Do not fully tighten at this point.
Note: In order to achieve proper alignment of reflector
sections, it may be necessary to loosen the
preassembled bolts prior to assembly and retighten once
complete.
DD
DD
FF
FF
GG
GG
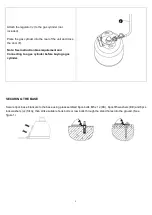
DD
FF
GG


