background image


Installation and 

User Manual 


ISLAND COOKER HOOD 

eiQTMISLANDSLIM


Summary of Contents for ISLAND eiQTMISLANDSLIM

Page 1: ...Installation and User Manual ISLAND COOKER HOOD eiQTMISLANDSLIM...

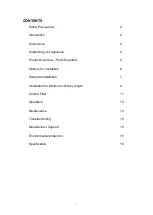
Page 2: ...r appliance 4 Product Overview Parts Supplied 5 Options for Ventilation 6 Standard Installation 7 Installation for Minimum chimney length 9 Carbon Filter 11 Operation 12 Maintenance 13 Troubleshooting...

Page 3: ...ker hood The cooker hood is for domestic use only and is not designed for commercial use It should only be used for the purpose it was intended to extract vapours and cooking odours Do not flamb or us...

Page 4: ...lation in case you need to isolate it in an emergency If the unit is hard wired to the mains via a spur a fused switch should be installed and accessible for it The minimum distance between the hob su...

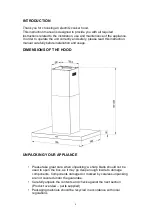
Page 5: ...ual carefully before installation and usage DIMENSIONS OF THE HOOD UNPACKING YOUR APPLIANCE Please take great care when unpacking a sharp blade should not be used to open the box as it may go deep eno...

Page 6: ...er hood 1 Chimney 2 Adaptor 1 Cable Tie 1 Wall Bracket 1 Hanging hook 1 Metal angle bar 8 Screw ST4 4mm x 30mm 11 Wall plug 11 Expansion bolt 6mm x 50mm 6 Screw M5 5mm x 10mm 40 Screw self tapping 4mm...

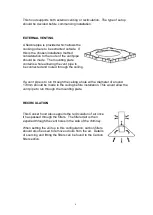
Page 7: ...d through the ceiling If a vent pipe is to run through the ceiling a hole with a diameter of around 170mm should be made in the ceiling before installation This would allow the vent pipe to run throug...

Page 8: ...ix the angle bars to the hanging plate using the 8 x M5 screws 3 Extend the angle bars to the required height and then fix them in position using the 16 x M5 screws The angle bars must have an overlap...

Page 9: ...the cooker hood onto the angle bar and then fix it into position using the 16 x M5 screws IMPORTANT This stage of the installation process MUST be completed by two people as one person must support th...

Page 10: ...d to allow fitting to concrete 2 Calculate the length of the angle bars according to the overall height of the hood required Extend the angle bars to the required height and then fix them in position...

Page 11: ...T This stage of the installation process MUST be completed by two people as one person must support the weight of the hood until all the screws have been securely tightened 8 The unit should then be c...

Page 12: ...the lock and pull it downward as below Put the activated carbon filter onto the end of the motor unit and turn it in clockwise direction Repeat the same on the other side see diagram NOTE Make sure th...

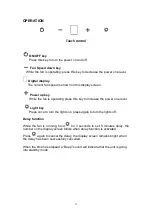
Page 13: ...ress this key to increase the power one level Light key Press once to turn the lights on press again to turn the lights off Delay function While the fan is running hold for 3 seconds to set 5 minutes...

Page 14: ...lly flammable will saturate on the filter Remove the filter as shown in the Installation section Clean it with a soft nylon brush in a mild solution of warm water and a small amount of washing up liqu...

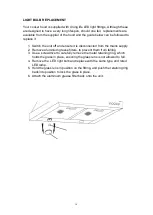
Page 15: ...it is disconnected from the mains supply 2 Remove aluminium grease filters to prevent them from falling 3 Use a screwdriver to carefully remove the metal retaining ring which holds the glass in place...

Page 16: ...d out by qualified service personnel only The unit is not hung properly on the bracket Take down the unit and check whether the bracket is in proper location Suction performance not good 1 Grease filt...

Page 17: ...not to block the airway 3 Remember to switch off the cooker hood light after cooking 4 Remember to switch off the cooker hood after cooking Information for dismantling Do not dismantle the appliance i...

Reviews: