background image

4

Setup procedure

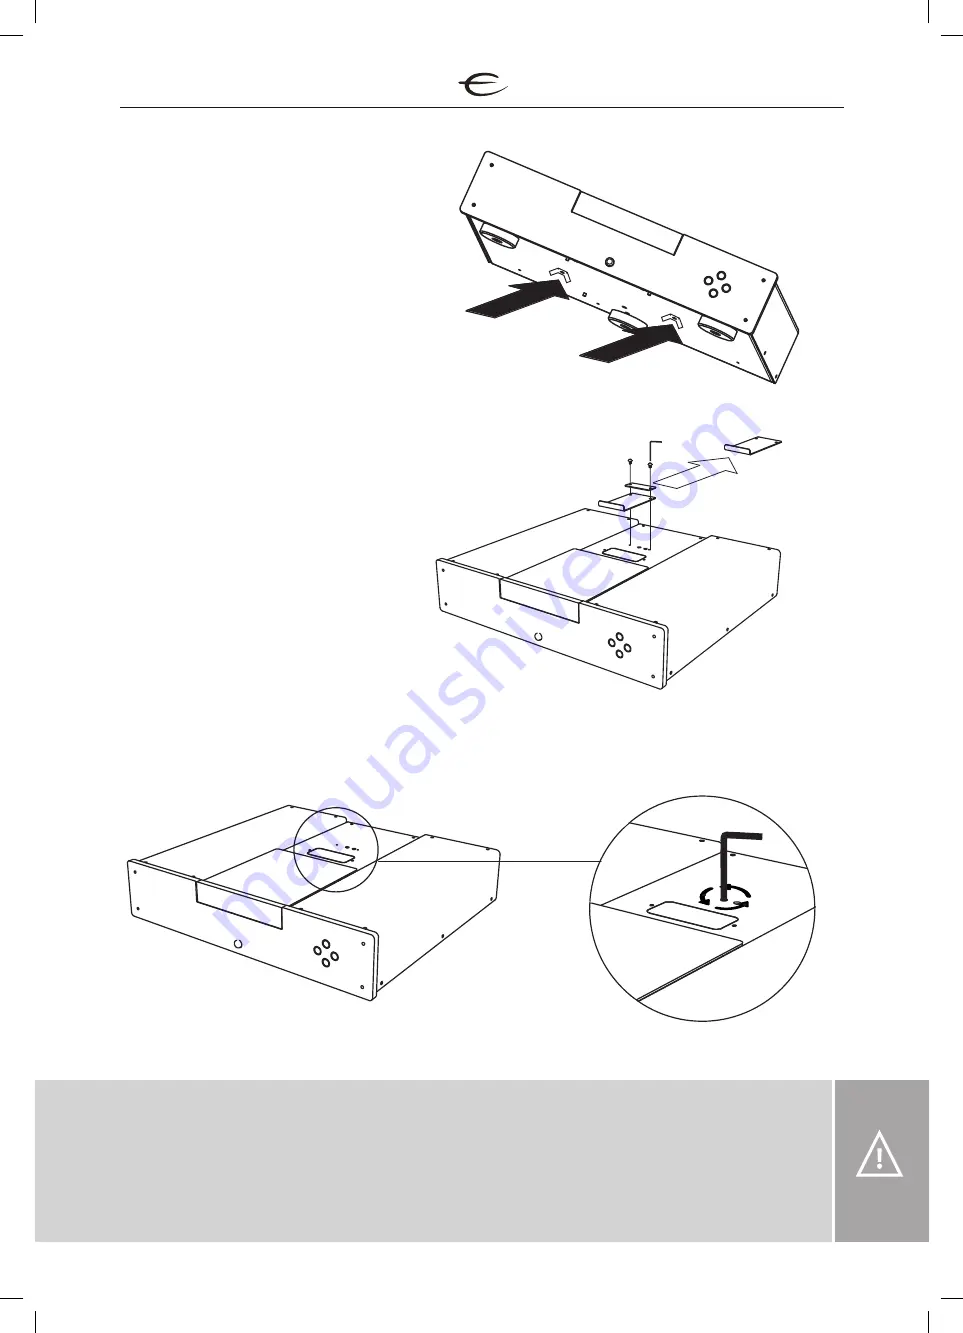
How to remove a CD transport screws.

1. Remove the two wing bolts and the 

wing nut  located underneath the unit.

2.  Unscrew the Allen screws holding 

the gold sign marked «Reference CD 

player » with the smallest Allen key 

and remove the transport lock bracket.

3. To loosen the transport screw located underneath the golden sign, use the largest Allen key 

and unscrew counter clockwise for about 10 turns. Do not remove this Allen screw.

4. Put the golden sign back and fasten it whith the Allen screws.

Important Notice

Keep Allen keys and all transport necessities  in  a  safe  place  for future use. Always tighten 

the transport screw on top first, then the wing nut and wing bolts when moving the CD Player. 

The cancellation system weights  close  to  six  kilograms alone. If not securely fastened, the 

CD player will be severely damaged,  resulting  in  void  of warranty. Do not over-tighten the 

transport screws.

Remove

Remove

Remove

EMC 1_MKV.indd   4

21.11.2019   17:16:39

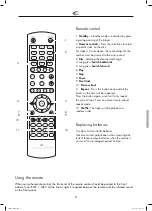
Summary of Contents for EMC 1 MKV

Page 1: ...r S N MAINS 115 230VAC CAUTION DO NOT OPEN RISK OF ELECTRICAL SHOCK CLASS 1 LASER PRODUCT Class A Laser Product Complies with 21 CFR 1040 10 and 1040 11 FUSE 200 240VAC 1AT 250V 100 120VAC 1AT 250V DE...

Page 2: ...t hall into the very heart of your home Our aim when developing and testing new products is to ensure that the wonderful richness of tone and every nuance of feeling and emotion of a piece of music is...

Page 3: ...rials for future shipment Important Notice The transport screws must be removed for proper operation When moving the CD player Always re insert and tighten the transport screws to avoid severe damage...

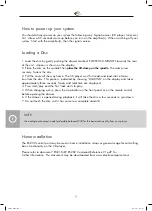
Page 4: ...r clockwise for about 10 turns Do not remove this Allen screw 4 Put the golden sign back and fasten it whith the Allen screws Important Notice Keep Allen keys and all transport necessities in a safe p...

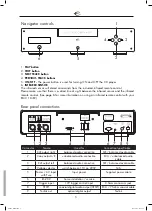
Page 5: ...Trigger input 12V trigger control input 3 5mm mono mini jack 8 SPDIF coaxial digital audio output SPDIF RCA 75 ohm coaxial cable 9 Toslink out optical digital output Toslink ANALOG OUTPUT SPDIF OUTPUT...

Page 6: ...ing the display and E logo 4 Long press Search backwards 5 Long press Search forward 6 Play 7 Stop 8 Pause 9 Next track 10 Previous track 11 Repeat Press this button once and all the tracks on the dis...

Page 7: ...OADING on the display and takes approximately three seconds Tracks and total time are displayed 4 Press start play and the first track starts to play 5 When changing a disc press the stop button on th...

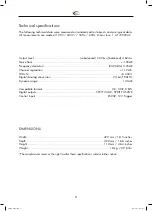
Page 8: ...deviation 20 20kHz 0 05dB Channel separation 110 dB THD N 0 003 Digital analog conversion 24 bit 192kHz Dynamic range 120 dB Compatible formats CD CD R D RW Digital outputs SPDIF COAX SPDIF TOSLINK C...

Page 9: ...always include the following 1 A sales slip or other proof of purchase if repair is claimed under warranty 2 A proforma invoice with value of goods stating that the EMC 1 MKV is returned to Norway fo...

Page 10: ...00 CD DIM RC6 04 13 PREV RC6 04 21 PLAY RC6 04 2C STOP RC6 04 31 NEXT RC6 04 20 REPEAT RC6 04 1D SHUFFLE RC6 04 1C PAUSE RC6 04 30 FAST FORWARD RC6 04 5B FAST BACKWARD RC6 04 5A IR Remote control code...

Page 11: ...11 EMC 1_MKV indd 11 21 11 2019 17 16 40...

Page 12: ...user serviceable parts inside Refer servicing to qualified service personal The warranty is void if the product is tampered by non authorised personnel Use only authorized Electrocompaniet service ce...

Reviews: