18
D4
END OF WORK AND DAILY CLEANING
The appliance is designed to carry out an automatic
cleaning cycle to help flush out any residues and to
guarantee greater health and hygiene:
•
Open the door and take out the rack containing the
clean pans.
•
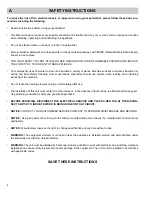
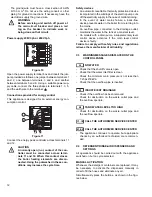
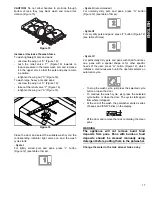
Remove the tank filters “C”-”D”-”E” and the overflow
“W” to drain the water from the tank (Figure 17).
Figure 17
•
Close the door.
•
Select the drain cycle by pressing “B” button
(Figure 12).
The message "CLE" ("CLEAN") will be displayed
throughout the drain cycle:
•
After a few minutes, 3 beeps indicate the end of the
cleaning cycle and “END” blinks on the display:
•
Switch off the potwasher by pressing “A” button
(Figure 12).
•
Switch unit off at the main circuit breaker.
•
Close the water shutoff valve.
•
Replace the filters and the overflow.
Cleaning the nozzle jets
•
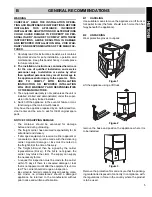
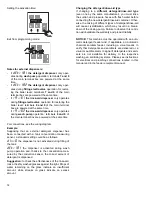
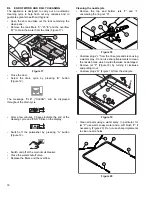
Remove the top and bottom jets “F” and “I”,
unscrewing the ring nut “H”.
Figure 18
•
Unscrew plugs “L” from the rinse jets and clean using
a water spray. Do not use sharp implements to clean
the nozzle holes, which could otherwise be damaged.
•
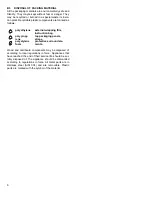
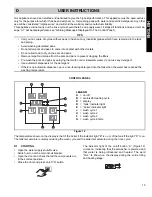
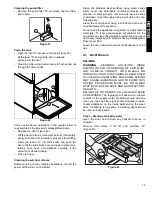
Remove jet “P” (Figure 19) by turning it clockwise
and pulling it out.
•
Unscrew plugs “R” (Figure 19) from the side jets.
Figure 19
•
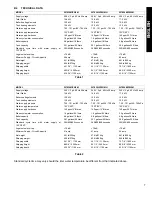
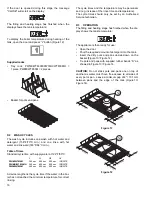
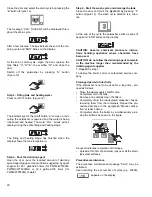
Clean all parts using a water spray. In particular, for
jet “P” use warm soapy water and a soft brush “Z” if
necessary (Figure 20). Do not use sharp implements
to clean nozzle holes.
Figure 20
W
C
D
E
H
F
I
L
P
R
R
P
Z
Z
Z
Z

