background image

11

INSTALLATION INSTRUCTIONS

Positioning the Dishwasher

The  back of the dishwasher should be positioned against 

a wall and the sides of the dishwasher between two walls 

or cabinets. Make sure your location has the correct drain, 

water and electrical outlets to attach the connections.

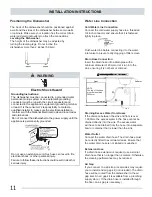
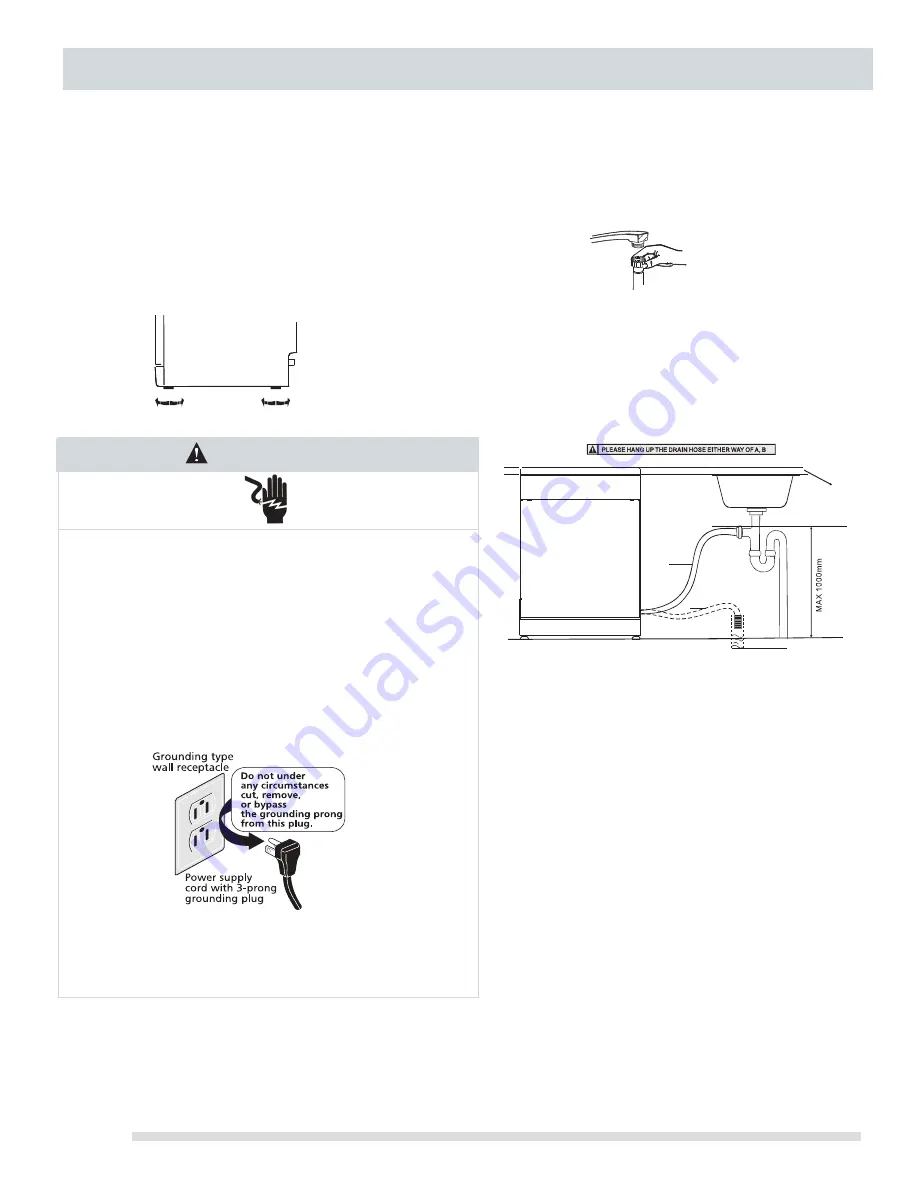
Leveling the Dishwasher

The height of the dishwasher may be adjusted by 

turning the leveling legs. Do not incline the 

dishwasher more than 2 inches (5.08cm).

Electric Shock Hazard

Grounding Instructions:

The dishwasher must be connected to a grounded metal,

permanent wiring system or an equipment-grounding

conductor must be run with the circuit conductors and

connected to the appliance’s equipment grounding terminal

or lead. It is the consumer’s responsibility to contact a

qualified installer to make sure the electrical installation

conforms with the National Electrical Code and local codes

and ordinances.
Do not connect the dishwasher to the power supply until the

appliance is permanently grounded.

Do not use an extension cord. Such use can result in fire,

electrical shock, or other personal injury.
Failure to follow these instructions could result in death or

serious injury.

WARNING

Water Line Connection

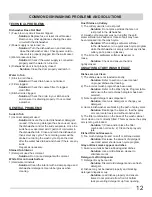
Cold Water Line Connection

Connect the cold water supply hose to a threaded 

3/4 inch connector and ensure that it is fastened 

tightly in place. 

Flush water line before connecting it to the water 

inlet valve to prevent early clogging of filter screen.

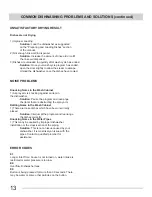
Drain Hose Connection

Insert the drain hose into a drain pipe with a 

mininum diameter of 40mm or let it run into the 

sink, ensuring it is not bent or crimped.

Draining Excess Water from Hoses

If the distance between the sink and floor is over

1,000mm, the excess water in the hose cannot be 

drained directly into the sink. The excess water 

will have to be drained from the hose into a separate 

bowl or container that is lower than the sink.

Water Outlet

Connect the water drain hose. The drain hose must

be correctly fitted to avoid water leaks. Ensure that 

the water drain hose is not kinked or squashed.

Extension Hose

If a drain hose extension is required, use a similar

drain hose that is no longer than 4 meters. Otherwise,

the cleaning performance may be reduced.

Air Gap

If you connect to a sink trap, local codes may require

you to install and air gap kit (not included). The drain

hose will be routed from the dishwasher to the air

gap inlet. An air gap kit is available from a plumbing

supply store. ( If the drain hose is installed through

the floor, an air gap is necessary.)

A

Counter

Front

Drain pipe

NOTE

The top of the hose

must be less than

1000mm.

φ

40mm

B

Summary of Contents for DFB09JFCSD

Page 1: ...Safety Instructions 2 Dishwasher Features 3 Operating Instructions 4 Wash Programs Chart 5 Dish Preparation 6 Preparing and Loading Dishes 7 Dishwasher Dispensers 8 9 Care and Cleaning 10 Installation Instructions 11 Common Dishwashing Problems and Soultions 12 13 Loading the Baskets According to En50242 14 Notes 15 DFB09JFC W S D ...

Page 2: ......

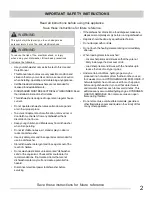
Page 3: ...or recommendations if not marked Items that are not dishwasher safe may melt and create a potential fire hazard Disconnect electrical power to dishwasher before servicing If the dishwasher drains into a food disposer make sure disposer is completely empty before running dishwasher Repairs should be done by a qualified technician Do not tamper with controls Do not touch the heating element during o...

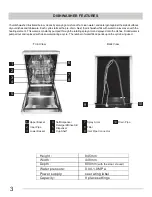
Page 4: ...ating spray arm and sprayed onto the dishes Soiled water is pumped out and replaced with clean water during a cycle The number of water fills depends upon the cycle being used 1 2 3 4 5 7 6 9 1 2 3 4 5 6 7 8 1 5 6 7 8 9 10 3 2 4 10 Upper Basket Inner Pipe Lower Basket Salt Dispenser Detergent Rinse Aid Dispenser Cup Shelf Spray Arms Filter Inlet Pipe Connector Drain Pipe Front View Back View Heigh...

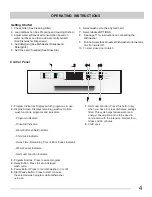
Page 5: ...ich program is in use 2 Display Screen Displays remaining wash cycle time wash functions programs and indicators Program Indicators Rinse Aid Indicator Water Softener Salt Indicator Child Lock Indicator Delay Time Remaining Time or Error Codes Indicator Water Faucet Indicator Half Load Function Indicator 3 Program Buttons Press to select program 4 Delay Button Press to set up delayed wash cycle 5 ...

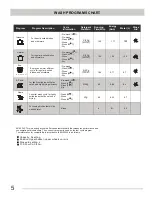
Page 6: ...ed dishes and silverware A shorter wash cycle for lightly soiled loads that do not need drying Intensive Normal Eco Rapid WASH PROGRAMS CHART EN 50242 This is a widely accepted European test standard that measures performance and consumption of dishwashers The economy program is used as the test cycle program The information for compatibility in accordance to EN50242 is as follows Capacity 9 setti...

Page 7: ...o sit for a long period of time Unless the dishwasher is to be operated at once it is best to rinse off these food soils Load dishes facing the center of the rack so that the water spray from the rotating spray arm can reach soiled surfaces Be sure large items do not block the detergent dispenser preventing it from opening during the wash cycle To be sure an item is dishwasher safe read the manufa...

Page 8: ... items at the sides and not across the front so they do not block the detergent dispenser preventing it from opening Loading the Top Rack Glasses and cups Place glasses and cups against outside pins at an angle Cups with a concave bottom will collect water Small plates and saucers Place dishes between middle two rows of pins Plasticware Load plasticware in the top rack to avoid melting Bowls Place...

Page 9: ...er located next to the detergent cup automatically releases a measured amount of rinse aid during the last rinse If spotting and poor drying are problems increase the amount of rinse aid dispensed by removing the dispenser lid and rotating the dial to a higher number The dial is located under the dispenser cap The indicator will be completely dark when full and the size of the dot on the indicator...

Page 10: ... use of concentrated detergent with a normal wash program reduces energy usage as this wash cycle is matched to the dirt dissolving properties of the enzymes of the concentrated detergent Using other types of non concentrated detergents would require using an intensive wash program to achieve the same wash result Detergent Tablets Different brands of detergent tablets dissolve at different speeds ...

Page 11: ...e removed from the dishwasher as water passes through the filter assembly Each part of the assembly should be cleaned often to ensure that all food fragments are removed from the dishes To remove food fragments from the filter assembly the filters must be removed from the dishwasher To remove the filters pull up on the edge of the main filter Next rinse the main filter and fine filter under runnin...

Page 12: ...Water Line Connection Connect the cold water supply hose to a threaded 3 4 inch connector and ensure that it is fastened tightly in place Flush water line before connecting it to the water inlet valve to prevent early clogging of filter screen Drain Hose Connection Insert the drain hose into a drain pipe with a mininum diameter of 40mm or let it run into the sink ensuring it is not bent or crimped...

Page 13: ...rust proof Solution Do not place articles that are not rust proof in the dishwasher 2 A wash cycle program was not run after the salt water softener was added or traces of salt may have been released into the wash cycle Solution When adding salt water softener to the dishwasher run a quick wash cycle program while the dishwasher is empty without any dishes cutlery pots pans or glasses 3 The lid on...

Page 14: ... is knocking against an item in the dishwasher Solution Pause the program and rearrange the items that are obstructing the spray arm Rattling Noise in the Wash Cabinet 1 There are loose dishes which have been incorrectly placed Solution Interrumpt the program and rearrange the dishes correctly Knocking Noise in the Water Pipes 1 This many be caused by improper dishwasher installation or the cross ...

Page 15: ...edium serving bowl 3 Glasses Saucers 2 1 Cups Oval platt er Dinner plates Soup plates Dessert dishes Te aspoons 4 Soup spoons 2 Forks 1 Serving forks 8 Serving spoons 6 Knives 5 3 Dessert spoons 7 Gravy ladles 1 3 5 1 3 1 4 Cutlery Basket 14 ...

Page 16: ...15 NOTES ...
Reviews: