background image

10. DAILY USE

10.1 Start a programme without

delay start

1. Prepare the laundry and load the

appliance. 

CAUTION!

Make sure that when

you close the door, the

laundry does not catch

between the appliance

door and the rubber

seal.

2. Press the on/off button to activate the

appliance.

3. Set the correct programme and

options for the type of load.

The display shows the programme

duration.

The drying time you see is

related to the load of 5 kg for

cotton and jeans

programmes. For the other

programmes the drying time

is related to the

recommended loads. The

drying time of the cotton and

jeans programmes with the

load more than 5 kg is

longer.

4. Press the Start/Pause touchpad.

The programme starts.

10.2 Starting the programme

with delay start

1. Set the correct programme and

options for the type of load.

2. Press the delay start button again

and again until the display shows the

delay time you want to set. 

You can delay the start

of a programme from a

minimum of 30 minutes

to a maximum of 20

hours.

3. Press the Start/Pause touchpad.

The display shows the countdown of the

delay start.

When the countdown is completed, the

programme starts.

10.3 Change a programme

1. Press the on/off button to deactivate

appliance

2. Press the on/off button to activate the

appliance.

3. Set the programme.

10.4 At the end of the

programme

When the programme is completed:
• An intermittent acoustic signal

operates.

• The indicator   flashes.

• The Start/Pause indicator is on.

The appliance continues to operate with

the crease guard phase for

approximately other 30 minutes.
The crease guard phase prevents

creases from your laundry.
You can remove the laundry before the

crease guard phase is completed. We

recommend, for better results, that you

remove the laundry when the phase is

almost completed.
When the crease guard phase is

completed:

• The indicator   is on but does not

flash.

• The indicator   is on but does not

flash.

• Start/Pause indicator goes off.
1. Press the on/off button to deactivate

the appliance.

2. Open the appliance door.

3. Remove the laundry.

4. Close the appliance door.

Always clean the filter and

empty the water container

when a programme is

completed.

10.5 Stand-by function

To decrease the energy consumption,

this function automatically deactivates

the appliance:

www.electrolux.com

12

Summary of Contents for EDH3586GDW

Page 1: ...EDH3586GDW EN Tumble Dryer User Manual ...

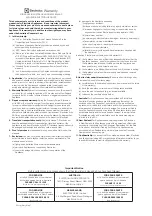
Page 2: ... in the knowledge that you ll get great results every time Welcome to Electrolux Visit our website for Get usage advice brochures trouble shooter service information www electrolux com webselfservice Register your product for better service www registerelectrolux com CUSTOMER CARE AND SERVICE Always use original spare parts When contacting our Authorised Service Centre ensure that you have the fol...

Page 3: ...nd the hazards involved Do not let children play with the appliance Children aged 3 years and under must be kept away from this appliance when it is in operation at all times Keep all packaging away from children and dispose of it appropriately Keep detergents away from children Keep children and pets away from the appliance door when it is open If the appliance has a child safety device this shou...

Page 4: ...ly at the end of the installation process Make sure that the mains plug is accessible after installation Ensure good air ventilation in the located room to avoid the backflow of unwanted gases into the room from appliances burning gas or other fuels including open fires Exhaust air must not be discharged into a flue which is used for exhausting fumes from any appliances burning gas or other fuels ...

Page 5: ...pliance and disconnect the mains plug from the socket 2 CONDITIONS OF USE This appliance is intended to be used in household and similar applications such as Farm houses By clients in serviced apartments holiday apartments and other residential type environments 3 SAFETY INSTRUCTIONS 3 1 Installation Remove all the packaging Do not install or use a damaged appliance Follow the installation instruc...

Page 6: ...especially when exposed to heat sources such as in a tumble dryer The items become warm causing an oxidation reaction in the oil Oxidation creates heat If the heat cannot escape the items can become hot enough to catch fire Piling stacking or storing oil affected items can prevent heat from escaping and create a fire hazard If it is unavoidable that fabrics that contain vegetable or cooking oil or...

Page 7: ...ce with local requirements for the disposal of Waste Electrical and Electronic Equipment WEEE 4 PRODUCT DESCRIPTION 1 2 7 4 3 5 6 9 10 11 12 8 1 Water container 2 Control panel 3 Internal light 4 Appliance door 5 Primary Filter 6 The button to open the heat exchanger door 7 Airflow slots 8 Adjustable feet 9 Heat exchanger door 10 Heat exchanger cover 11 The knob to lock the heat exchanger cover 12...

Page 8: ...h the touchpads with your finger in the area with the symbol or name of the option Do not wear gloves when you operate with the control panel Make sure that the control panel is always clean and dry 5 1 Indicators Indicators Description Drying phase Cooling phase Crease guard phase Condenser Water container Filter Delay start Child lock Acoustic signals www electrolux com 8 ...

Page 9: ...a dry 3 5kg Cupboard Dry Drying level cupboard dry 3 5kg Iron Dry Drying level suitable for ironing 3 5kg Rapid To dry cotton and synthetic fabrics 2kg Time Drying With this programme you can use the Time option and set the programme duration 5kg Refresh Refreshing a textiles that were in storage 1kg Wool Wool fabrics Gentle drying for hand washable woollens Remove immedi ately the items when the ...

Page 10: ...s The setting of the duration is related to the quantity of laundry in the appliance We recommend that you set a short duration for small quantities of laundry or for only one item 7 2 Wool Load This option is applicable only to the Wool programme To get laundry more dried press the Wool Load touchpad again and again to increase the programme duration estimated drying time will appear on the displ...

Page 11: ...laundry moisture degree To change the default degree of the remaining moisture of the laundry 1 Press the on off button to activate the appliance 2 Wait approximately 8 seconds 3 Press and hold buttons A and B at the same time One of the these indicators comes on the maximum dry laundry the more dry laundry the standard dry laundry 4 Press the button E again and again until the indicator of the co...

Page 12: ...ows the countdown of the delay start When the countdown is completed the programme starts 10 3 Change a programme 1 Press the on off button to deactivate appliance 2 Press the on off button to activate the appliance 3 Set the programme 10 4 At the end of the programme When the programme is completed An intermittent acoustic signal operates The indicator flashes The indicator flashes The Start Paus...

Page 13: ...ppliance Do not put dark colours together with light colours Use a suitable programme for cotton jersey and knitwear to prevent shrinkage Make sure that the load do not exceeds the maximum load stated in programs chapter or shown on the display Only dry laundry that is suitable for tumble drying Refer to the fabric label on the items Do not dry large and small items together Small items can be tra...

Page 14: ...r using a brush and or a vacuum cleaner 12 2 Emptying the water container 1 2 3 4 You can use the water from the water container as an alternative to distilled water e g for steam ironing Before you use the water remove dirt residues with a filter www electrolux com 14 ...

Page 15: ...ect the appliance before you clean it Use a standard neutral soap detergent to clean the inner surface of the drum and drum lifters Dry the cleaned surfaces with a soft cloth CAUTION Do not use abrasive materials or steel wool to clean the drum 12 5 Cleaning the control panel and housing Use a standard neutral soap detergent to clean the control panel and housing Use a moist cloth to clean Dry the...

Page 16: ...he appliance door and the rubber seal The appliance stops during operation Make sure that the water container is empty Press Start Pause to start the pro gramme again Load is too small increase the load or use the Time Drying program The cycle time is too long or unsatisfacto ry drying result 1 Make sure that the weight of the laundry is applicable to the duration of the pro gramme Make sure that ...

Page 17: ...flow slots are clogged Room temperature is too low or too high optimal room temperature 19 C to 24 C 14 TECHNICAL DATA Height x Width x Depth 850 x 600 x 600 mm maximal 640 mm Max depth with the appliance door open 1090 mm Max width with the appliance door open 950 mm Adjustable height 850 mm 15 mm feet regulation Drum volume 118 l Maximum load volume 8 kg Voltage 230 240 V Frequency 50 Hz Total p...

Page 18: ...s the Appliance is warranted against manufacturing defects in Australia for 24 months and in New Zealand for 24 months following the date of original purchase of the Appliance h you means the purchaser of the Appliance not having purchased the Appliance for re sale and your has a corresponding meaning 2 This warranty only applies to Appliances purchased and used in Australia or New Zealand and use...

Page 19: ...ludes all warranties and liabilities other than as contained in this document including liability for any loss or damage whether direct or indirect arising from your purchase use or non use of the Appliance 10 For Appliances and services provided by Electrolux in Australia the Appliances come with a guarantee by Electrolux that cannot be excluded under the ACL You are entitled to a replacement or ...

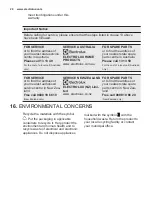
Page 20: ...ERVICE or to find the address of your nearest authorised service centre in New Zea land Free call 0800 10 66 10 New Zealand only SERVICE NEW ZEALAND ELECTROLUX NZ Limi ted www electrolux co nz FOR SPARE PARTS or to find the address of your nearest state spare parts centre in New Zea land Free call 0800 10 66 20 New Zealand only 16 ENVIRONMENTAL CONCERNS Recycle the materials with the symbol Put th...

Page 21: ...r service iii improper negligent or faulty servicing or repair works done by anyone other than an Electrolux authorised repairer or ASC iv normal wear and tear v power surges electrical storm damage or incorrect power supply vi incomplete or improper installation vii incorrect improper or inappropriate operation viii insect or vermin infestation ix failure to comply with any additional instruction...

Page 22: ...www electrolux com shop 136947181 A 412016 ...

Reviews: