39
Installation
Standard accessories included:
• Screws for mounting
• Drilling scheme
• No return valve (mounted on air outlet)
Mounting of hood
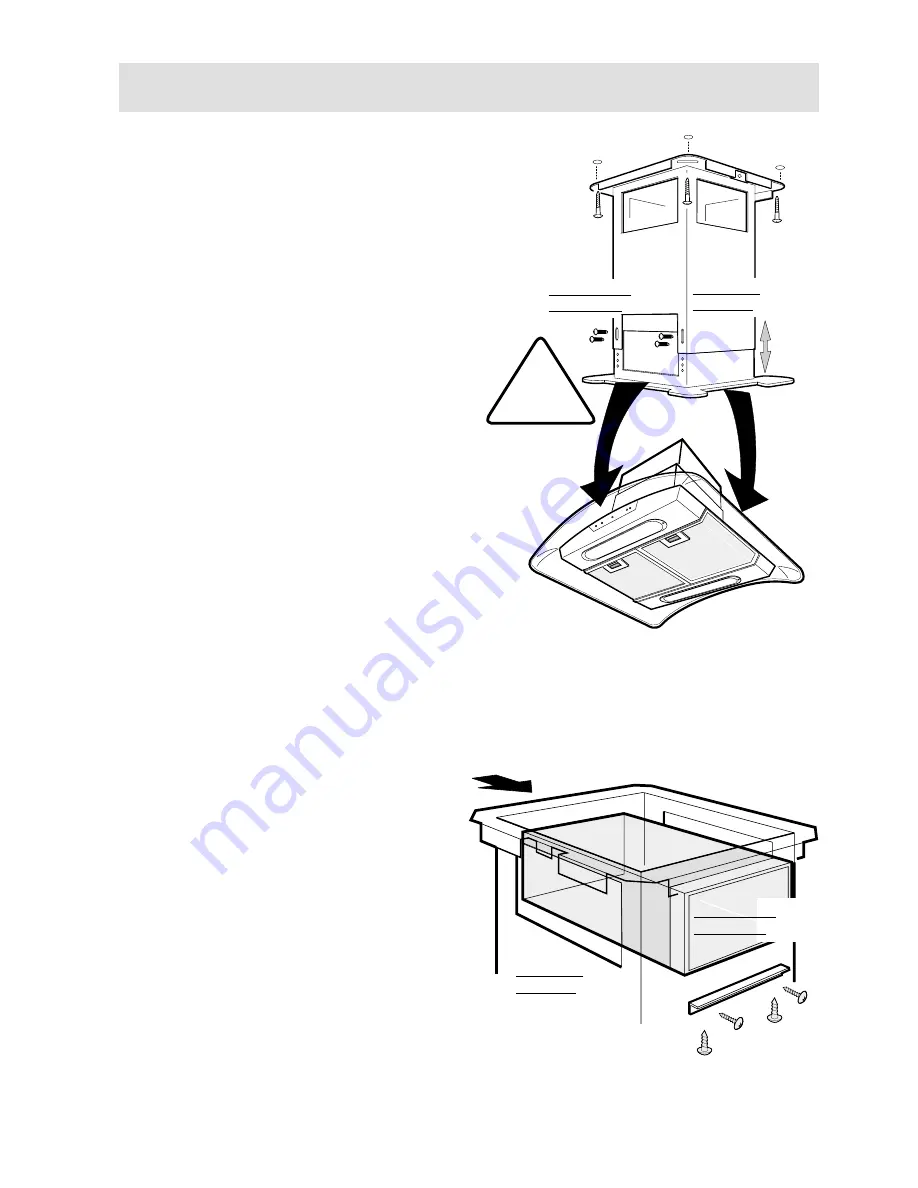
First set the telescopic support structure on the
right direction and drill as indicated on the
drilling scheme supplied with the hood.
• The two sections of the structure are fixed
one each other with 8 screws (fig. 5- "a").
Remove all screws, regulate the lenght of the
structure according the exigencies, fit again
the 8 screws.
In order to install the cooker hood at the right
height consider also that the height of the
body of the hood is 290 and that a minimum
distance from hobs must be in any case
respected (see paragraph "Placement").
Choose how to use the hood:
Extractor version
• Fit a Ø 150 mm exhausting pipe or flex tube
on the ceiling sufficiently long to reach the
connection ring above the hood, once the
hood will be fit on place.
Recirculating version
• Fit the deflector from one side of the slots of
the upper section of the telescopic supporting
structure (Fig. 9).
• Fix the deflector with bracket supplied and 4
screws 2,9x6,5 (Fig. 9).
Fix the deflector also on the other side of the
structure with two other screws same shape.
RIGHT SIDE
LEFT SIDE
FRONT SIDE
REAR SIDE
!
c
b
b
b
a
a
RIGHT SIDE
LEFT SIDE
FRONT SIDE
REAR SIDE
Fig. 8
Fig. 9
Summary of Contents for EFC 009.1X
Page 1: ...Gebrauchsanweisung Manuel d utilisation EFC 009 1X F I D Istruzioni per l uso User manual UK ...
Page 12: ......
Page 13: ......


