background image

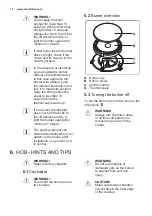
8.7 Turning off the grill burner

To put out the flame, turn the knob to the
off position  .

9. OVEN - CLOCK FUNCTIONS
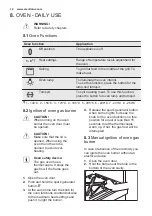
9.1 Minute Minder

Use it to set a countdown time.

This function has no effect

on the operation of the

appliance.

Turn the knob for the timer as far as it

goes, then turn it to necessary time

period.

After the time period is completed, an

acoustic signal sounds.

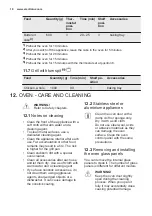
10. USING THE ACCESSORIES

WARNING!

Refer to Safety chapters.

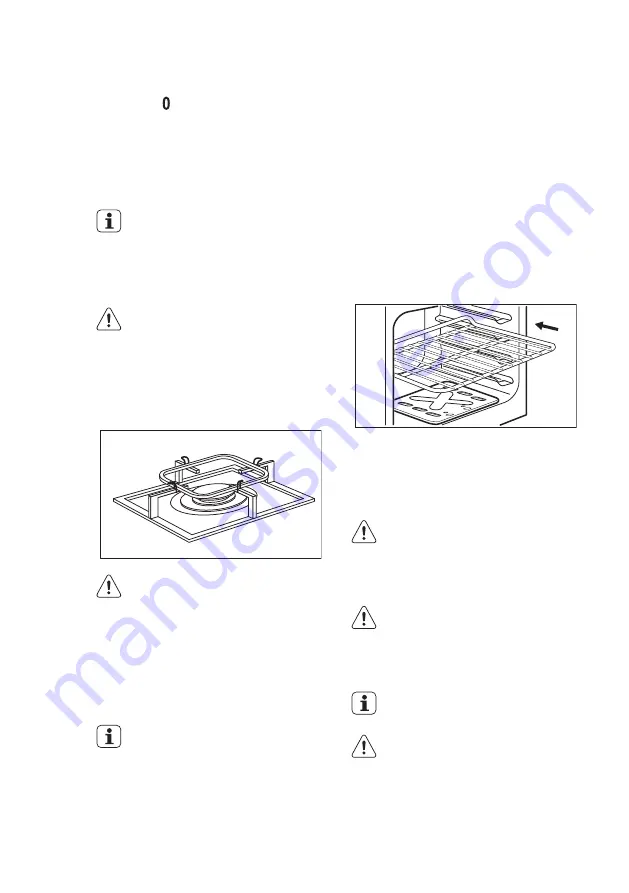
10.1 Using the wok support

The wok support lets you use a round

bottomed wok on the hob. Use the wok

support on the rapid burner only.

WARNING!

Make sure the wok support

is assembled correctly and

fits securely with the pan

supports to prevent the

pan/pot overturning.

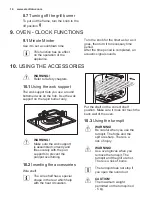
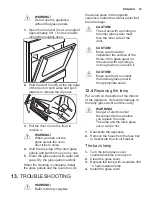
10.2 Inserting the accessories

Wire shelf:

The wire shelf has a special

shape in the rear which help

with the heat circulation.

Put the shelf on the correct shelf

position. Make sure it does not touch the

back wall of the oven.

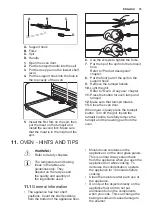
10.3 Using the turnspit

WARNING!

Be careful when you use the

turnspit. The forks and the

spit are sharp. There is a

risk of injury.

WARNING!

Use oven gloves when you

remove the turnspit. The

turnspit and the grill are hot.

There is a risk of burns.

The turnspit does not stop if

you open the oven door.

CAUTION!

The maximum weight

permitted on the turnspit is 4

- 5 kg.

www.electrolux.com

14

Summary of Contents for EKG51105OX

Page 1: ...EKG51105OX EN Cooker User Manual ...

Page 2: ... in mind So whenever you use it you can be safe in the knowledge that you ll get great results every time Welcome to Electrolux Visit our website for Get usage advice brochures trouble shooter service information www electrolux com webselfservice Register your product for better service www registerelectrolux com Buy Accessories Consumables and Original spare parts for your appliance www electrolu...

Page 3: ...e use of the appliance and understand the potential hazards involved Do not let children play with the appliance Keep all packaging away from children and dispose of it appropriately Keep children and pets away from the appliance when it operates or when it cools down Accessible parts are hot Children shall not carry out cleaning and user maintenance of the appliance without supervision 1 2 Genera...

Page 4: ...e and its accessible parts become hot during use Care should be taken to avoid touching heating elements Children less than 8 years of age shall be kept away unless continuously supervised Always use oven gloves to remove or put in accessories or ovenware Before maintenance cut the power supply Ensure that the appliance is switched off before replacing the lamp to avoid the possibility of electric...

Page 5: ...thed Make sure that the electrical information on the rating plate agrees with the power supply If not contact an electrician Always use a correctly installed shockproof socket Do not use multi plug adapters and extension cables Do not let mains cables touch or come near the appliance door especially when the door is hot The shock protection of live and insulated parts must be fastened in such a w...

Page 6: ...e door carefully The use of ingredients with alcohol can cause a mixture of alcohol and air WARNING Risk of damage to the appliance To prevent damage or discoloration to the enamel do not put ovenware or other objects in the appliance directly on the bottom do not put water directly into the hot appliance do not keep moist dishes and food in the appliance after you finish the cooking be careful wh...

Page 7: ...when there are spills on the surface Before you close the lid turn all burners off Do not close the lid until the hob and oven are completely cold Glass lid can shatter when heated if applicable 2 7 Internal light The type of light bulb or halogen lamp used for this appliance is only for household appliances Do not use it for house lighting WARNING Risk of electrical shock Before replacing the lam...

Page 8: ...ator 3 Button for the lamp and turnspit 4 Knob for the Minute Minder 5 Knob for the oven functions 6 Grill 7 Lamp 8 Turnspit hole 9 Shelf positions 3 2 Cooking surface layout 1 2 4 3 1 Auxiliary burner 2 Semi rapid burner 3 Semi rapid burner 4 Rapid burner 3 3 Accessories Wire shelf For cookware cake tins roasts Grill Roasting pan To bake and roast or as pan to collect fat Turnspit For roasting la...

Page 9: ...otter than usual The appliance can emit an odour and smoke This is normal Make sure that the airflow is sufficient Let the oven cool down Dampen a soft cloth with warm water and a little mild washing up liquid and use this to clean the oven cavity 5 HOB DAILY USE WARNING Refer to Safety chapters 5 1 Ignition of the hob burner Always light the burner before you put on the cookware WARNING Be very c...

Page 10: ...er accidentally goes out turn the knob to the off position and try to light the burner again after minimum 1 minute The spark generator can start automatically when you switch on the mains after installation or a power cut It is normal 5 2 Burner overview A B D C A Burner cap B Burner crown C Ignition candle D Thermocouple 5 3 Turning the burner off To put the flame out turn the knob to the off po...

Page 11: ...discoloration Clean the hob with a moist cloth and non abrasive detergent After cleaning wipe the hob dry with a soft cloth To clean the enamelled parts cap and crown wash them with warm soapy water and dry them carefully before you put them back on 7 3 Cleaning the spark plug This feature is obtained through a ceramic ignition candle with a metal electrode Keep these components well clean to prev...

Page 12: ... sure that the lid is opened When using the oven the lid has to be opened to avoid over heating Oven safety device The gas oven has a thermocouple It stops the gas flow if the flame goes out 1 Open the oven door 2 Push and hold the spark generator button 3 At the same time turn the knob for the oven functions counterclockwise to the maximum heat settings and push it to light the burner 4 Release t...

Page 13: ...e grill put the grill deflector A into the place above the door Make sure that the two catches fit correctly in the holes in the top part of the front frame of the oven cavity underneath the control panel A Do not put the meat directly on the tray or pan CAUTION Do not put the meat on the highest shelf level There is a risk of fire 1 Open the oven door 2 Push and hold the spark generator button 3 ...

Page 14: ... burner only WARNING Make sure the wok support is assembled correctly and fits securely with the pan supports to prevent the pan pot overturning 10 2 Inserting the accessories Wire shelf The wire shelf has a special shape in the rear which help with the heat circulation Put the shelf on the correct shelf position Make sure it does not touch the back wall of the oven 10 3 Using the turnspit WARNING...

Page 15: ...ss the turnspit button Turn off the grill Install the turnspit handle Carefully remove the turnspit and the roasting pan from the oven 11 OVEN HINTS AND TIPS WARNING Refer to Safety chapters The temperature and baking times in the tables are guidelines only They depend on the recipes and the quality and quantity of the ingredients used 11 1 General information The appliance has four shelf position...

Page 16: ...e 3 4 of the set cooking time is up If you use two baking trays at the same time keep one empty level between them 11 4 Cooking meat and fish Use a deep pan for very fatty food to prevent the oven from stains that can be permanent Leave the meat for approximately 15 minutes before carving so that the juice does not seep out To prevent too much smoke in the oven during roasting add some water into ...

Page 17: ...e 5 2400 3 4 60 2 3 baking tray Quiche Lor raine4 1000 5 6 50 60 3 1 round tray diame ter 26 cm Peasant bread 5 750 750 4 5 50 60 3 2 round aluminized tray diameter 20 cm Romanian sponge cake 1 600 600 2 3 50 60 3 2 round aluminized trays diameter 25 cm Romanian sponge cake traditional1 600 600 2 3 40 50 3 2 round aluminized trays diameter 25 cm Swiss roll1 500 2 3 20 25 3 baking tray Meringue 400...

Page 18: ...r food remains may result in a fire The risk is higher for the grill pan Clean stubborn dirt with a special oven cleaner Clean all accessories after each use and let them dry Use a soft cloth with warm water and a cleaning agent If you have nonstick accessories do not clean them using aggressive agents sharp edged objects or a dishwasher It can cause damage to the nonstick coating 12 2 Stainless s...

Page 19: ...een with a printing on the inner glass panel must face the inner side of the door CAUTION Make sure that after installation the surface of the frame of the glass panel on the screen with a printing is not rough when you touch it CAUTION Make sure that you install the internal glass panel in the appropriate seats 12 4 Replacing the lamp Put a cloth on the bottom of the interior of the appliance It ...

Page 20: ...idues Make sure that the injector is not blocked and the burner crown is clean The burners do not work There is no gas supply Check the gas connection The appliance makes noises Some metal parts of the appliance expand and con tract when they heat up or cool down The noises are normal The flame colour is orange or yellow The flame can look orange or yellow in some areas of the burner This is norma...

Page 21: ... 14 INSTALLATION WARNING Refer to Safety chapters 14 1 Location of the appliance You can install your freestanding appliance with cabinets on one or two sides and in the corner Keep a distance of about 1 cm between the appliance and the back wall to make sure that the lid opens For minimal distances for fitting check the table A C D D B Minimum distances Dimension mm A 400 B 650 C 150 D 20 14 2 Te...

Page 22: ...NING The gas connection pipe must not touch the part of the appliance shown in the illustration 14 7 Flexible nonmetal pipes connection If you have an easy access to the connection you can use a flexible pipe The flexible pipe must be tightly attached by clamps In installation always use the pipe holder and the gasket The flexible pipe can be applied when it can not get hotter than room temperatur...

Page 23: ...justable connection D LPG pipe holder 14 9 Levelling of the appliance Use small feet on the bottom of appliance to set the appliance top surface level with other surfaces 14 10 Anti tilt protection Set the correct height and area for the appliance before you attach the anti tilt protection CAUTION Make sure you install the anti tilt protection at the correct height Make sure that the surface behin...

Page 24: ...you must adjust the side measurement to the centre of the appliance 14 11 Electrical installation WARNING The manufacturer is not responsible if you do not follow the safety precautions from Safety chapters This appliance is supplied with a main plug and a main cable WARNING The power cable must not touch the part of the appliance shown in the illustration 15 ENERGY EFFICIENCY 15 1 Product informa...

Page 25: ...losed properly when the appliance operates and keep it closed as much as possible during the cooking Use metal dishes to improve the energy saving When possible put the food inside the oven without heating it up When the cooking duration is longer than 30 minutes reduce the oven temperature to minimum 3 10 minutes before the end of the cooking time depending on the duration of the cooking The resi...

Page 26: ...www electrolux com 26 ...

Page 27: ...ENGLISH 27 ...

Page 28: ...www electrolux com shop 867313847 A 062016 ...

Reviews: