important
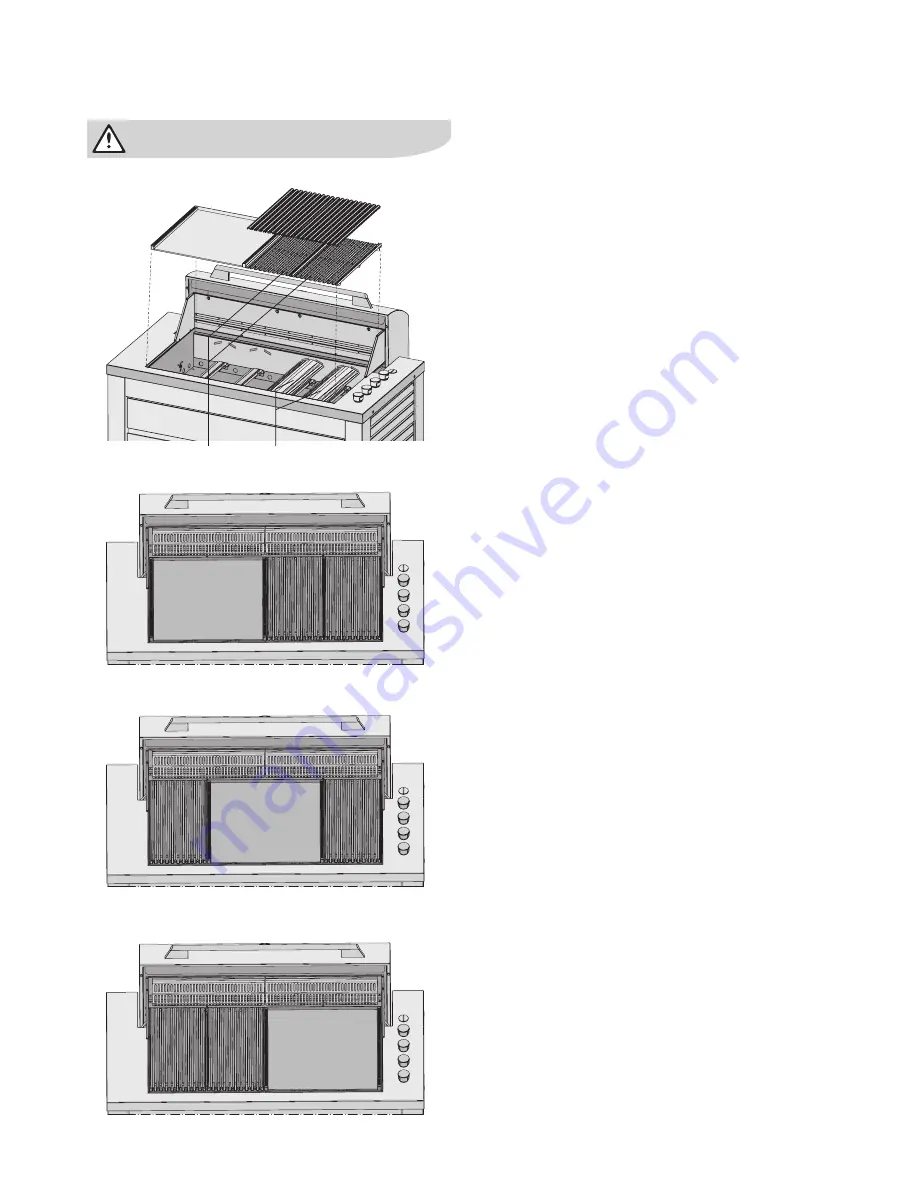
Ensure flame tamers are positioned under the grill
panels
Left hand hotplate, right hand grill
Left hand half grill, central hotplate, right hand half grill
Left hand grill, right hand hotplate
electrolux en:v barbecue
hotplate and grill configuration/operating instructions 11
Options for configuration of hotplates
and grills
Operating instructions
Control functions
Before lighting the barbecue:
• Check that all hoses and gas fittings are tight.
• Open the roasting hood.
• Check all control knobs are in the ‘OFF’ position.
• Ensure that the cooking surfaces are clean.
• Turn the gas isolation valve ‘ON’.
Lighting instructions
• Do not attempt to light burners with the cooking
surfaces covered.
• Read instructions before lighting.
• To light a burner, depress the knob and rotate to ‘RAPID
PREHEAT’.
• Hold for 3 seconds, release and check the flame.
• If burner did not light, turn knob to the ‘OFF’ position
Allow gas to disperse, then repeat lighting procedure.
Manual lighting
• If, in the event of the automatic ignition system not
working, the barbecue can be lit manually.
• Lift the front edge of the hotplate and grills, rotate the
knob to the ‘RAPID PREHEAT’ and place a lighted
match near to the burner intended to be lit.
• Once alight, repeat for other burners. Lower the grills
and hotplate, taking extreme care with hot surfaces and
flames.
Preheating
• This barbecue is fitted with high power burners. In
most conditions it will only be necessary to preheat the
barbecue for 5 minutes before cooking can commence.
• As with most things, experience will familiarise you with
the effectiveness of and the time required to achieve the
desired preheating time to obtain the desired cooking
temperature.
• Testing has shown that the burners can be turned to
the low position for satisfactory cooking.
• If the unit does not operate correctly refer to the
troubleshooting section on page 15.
• If the burners are left to run too hot there will be
excessive smoking during the cooking process and
subsequent burning of the food being prepared. This
may also result in excessive flaring of the fat being
emitted from the food.
• Roasting with the hood closed only requires the 2
outermost burners to be on low setting for satisfactory
cooking. Refer to page 13 for further information on
roasting.
To turn the burner off
• When cooking is complete, rotate the knob fully
clockwise so the pointer on the knob is positioned at
the off position.
• Turn gas bottle isolation valve off after turning all knobs
to off position when appliance not in use.
grill panels
flame tamers


