


6 using the rangehood
electrolux canopy rangehood
Using the rangehood
Touch control operation
Lock
Depress and hold ‘lock’ button for 3
seconds to lock control panel when
cleaning, touch and hold for 3 seconds
to unlock control panel.
Fan – select speed to suit cooking
conditions.
low
– light frying/boiling
medium – frying/heavy boiling
high
– grilling, intensive frying and
wok cooking
Boost
– increases air extraction when
intense cooking and frying
is taking place, which is
generally over a short time
frame when searing food.
On selecting the boost
function the fan intensity will
increase for 1 minute, then
revert back to the previous
selected speed.
To switch Lights ON and OFF
Touch the ‘light’ symbol to turn the lights ON.
Touch ‘light’ symbol again to turn the lights OFF.
Using the Timer
At the end of cooking, if the timer is switched on, the
rangehood will continue to run for an additional 5 minutes.
This should ensure the removal of any odours that remain
after cooking.
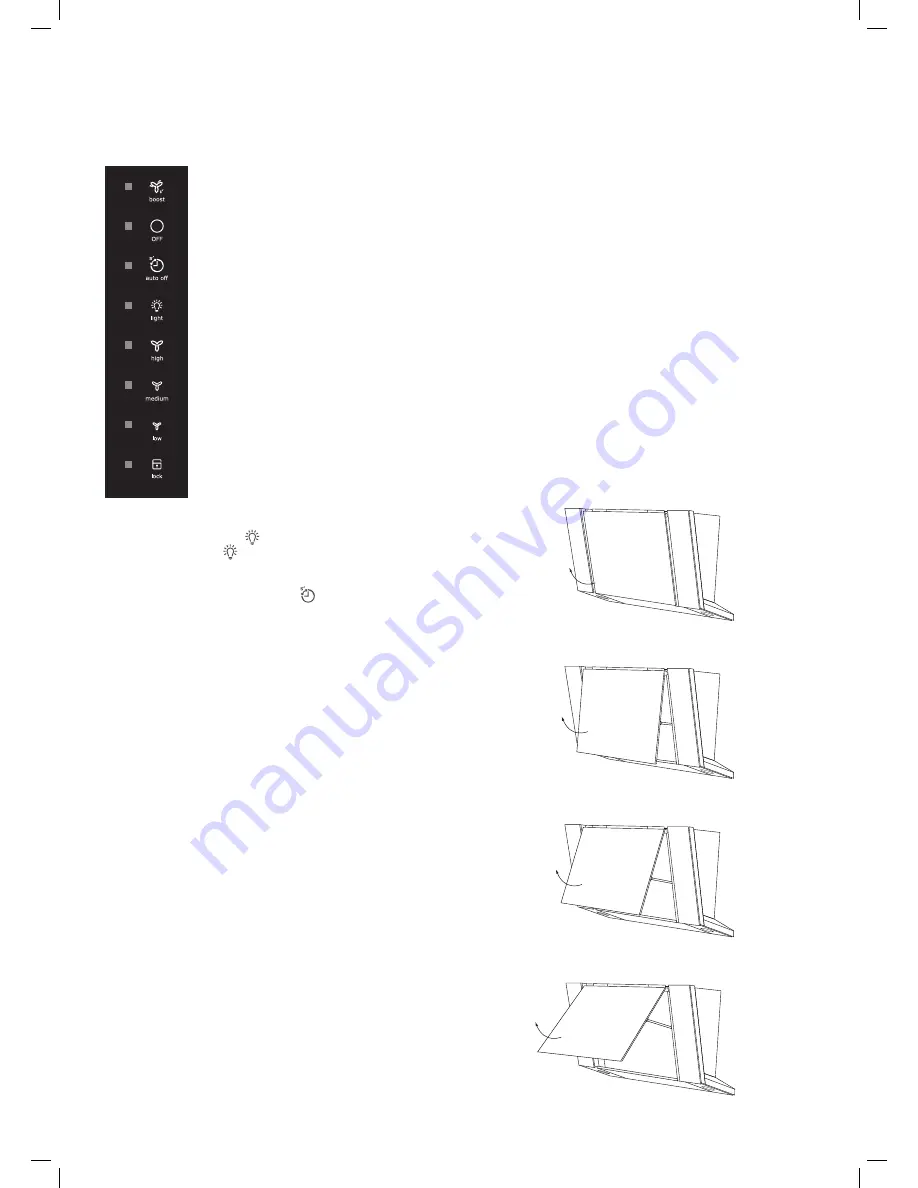
Door operation
The door panel can be located in several positions
depending on cooking intensity. You will hear a “click” as
the door reaches each set position.
Door Position 1, Closed
This door position can be used during light frying/boiling
(Image A)
Door Position 2
This door position can be used during frying/light wok
cooking/heavy boiling (Image B)
Door Position 3
Grilling, intensive frying and wok cooking (Image C)
Service / filter cleaning position
When the door is opened to it’s final position there will
be enough space to remove the outer filter for cleaning.
(Image D)
(see “Cleaning” section for detail on how to remove and
replace the outer filter)
(Image D)
(Image C)
(Image B)
(Image A)


