www.electrolux.com
6
EN
FR
RU
TR
Getting started / Première utilisation
Подготовка к работе / Başlarken
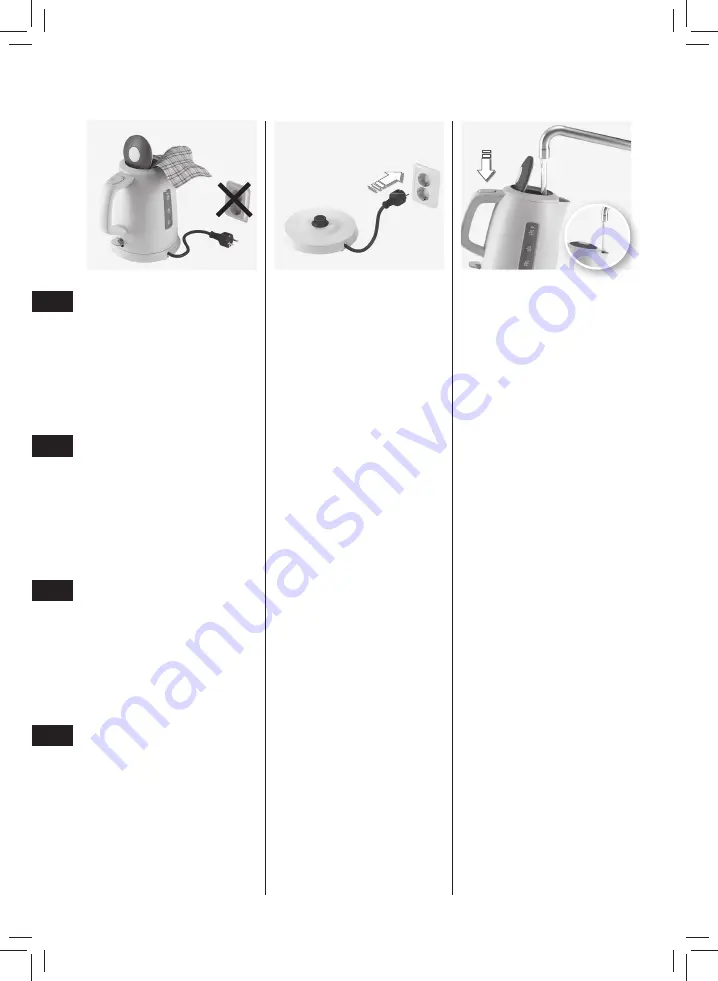
2. Place the base unit
on a fi rm and fl at
surface. Plug the mains plug into a
wall socket. Excess cord can be wound
into the bottom of base unit.
1. Before fi rst use
, rinse the inside and
wipe the outside of the kettle with a
damp cloth.
3. Press the button to open the lid
,
pour water into the kettle. It is also
possible to fi ll the kettle through the
spout, without opening the lid. Make
sure water level is visible in the water
level indicator, but not exceeding the
Max. mark.
2. Placez le socle
sur une surface plane
solide. Branchez l'appareil à une prise
secteur murale. L’excédent de cordon
d’alimentation peut être rangé sous
la base d’alimentation de la bouilloire
grâce à l’enrouleur de cordon.
1. Avant la première utilisation
,
rincez l’intérieur de la bouilloire et
essuyez l’extérieur à l’aide d’un chiff on
humide.
3. Pour ouvrir le couvercle, appuyez sur
le bouton
, puis versez de l'eau dans
la bouilloire. Vous pouvez également
remplir la bouilloire directement par
son large bec verseur. Assurez-vous que
l'indicateur de niveau d'eau soit visible,
afi n de ne pas dépasser le repère Max.
2. Altlığı
düz ve sağlam bir zemin
üzerine yerleştirin. Güç kablosu fişini
prize takın. Kablonun fazla kısmı,
tabanın altında bulunan bölüme
sarılabilir.
1. İlk kez kulanmadan önce
su ısıtıcının
iç yüzeyini yıkayın ve dış yüzeylerini
nemli bir bezle silin.
3. Düğmeye basarak kapağı açın
,
tanka su doldurun. Su ısıtıcıyı
kapağını açmadan, ağız kısmından
da doldurmak mümkündür. Su
seviyesinin, Max. işaretini geçmeyecek
şekilde su seviye göstergesinde
görülebildiğinden emin olun.
2. Поместите
подставку
на твердую
ровную поверхность. Вставьте
вилку в розетку. Избыток шнура
можно смотать на дне подставки.
1. Перед первым использованием
ополосните чайник изнутри и
протрите его внешнюю поверхность
влажной тряпкой.
3. Нажмите кнопку открывания
крышки
и налейте в чайник воду.
Также можно наливать в чайник воду
через носик, не открывая крышку.
Убедитесь, что уровень воды
виден на индикаторе уровня и не
превышает максимальной отметки.
ELU IFU EEWA51xx_52xx.indd 6
ELU IFU EEWA51xx_52xx.indd 6
20.05.14 11:33
20.05.14 11:33


