
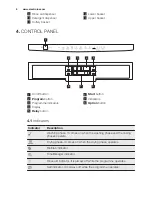


8.
BEFORE FIRST USE
1. Make sure that the current level of
the water softener agrees with the
hardness of the water supply. If
not, adjust the level of the water
softener.
2.
Fill the salt container.
3.
Fill the rinse aid dispenser.
4.
Open the water tap.
5.
Start a programme to remove any
processing residuals that can still be
inside the appliance. Do not use
detergent and do not load the
baskets.
When you start a programme, the
appliance can take up to 5 minutes to
recharge the resin in the water softener. It
seems that the appliance is not working.
The washing phase starts only after this
procedure is completed. The procedure
will be repeated periodically.
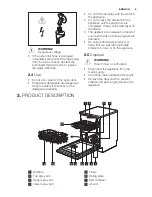
8.1
The salt container
CAUTION!
Only use salt specifically
designed for dishwashers.
The salt is used to recharge the resin in
the water softener and to assure good
washing results in the daily use.
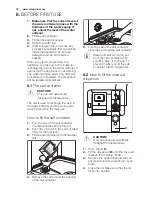
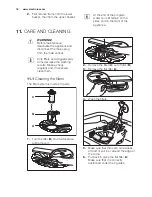
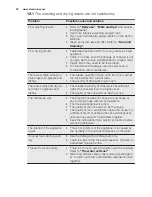
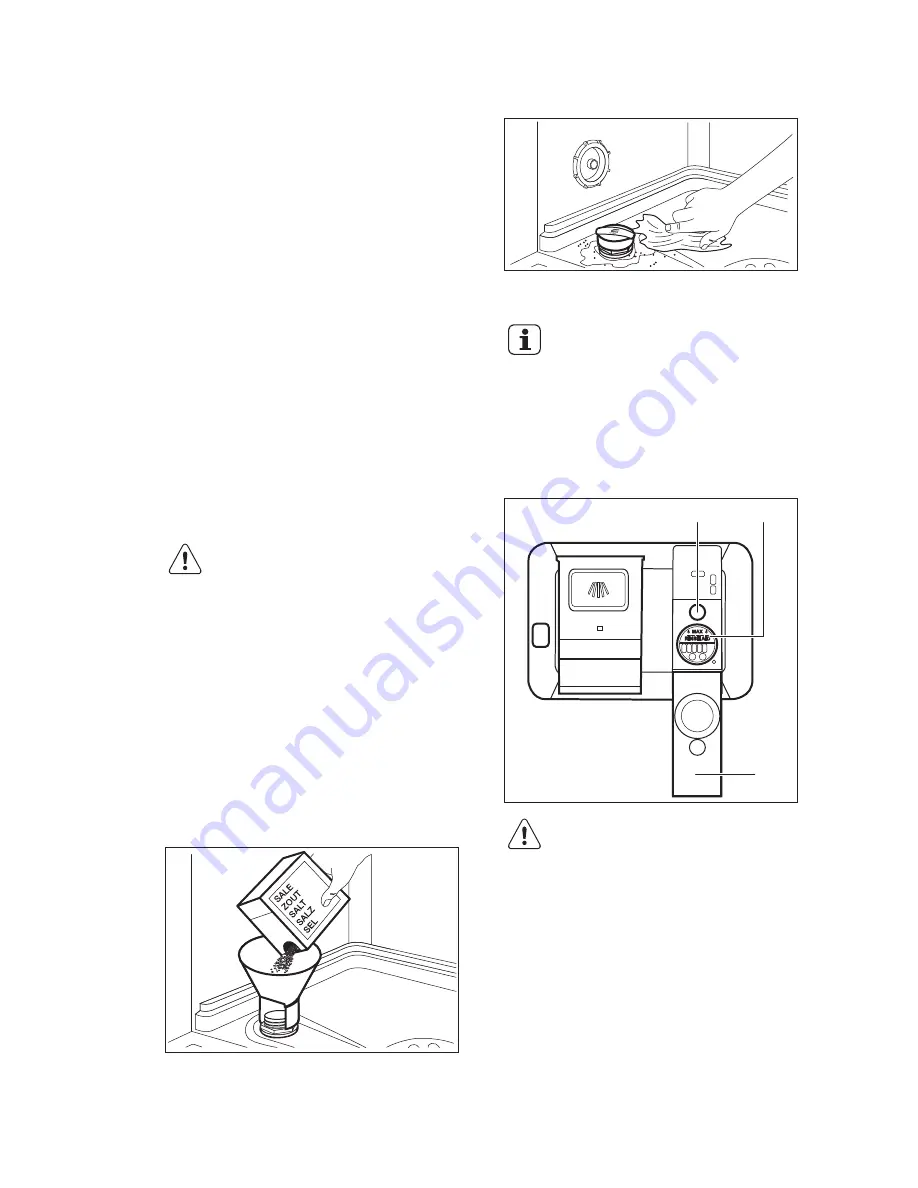
How to fill the salt container
1.
Turn the cap of the salt container
counterclockwise and remove it.
2.
Put 1 litre of water in the salt container
(Only for the first time).
3.
Fill the salt container with dishwasher
salt.
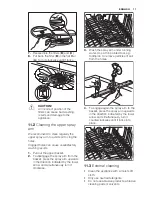
4.
Remove the salt around the opening
of the salt container.
5.
Turn the cap of the salt container
clockwise to close the salt container.
Water and salt can come out
from the salt container when
you fill it. Risk of corrosion. To
prevent it, after you fill the salt
container, start a programme.
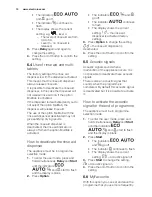
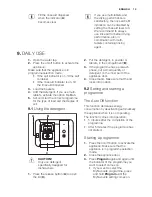
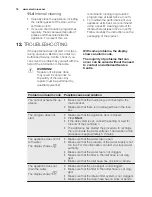
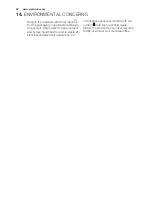
8.2
How to fill the rinse aid
dispenser
A
B
C
CAUTION!
Only use rinse aid specifically
designed for dishwashers.
1.
Open the lid (
C
).
2.
Fill the dispenser (
B
) until the rinse aid
reaches the marking ''MAX''.
3.
Remove the spilled rinse aid with an
absorbent cloth to prevent too much
foam.
4.
Close the lid. Make sure that the lid
locks into position.
www.electrolux.com
12


