
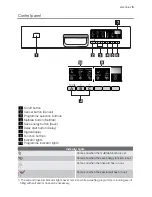

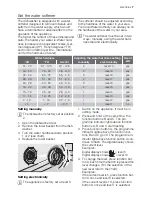
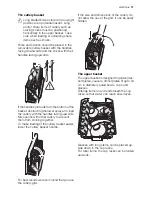

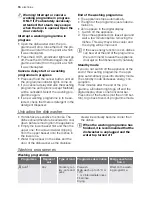


The digital display
The digital display indicates:
• the level of hardness to which the water
softener is set,
• the approximate remaining time of the run-
ning programme,
• activation/deactivation of the rinse aid dis-
penser (
ONLY
with multitab function ac-
tive),
• the end of a washing programme (a zero
will appear in the digital display),
• the countdown for the delay start,
• fault codes concerning malfunction of the
dishwasher.
Cancel button
With this button you can cancel a washing
programme or a delay start in progress.
Programme selection buttons
Press one of these buttons until the pro-
gramme indicator light of the desired pro-
gramme comes on.
Multitab button
Set this function when you use combi deter-
gent tablets (3 in 1, 4 in 1, 5 in 1, etc.).
Refer to 'Multitab function' chapter.
Save energy button
This function decreases the temperature in
the drying phase. Energy saving is between
10% and 25%.
Dishes can be wet at the end of the pro-
gramme. In this condition we recom-
mend, to open the dishwasher door and
keep it ajar and let dishes dry naturally.
This function can be set with all washing pro-
grammes. The related indicator light comes
on when you press the button.
The save energy function has no effect on
some programmes. Refer to 'Washing pro-
grammes' for the list of programmes where
save energy has or not effect.
Delay start button
You can delay the start of the programme for
between 1 and 19 hours.
Refer to 'Select and start a washing pro-
gramme' chapter for the set of this function.
Function buttons (A, B and C)
The following functions can be set using
these buttons:
• adjustment of the water softener level,
• activation/deactivation of the rinse aid dis-
penser when multitab function is active.
Setting mode
The appliance must be in setting mode
when you:
– select a washing programme,
– adjust the water softener level,
– activate/deactivate the rinse aid dis-
penser.
Switch on the appliance.
– All programme indicator lights come on,
the appliance is in setting mode.
Switch on the appliance.
– Only one programme indicator light comes
on, the last selected programme is still set.
In this case, to go back to the setting
mode, you must cancel the programme.
– Simultaneously press and hold the cancel
button until all the programme indicator
lights come on. The programme has been
cancelled and the appliance is now in set-
ting mode.
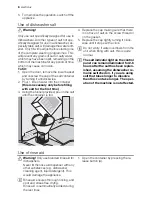
First use
Before using your dishwasher for the first
time:
• Ensure that the electrical and water con-
nections comply with the installation in-
structions
• Remove all packaging from inside the ap-
pliance
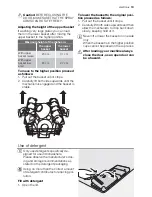
• Set the water softener level
• Pour 1 litre of water into the salt container
and then fill with dishwasher salt
• Fill the rinse aid dispenser
If you want to use combi detergent
tablets such as: ''3 in 1'', ''4 in 1'', ''5
in 1'' etc... set the Multitab function.
(See ''Multitab function'').
6
electrolux
Summary of Contents for ESF47000
Page 1: ...user manual Dishwasher ESF 47000 ...
Page 25: ...electrolux 25 ...
Page 26: ...26 electrolux ...
Page 27: ...electrolux 27 ...


