background image

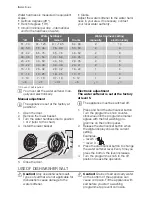
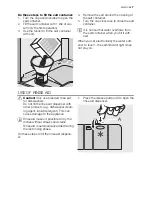
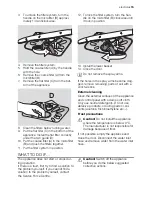
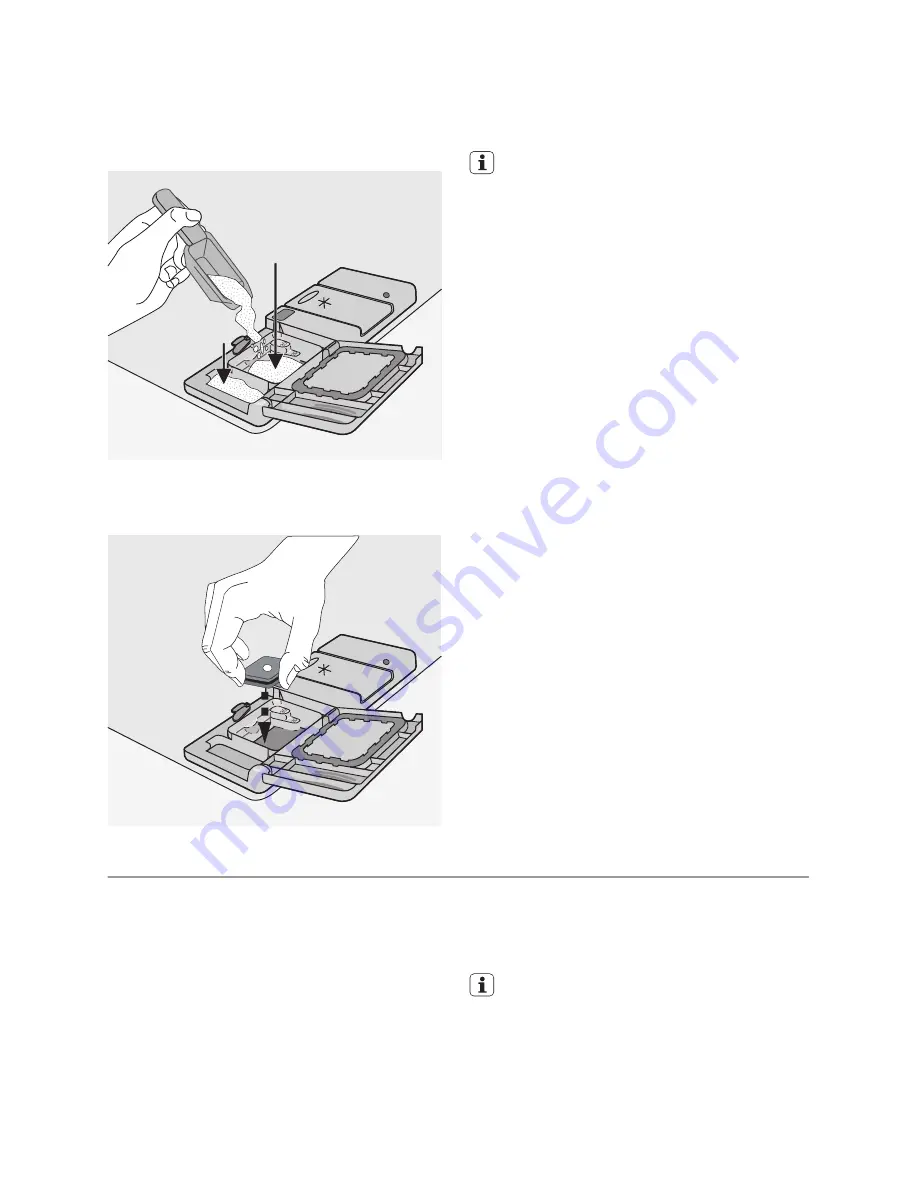
3. If you use a washing programme with

prewash phase, put more detergent in
the prewash detergent compartment
(B).

A

B

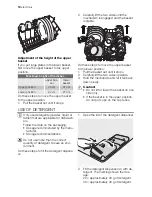
4. If you use detergent tablets, put the de-

tergent tablet in the detergent dispens-
er (A).

5. Close the lid of the detergent dispens-

er. Press the lid until it locks into posi-
tion.

Different brands of detergent dissolve
in different times. Some detergent tab-
lets do not have the best cleaning re-
sults during short washing pro-
grammes. Use long washing pro-
grammes when you use detergent tab-
lets to fully remove the detergent.
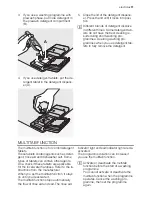
MULTITAB FUNCTION

The multitab function is for combi detergent
tablets.
These tablets contain agents such as deter-
gent, rinse aid and dishwasher salt. Some
types of tablets can contain other agents.
Do a check if these tablets are applicable
for the local water hardness. Refer to the in-
structions from the manufacturer.
When you set the multitab function, it stays
on until you deactivate it.
The multitab function stops automatically
the flow of rinse aid and salt. The rinse aid

indicator light and salt indicator light are de-
activated.
The programme duration can increase if
you use the multitab function.

Activate or deactivate the multitab
function before the start of a washing
programme.
You cannot activate or deactivate the
multitab function when the programme
operates. Cancel the washing pro-
gramme, then set the programme
again.

electrolux 

11

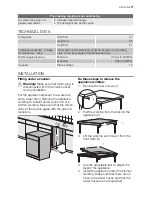
Summary of Contents for ESF65050

Page 1: ...user manual Dishwasher ESF65050 ...

Page 2: ...ucts for dishwash ers detergent salt rinse aid If you open the door while the appliance is in operation hot steam can escape Risk of skin burns Do not remove dishes from the dish washer before the end of the washing programme When the washing programme is com pleted disconnect the mains plug from the mains socket and close the water tap Only an authorised service engineer can repair this appliance...

Page 3: ...ications or mod ify this product Risk of injury and dam age to the appliance Do not use the appliance if the mains cable or water hoses are damaged if the control panel worktop or plinth area are damaged that you can get access to the inner side of the appli ance Contact your local Service Force Centre Do not drill into the sides of the appliance to prevent damage to hydraulic and elec trical comp...

Page 4: ...ation of the appliance Rinse aid 1 Comes on when it is necessary to fill the rinse aid container Refer to Use of rinse aid 1 When the salt and or rinse aid containers are empty the related indicator lights do not come on while a washing programme operates Programme knob To switch on the appliance or to set a washing programme turn the pro gramme knob clockwise or counterclock wise The programme ma...

Page 5: ... codes Setting mode The appliance is in setting mode when One or more phase indicator lights are on The time duration of the programme flashes in the digital display The appliance must be in setting mode for these operations To set a washing programme To set the water softener level To deactivate activate the rinse aid dis penser The appliance is not in setting mode when One or more phase indicato...

Page 6: ...asket 3 Turn the water hardness dial to position 1 or 2 refer to the chart 4 Install the lower basket 5 Close the door Electronic adjustment The water softener is set at the factory at level 5 The appliance must be switched off 1 Press and hold the start cancel button Turn the programme knob counter clockwise until the programme marker agrees with the first washing pro gramme on the control panel ...

Page 7: ... when you fill it with salt When you set electronically the water soft ener to level 1 the salt indicator light does not stay on USE OF RINSE AID Caution Only use branded rinse aid for dishwashers Do not fill the rinse aid dispenser with other products e g dishwasher clean ing agent liquid detergent This can cause damage to the appliance Rinse aid makes it possible to dry the dishes without streak...

Page 8: ...d cutlery and dishes do these steps Remove all food remainings and deb ris Make burnt remaining food in pans soft While you load cutlery and dishes do these steps Load hollow items e g cups glasses and pans with the opening down Make sure that water does not collect in the container or in a deep base Make sure that cutlery and dishes do not lie inside one another Make sure that cutlery and dishes ...

Page 9: ...cutlery to prevent them to bond together Use the cutlery grid If the dimensions of the cutlery prevent the use of the cutlery grid you can remove it Upper basket The upper basket is for plates maximum 24 cm in diameter saucers salad bowls cups glasses pots and lids Arrange the items to let water touch all surfaces Prevent to put plates in the first three sectors in the front part of the basket Mak...

Page 10: ...fully lift the two sides upwards 3 Hold the mechanism and let it fall back down slowly Caution Do not lift or lower the basket on one side only If the basket is in the upper position do not put cups on the cup racks USE OF DETERGENT Only use detergents powder liquid or tablet that are applicable for dishwash ers Follow the data on the packaging Dosage recommended by the manu facturer Storage recom...

Page 11: ...etergent tablets These tablets contain agents such as deter gent rinse aid and dishwasher salt Some types of tablets can contain other agents Do a check if these tablets are applicable for the local water hardness Refer to the in structions from the manufacturer When you set the multitab function it stays on until you deactivate it The multitab function stops automatically the flow of rinse aid an...

Page 12: ...out dishes 5 Adjust the water softener to the water hardness in your area 6 Adjust the rinse aid dosage SELECT AND START A WASHING PROGRAMME Do these steps to set and start a washing programme 1 Close the door 2 Turn the programme knob to set the washing programme Refer to the chapter Washing programmes The phase indicator light or lights for the washing programme come on The programme duration in...

Page 13: ...programme End of the washing programme Switch off the appliance in these condi tions The appliance stops automatically The digital display shows a zero The phase indicator lights are off For better drying results keep the door ajar for some minutes before you remove the dishes Let the dishes cool down before you re move them from the appliance Hot dishes are easily damaged Standby mode If you do n...

Page 14: ...crockery and cutlery 3 Test programme for test institutes Please refer to separate leaflet supplied for test data Consumption values Programme Duration in minutes 1 Energy in kWh Water in litres 1 1 1 7 11 22 0 9 9 1 8 2 0 22 24 1 0 1 1 13 15 0 1 4 1 The digital display shows the programme duration The pressure and temperature of the water the variations of power supply and the quantity of dishes ...

Page 15: ... arms If the holes in the spray arms become clog ged remove remaining parts of soil with a cocktail stick External cleaning Clean the external surfaces of the appliance and control panel with a damp soft cloth Only use neutral detergents Do not use abrasive products scouring pads or sol vents acetone trichloroethylene etc Frost precautions Caution Do not install the appliance where the temperature...

Page 16: ...h on the appliance Set the knob on the same washing pro gramme as before the malfunction The programme continues from the point of interruption If the malfunction shows again contact your Service Force Centre If the display shows a fault code not de scribed in the chart contact your Service Force Centre These data are necessary to help you quickly and correctly Model Mod Product number PNC Serial ...

Page 17: ...g Make sure that mains plug is disconnected from the mains socket during installation Put the appliance adjacent to a water tap and a water drain Remove the appliance worktop to install it under a sink unit or a kitchen worktop Make sure that the dimen sions of the recess agree with the given di mensions Do these steps to remove the appliance worktop 1 Remove the rear screws 1 2 Pull the worktop f...

Page 18: ... Make sure that there are no kinks in the water inlet hose and that the water inlet hose is not squashed or entangled Fit the locknut correctly to prevent water leaks Caution Do not connect the appliance to new pipes or pipes that are not used for a long time Let the water run for some minutes then connect the inlet hose The water inlet hose is double walled and has an inner mains cable and a safe...

Page 19: ...use a correctly installed shock proof socket Do not use multi way plugs connec tors and extension cables There is a risk of fire Do not replace the mains cable your self Contact the Service Force Centre Make sure that the mains plug is ac cessible after installation Do not pull the mains cable to discon nect the appliance Always pull the mains plug ENVIRONMENT CONCERNS The symbol on the product or...

Page 20: ... the procedure Pull the mains plug out of the socket Cut off the mains cable and mains plug and discard them Discard the door catch This pre vents the children to close them selves inside the appliance and en danger their lives 20 electrolux ...

Page 21: ...electrolux 21 ...

Page 22: ...22 electrolux ...

Page 23: ...electrolux 23 ...

Page 24: ...156955130 A 162011 www electrolux com shop ...

Reviews: