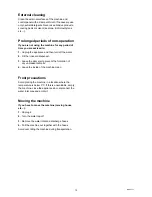
background image

17

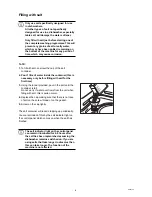
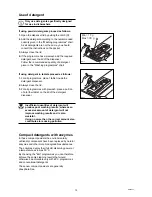
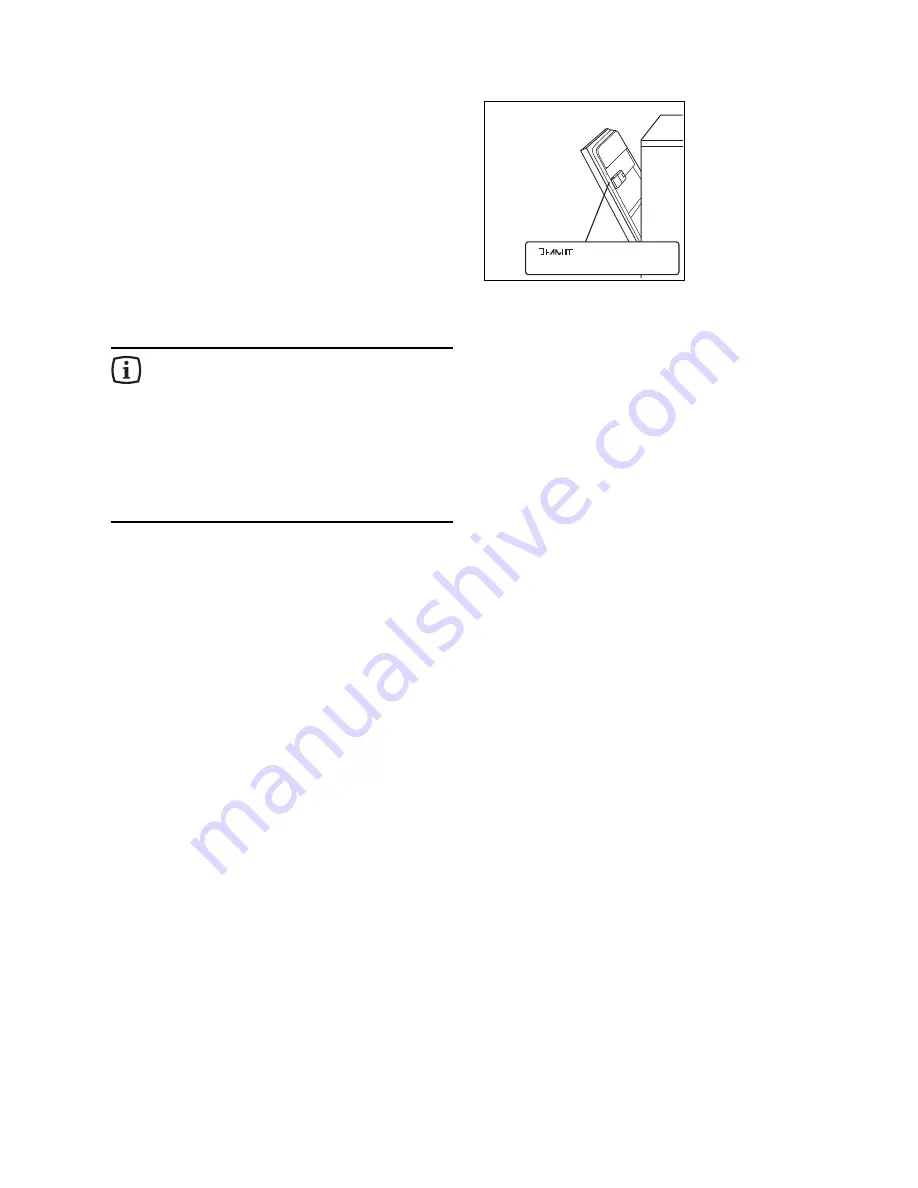
If after all these checks, the problem persists, contact
your local Service Force Centre, quoting the model
and serial number. This information can be found on
the rating plate located on the right hand side of the
dishwasher door (see picture).

Service and spare parts

This product should be serviced by an 
authorised Service engineer, and only 
genuine spare parts should be used.
Under no circumstances should you attempt 
to repair the machine yourself.
Repairs carried out by inexperienced 
persons may cause injury or serious 
malfunctioning. Contact your local Service 
Force Centre.
Always insist on genuine spare parts.

RIM12en

Prod.No. ........ Ser. No. .........

Mod. ........

RA01

Summary of Contents for ESF673

Page 1: ...83 0 PL GB D D i i s s h h w w a a s s h h e e r r Z Z m m y y w w a a r r k k a a I IN NS ST TR RU UC CT TI IO ON N B BO OO OK K I IN NS ST TR RU UK KC CJ JA A U UØ ØY YT TK KO OW WA AN NI IA A Model ESF 673 ...

Page 2: ...ning 15 Prolonged periods of non operation 15 Frost precautions 15 Moving the machine 15 Something not working 16 Service and spare parts 17 Hints for test centres 18 Technical specifications 18 For the installer Installation instructions 19 Water supply connections 19 Water outlet hose connection 20 Electrical connection 20 Adjusting the worktop 21 Fitting under a counter 21 Levelling 21 IND33en ...

Page 3: ...open door Isolate the appliance from the power supply and turn off the water supply after use Care should be taken when cleaning the bottom door seal and hinge area as any exposed metal edges may cut if care is not taken This product should be serviced by an authorised Service engineer and only genuine spare parts should be used Under no circumstances should you attempt to repair the machine yours...

Page 4: ... be confined to the only lower basket instead of both This option is useful and economical when only a few dishes need washing Remember to load all the dishes only into the lower basket 5 Door handle 6 Salt refilling indicator light 7 Programme marker 8 Programme selector dial 9 Programme sequence indicator As the programme progresses the programme selector dial turns to show the phase in the wash...

Page 5: ...adjusted according to the hardness of the water in your area Your local Water Authority can advise you on the hardness of the water in your area The dishwasher is factory set at level 2 If this level is not suitable for your area the softener should be adjusted To adjust the water softener With a screwdriver turn the selector on the upper front corner of the machine until the level required corres...

Page 6: ...ith salt for the first time 3 Using the funnel provided pour in the salt until the container is full Do not worry if water over flows from the unit when filling with salt this is quite normal 4 Replace the cap making sure that there is no trace of salt on the screw thread or on the gasket 5 Screw on the cap tightly The salt container will require topping up periodically You are reminded of this by...

Page 7: ...aid when the indicator B becomes clear Ensure that the lid is closed after every refill Do not put liquid detergent in the rinse aid compartment Clean up any rinse aid spilt during filling with an absorbent cloth to avoid excess foaming during the next wash Adjusting the dose According to the finish and drying results obtained adjust the dose of rinse aid by means of the 6 position selector C posi...

Page 8: ...icture To bring them back to the standing position just pull them up again The cutlery basket Long bladed knives stored in an upright position are a potential hazard Long and or sharp items of cutlery such as carving knives must be positioned horizontally in the upper basket Take care when loading or unloading sharp items such as knives Cutlery should be placed in the removable cutlery basket with...

Page 9: ... arms can rotate freely Adjusting the height of the upper basket If washing very large plates over 27 cm and up to 31 cm in diameter you can load them in the lower basket after moving the upper basket to the higher position To move to the higher position proceed as follows 1 Move the front runner stops A of the upper basket outward and slide the basket out 2 Refit the basket in the higher position...

Page 10: ...lid 3 For all programmes with prewash place a portion of a further tablet on the lid of the detergent dispenser Insufficient quantities of detergent will produce poor washing results whereas an excessive amount of detergent will not improve washing results and is also wasteful Using no more than the correct amount also contributes to reducing pollution Compact detergents with enzymes In these comp...

Page 11: ...e Items not suitable for dishwashers The following items should not be washed in the dishwasher unless they are sold as dishwasher proof Cutlery with wooden or horn handles or glued parts bronze cutlery saucepans with wooden handles aluminium ware crystal ware leaded glass plastic items antique or fine decorated china Certain types of decoration can discolour when washed in a dishwasher Crystal wa...

Page 12: ...e drying Hot prewash Main wash up to 70 C 2 cold rinses 1 hot rinse Active drying Cold prewash Main wash up to 50 C 1 cold rinse 1 hot rinse Active drying Main wash up to 65 C 1 cold rinse 1 hot rinse Active drying Main wash up to 50 C 1 cold rinse 1 hot rinse Active drying Main wash up to 50 C 1 cold rinse 1 hot rinse Active drying Main wash up to 50 C 1 cold rinse 1 hot rinse Main wash up to 50 ...

Page 13: ...rammes chart see Required push buttons 8 Start the programme Depress the On Off push button The On Off indicator light will come on and the machine will start If you wish to interrupt the washing programme at any time press this button again 9 At the end of the washing programme At the end of the programme the dishwasher will automatically stop The On Off indicator light remains on until the On Of...

Page 14: ... large filter Every month If necessary clean the large filter B on both sides under running water using a brush To remove the large filter 1 Remove the spray arm by pulling it upwards on one side 2 Turn the column C anticlockwise by 90 and then slide out the filter 3 Once cleaned refit it following the above instructions in reverse order 4 Ensure the filter is in its original position the handle o...

Page 15: ... the rinse aid dispenser 3 Leave the door ajar to prevent the formation of any unpleasant smells 4 Leave the inside of the machine clean Frost precautions Avoid placing the machine in a location where the temperature is below 0 C If this is unavoidable empty the machine close the appliance door disconnect the water inlet pipe and empty it Moving the machine If you have to move the machine moving h...

Page 16: ...he hose The sink may be blocked Clear any blockages The drain hose extension is not correct Follow the instructions for connecting to the waste There is no vent in the end of the drain hose The machine is noisy Dishes are rattling against each other refer to Loading your machine The spray arms are knocking against the dishes Refer to Loading your machine The door is difficult to close The dishwash...

Page 17: ...er door see picture Service and spare parts This product should be serviced by an authorised Service engineer and only genuine spare parts should be used Under no circumstances should you attempt to repair the machine yourself Repairs carried out by inexperienced persons may cause injury or serious malfunctioning Contact your local Service Force Centre Always insist on genuine spare parts RIM12en ...

Page 18: ...5 g in the dispenser 5 g on the dispenser lid US50 UI50 Arrangement upper basket Arrangement lower basket UI65 Arrangement cutlery basket DIMENSIONS Width 60 cm Height with worktop 85 cm Height without worktop 82 cm Max depth 61 cm Max depth with open door 115 2 cm ELECTRICAL CONNECTION Voltage 230 V 50 Hz MOTOR RATING DURING WASH 200 W POWER OF HEATING ELEMENT 2100 W OVERALL POWER 2300 W WATER SU...

Page 19: ...ts given in the technical specifications Your local Water Authority will advise you on the average mains pressure in your area The dishwasher features fill and drain hoses which can be turned either to the left or the right to suit the installation The locknut must be correctly fitted to avoid water leaks Avoid bends or kinks in the hose which could prevent or slow down the water supply If the mac...

Page 20: ... than the diameter of the hose provided The sink plug must not be in place when the machine is draining as this could cause the water to siphon back into the machine Electrical connection Before plugging the appliance into the wall socket make sure that 1 The mains voltage corresponds to the voltage given in the Technical specifications 2 The meter fuses mains power supply and wall socket can all ...

Page 21: ...oceed as follows Remove the machine s worktop by unscrewing the two rear retaining screws pull from the front and slide out the rear slots lifting the worktop Insert the machine after adjusting height and levelling with the adjustable feet When inserting the machine ensure that the water inlet and drain hoses are not kinked or squashed Levelling Good levelling is essential for correct closure and ...

Page 22: ......

Reviews: