background image

14  electrolux.com.au

BEFORE FIRST USE

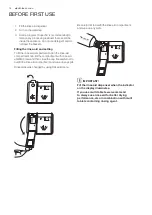
1.  Fill the rinse aid dispenser.
2.  Turn on the water tap.
3.  Start a program (‘Super 50’ is recommended) to 

remove any processing residuals that can still be 

inside the appliance. Do not use detergent and do 

not load the baskets.

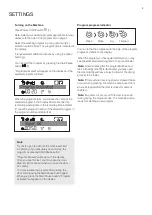
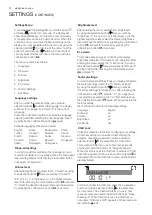
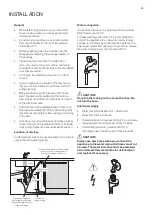
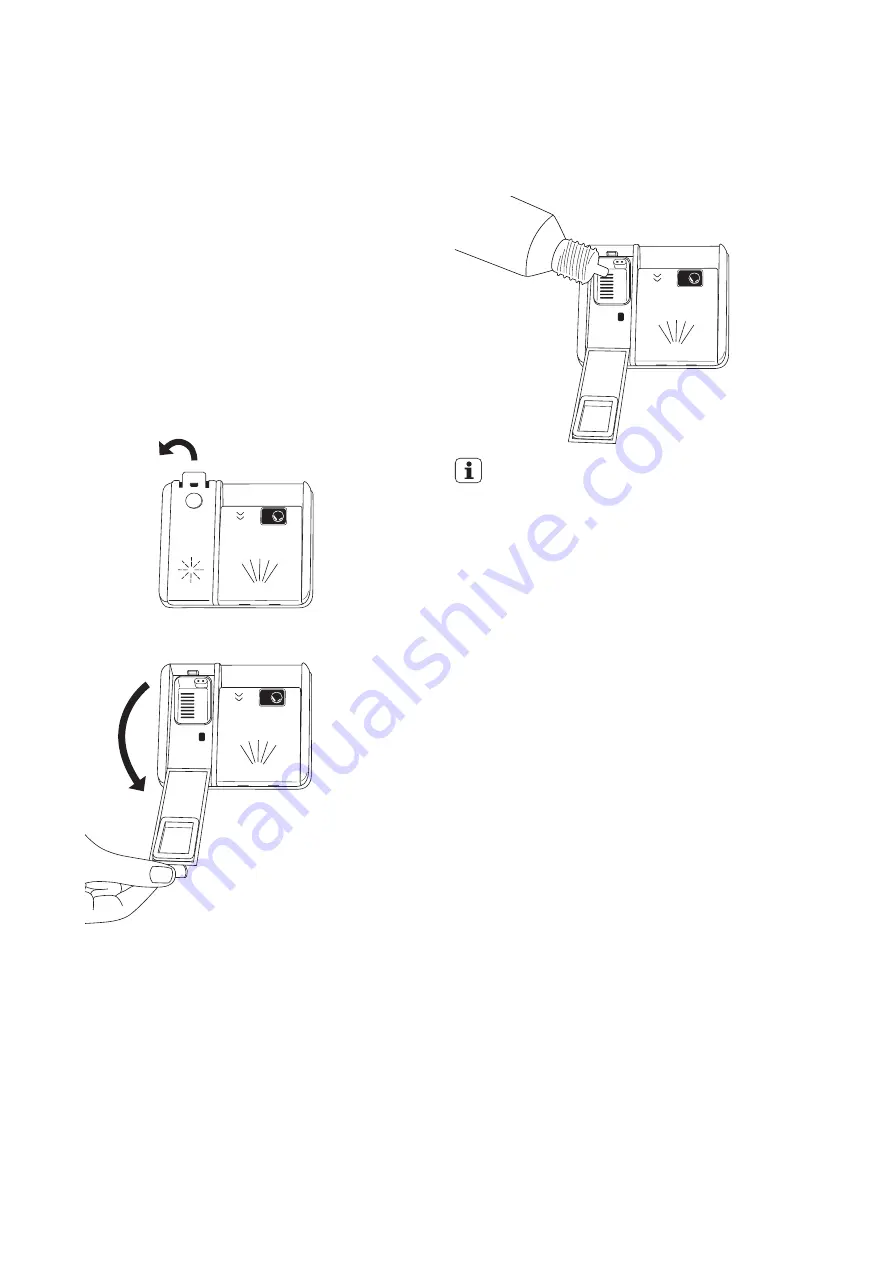
Filling the rinse-aid and setting

To fill the rinse aid compartment, open the rinse-aid 

compartment cap. Fill the compartment with rinse aid 

until MAX level and then close the cap. Be careful not to 

overfill the rinse aid compartment and wipe up any spills. 
Rinse aid level is changed by using Rinse aid menu.

Be careful not to overfill the rinse aid compartment  

and wipe up any spills.

RINSE-

AID


IMPORTANT! 

Fill the rinse aid dispenser when the indicator 

on the display illuminates.
If you use multi-tablets we recommend 

to always use rinse aid for better drying 

performance, also in combination with multi 

tablets containing rinsing agent.

Summary of Contents for ESF6767KXA

Page 1: ...User manual Dishwasher ESF6767KXA ...

Page 2: ...er working environments Farm houses By clients in hotels motels and other residential type environments Bed and breakfast type environments BEFORE YOU CALL Please ensure you read the instruction manual fully before you call for service or a full service fee could be applicable Record model and serial number here Model number ____________________________________ Serial number ______________________...

Page 3: ...n carried out or new devices fitted water meters etc let the water flow until it is clean and clear SYMBOLS WARNING This symbol indicates information concerning your personal safety CAUTION This symbol indicates information on how to avoid damaging the appliance IMPORTANT This symbol indicates tips and information about use of the appliance ENVIRONMENT This symbol indicates tips and information ab...

Page 4: ...m the mains supply Cut off the mains cable and discard it Remove the door catch to prevent children and pets to get closed in the appliance Environmental concerns Recycle the materials with the symbol Put the packaging in applicable containers to recycle it Help protect the environment and human health and to recycle waste of electrical and electronic appliances Do not dispose appliances marked wi...

Page 5: ...r spray arm 6 Lower basket with folding supports 7 Lower spray arm triple wash system 8 Filters 9 Rating plate 10 Control panel 11 Detergent and rinse aid dispenser 12 Upper basket height adjusting mechanism 13 Basket handle 14 Cutlery tray 15 Ceiling spray 16 Turbo drying unit 17 Door latch 15 16 2 4 1 3 13 14 6 10 11 7 12 17 8 9 5 ...

Page 6: ...n the display 5 Start Pause Button When you press the Start Pause Button the selected program starts and washing symbol a appears on the display You may follow the washing phases on the display 2 a b c d 6 Up Down Buttons Allows you to browse in Program Additional functions delay and settings menus 1 On Off 2 Confirmation Button 3 Option Button 4 Delay Start Button 5 Start Pause button 6 Up Select...

Page 7: ...tart Power Half load tablet child lock extra fast extra hygiene extra drying extra silent 40 Super 50 Medium soil levels old soups sauces pastries egg rice potato and oven foods fried foods Main wash 65 C Warm rinse Hot rinse Delay start Power Half load tablet child lock extra hygiene extra drying 40 Daily 60 C Heavy soil levels old soups sauces pastries egg rice potato and oven foods fried foods ...

Page 8: ...be carried out by the two extra water jets on the base Make sure that there are no dishes in the upper basket while using this feature 11 Extra Fast option Washes the dishes with more pressure thus shortens the time of the selected program and provides economical water usage 12 Extra Silent option Washes the dishes with less pressure thus provides more sensitive and silent washing 13 Extra Drying ...

Page 9: ... help of the program list on page 7 Select the washing program by using up down 6 7 selection buttons Note The program time is indicated in the display If required select additional options by using the option button You can start the program by pressing the Start Pause button 5 Program Activated will appear on the display and the selected program will start When the program starts you will see th...

Page 10: ...pressing the Start Pause button again Program activated will appear on the display Note The new program starts from the step where the previous program was left If you want the new program to start from the beginning you must first cancel the previous program and then select a new one Cancelling the Program 1 Hold the Start Pause button for 3 seconds to cancel a program 2 The display will show Pro...

Page 11: ...n a place where electricity is cheaper to use at night you might select the silent option and wash your dishes more economically and silently this function was developed also for a more sensitive washing process Additional options are not suitable for every program you might find below the functions suitable for the programs For the programs not suitable for additional options you will see that th...

Page 12: ...lect the 4 Brightness by using the selection buttons Here you will see brightness X X L1 L2 L3 L1 is the lowest L3 is the highest brightness level select the desired brightness level and save the selection by pressing the confirmation button activate X and save by pressing the confirmation button once more Eco mode This mode saves energy by minimizing the display brightness level after 15 minutes ...

Page 13: ...f the selected program Changing the program or function on Delayed Start Pause the machine by pressing the Start Pause button the countdown will stop and the program paused and Delay timer active appear on screen If you press the buttons without pausing the machine you will receive warnings such as Delay timer active or invalid After pausing the Delayed Start you may select program and add functio...

Page 14: ... compartment cap Fill the compartment with rinse aid until MAX level and then close the cap Be careful not to overfill the rinse aid compartment and wipe up any spills Rinse aid level is changed by using Rinse aid menu Be careful not to overfill the rinse aid compartment and wipe up any spills RINSE AID IMPORTANT Fill the rinse aid dispenser when the indicator on the display illuminates If you use...

Page 15: ...rgent in the detergent dispenser before you start a new program End of program When the program is completed open the door and press the power button to turn off the appliance Turn off the water tap DAILY USE 1 Turn on the water tap 2 Press the on off button to activate the appliance Make sure that the appliance is in program selection mode If the rinse aid indicator is on fill the rinse aid dispe...

Page 16: ... programs To prevent detergent residues on the tableware we recommend that you use the tablets with long programs Do not use more than the correct quantity of detergent Refer to the instructions on the detergent packaging What to do if you want to stop using multi tablets Before you start to use detergent and rinse aid separately follow this procedure 1 Make sure that the rinse aid container is fu...

Page 17: ...pwards or refer to diagram 2 downwards without removing it from your machine when it is full to create large spaces at the upper or bottom area of your machine as needed The basket of your machine is set to the upper position from the factory In order to raise your basket hold it from both sides and pull it upwards In order to lower it hold it from both sides again pull upwards and then lower care...

Page 18: ...The upper cutlery basket is composed of two pieces if you need to make space for the dishes in the upper basket you can take out the left or right part of the upper cutlery basket in order to create more space WARNING Knives and other sharp objects must be placed horizontally in the cutlery basket Alternate cutlery basket An alternate cutlery basket is available as an accessory for your convenienc...

Page 19: ...e basket loads Lower Basket Upper Basket 19 Lower Basket Folding Racks Folding tines prongs consisting of four parts that are located on the lower basket of your machine are designed in order to let you place big items easier such as pots pans etc If required each rack can be folded separately or all of them can be folded and larger spaces created You can use folding tines prongs in the upright po...

Page 20: ...tems from the lower basket then from the upper basket IMPORTANT At the end of the program water can still remain on the sides and on the door of the appliance For better drying results set the auto door function or open the door 5 10cm and allow tableware to cool down for 30 40 min Whenever you will not be operating your machine Unplug the machine and then turn the water off Leave the door slightl...

Page 21: ... Metal Plastic Filter 1 To remove and clean the filter combination turn it counter clockwise and take it out by lifting upwards 1 2 Pull and remove the metal plastic filter 3 3 Then pull the coarse filter out of the micro filter 2 4 Rinse it with lots of water under the tap Refit the metal plastic filter Insert the coarse filter into the micro filter in a way that the marks will correspond to one ...

Page 22: ...e water pressure water inlet temperature and ambient temperatures With this program you have the most efficient use of water and energy consumption for crockery and cutlery for normal soil This is the standard program for Test Institutes CAUTION The Jetwash 14 minute Quick 30 minute and Super 50 Minute programs do not have a drying step The values stated above are values that are obtained in labor...

Page 23: ...1 23 48 Daily 60 C 11 1 1 34 93 FlexiWash 60 C 11 1 1 33 103 AutoFlex 30 C 50 C 9 9 13 7 0 83 62 85 AutoFlex 50 C 60 C 10 5 14 3 1 7 82 110 AutoFlex 60 C 70 C 11 9 19 9 1 52 123 168 Information for Test institutes For all the necessary information for test performance send an email to dishwasher standardtest info and provide the model and PNC number on the rating plate 11 6 0 65 ...

Page 24: ...g and avoids damage to the dishwasher components Check the filter and the hose from time to time and clean them if necessary To clean the filter first turn off your tap and then remove the hose After removing the filter from the hose clean it under the tap Insert the cleaned filter back into its place inside the hose Refit the hose turn on the tap and check for leaks CARE AND CLEANING ...

Page 25: ... optimal cleaning results and energy savings The program lasts too long Select the Extra Fast option to shorten the program time If the delayed start option is set cancel the delay setting or wait for the end of the countdown The remaining time in the display increases and skips nearly to the end of program time This is not a defect The appliance is working correctly Warning Messages Your machine ...

Page 26: ...tting the dishes If there are partial food wastes left on the dishes Dishes placed incorrectly into the machine sprayed water did not reach related places Basket overly loaded Dishes leaning against one another Very small amount of detergent added An unsuitable rather weak wash program selected Spray arm clogged with food wastes Filters clogged Filters incorrectly fitted Water drain pump clogged I...

Page 27: ...ap Contact the Customer Care Centre F5 Inadequate water supply Make sure the water tap is fully open and that there is mains water available Water inlet hose kinked check installation Close the water tap disconnect the hose from the tap and clean the filter at the connection Restart your machine contact the service if the error resumes F6 Faulty heater sensor Contact the Customer Care Centre F7 Ov...

Page 28: ...ty 15 place settings Height with worktop 850mm Height without worktop 820mm Width 598mm Depth 598mm Net weight 55kg Electricity input 220 240V 50Hz Total power 1900W Current 10A Water supply pressure 0 03 MPa 0 3 bar 1 MPa 10 bar Water supply Hot or Cold water max 60o C 10L min ESF6767KXA ...

Page 29: ...t the feet and ensure its stable position Location of services All dishwasher services should be located in the cabinet next to the dishwasher opening Water connection Connect the inlet hose to a water tap with an external BSP thread spout of 3 4 For best washing performance it is recommended to connect the appliance to a cold water supply Energy savings can be made by connecting the appliance to ...

Page 30: ...d clay rust etc that might be occasionally carried in through the main s water supply or the indoor plumbing and to avoid problems of staining and formation of deposits after washing Water inlet hose Do not use the water inlet hose of your old machine you must use the new water inlet hose supplied with your machine Before connecting the water inlet hose to the water tap ensure clean water is flowi...

Page 31: ...hine is designed for 220 240 V The machine should not be plugged in during installation Always use the molded plug supplied with your machine Running in low voltage will cause a decline in washing quality The machine s electrical cable should be replaced by an authorised service or an authorised electrician only Failure to do so may lead to accidents For safety purposes always make sure to disconn...

Page 32: ...Fit your machine by pushing it undercounter without letting the hoses get crushed or bent WARNING WARNING After removal of worktop ensure the opening for the dishwasher is according to the following dimensions Timber wedging piece Bench top 3mm gap Filler piece cut to suit installation 1 570 465 97 85 598 596 850 820 2 3 min 600mm 570mm 5 ...

Page 33: ...33 NOTES ...

Page 34: ...34 electrolux com au NOTES ...

Page 35: ...vice iii improper negligent or faulty servicing or repair works done by anyone other than an Electrolux authorised repairer or ASC iv normal wear and tear v power surges electrical storm damage or incorrect power supply vi incomplete or improper installation vii incorrect improper or inappropriate operation viii insect or vermin infestation ix failure to comply with any additional instructions sup...

Page 36: ...m au Electrolux Home Products New Zealand telephone 0800 436 245 fax 0800 225 088 email customercare electrolux co nz web electrolux co nz To add a touch of professional inspiration to your home visit electrolux com au or electrolux co nz electrolux com au or electrolux co nz P No 52217762 A 2019 Electrolux Home Products Pty Ltd EMAN_ESF6767XA_11Apr19 ...

Reviews: