
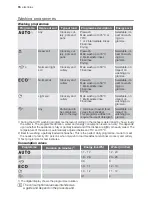

Washing programmes
Washing programmes
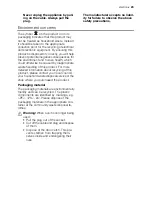
Programme
Degree of soil
Type of load
Programme description
Energy save
1)
Any
Crockery, cut-
lery, pots and
pans
Prewash
Main wash up to 45°C or
70°C
1 or 2 intermediate rinses
Final rinse
Drying
Selectable, im-
pact on wash-
ing pro-
gramme.
Heavy soil
Crockery, cut-
lery, pots and
pans
Prewash
Main wash up to 70°C
2 intermediate rinses
Final rinse
Drying
Selectable, im-
pact on wash-
ing pro-
gramme.
2)
Normal or light
soil
Crockery and
cutlery
Main wash up to 60°C
Final rinse
Selectable, no
impact on
washing pro-
gramme.
3)
Normal soil
Crockery and
cutlery
Prewash
Main wash up to 50°C
1 intermediate rinse
Final rinse
Drying
Selectable, im-
pact on wash-
ing pro-
gramme.
Light soil
Crockery and
cutlery
Main wash up to 55°C
1 intermediate rinse
Final rinse
Selectable, no
impact on
washing pro-
gramme.
Any
Partial load (to
be completed
later in the day).
1 cold rinse (to avoid food
scraps from sticking).
This programme does not
require the use of detergent.
Selectable, no
impact on
washing pro-
gramme.
1) During the AUTO washing programme the level of soiling on the dishes is determined by how cloudy
the water is. The programme duration, water and energy consumption levels can vary; this depends
upon whether the appliance is fully or partially loaded and if the dishes are lightly or heavily soiled. The
temperature of the water is automatically adjusted between 45°C and 70°C.
2) Ideal for washing a partially loaded dishwasher. This is the perfect daily programme, made to meet
the needs of a family of 4 persons who only wish to load breakfast and dinner crockery and cutlery.
3) Test programme for test institutes.
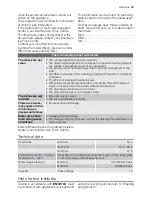
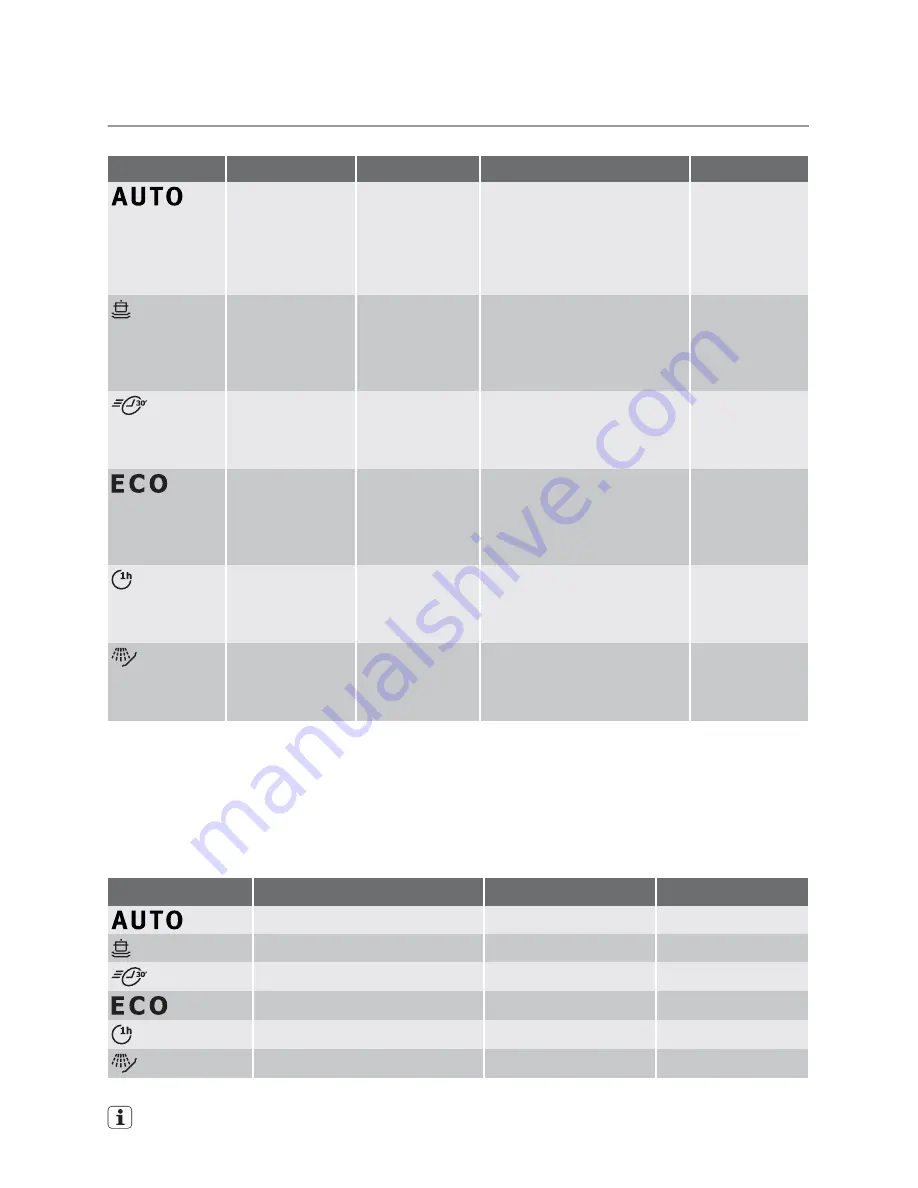
Consumption values
Programme
Duration (in minutes)
1)
Energy (in kWh)
Water (in litres)
-
1,1 - 1,7
12 - 23
-
1,8 - 2,0
23 - 25
-
0,9
9
-
1,0 - 1,1
12 - 13
-
1,0 - 1,2
11 - 12
-
0,1
4
1) The digital display shows the programme duration.
The consumption values are intended as
a guide and depend on the pressure and
16
electrolux


