


17
PII06GB
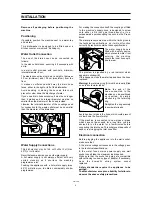
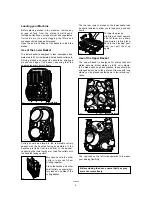
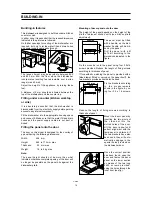
Securing under a counter
Secure the dishwasher to
the counter on the front
part by means of two
4,2x13 screws provided
(see fig. - point A).
Important!
The dishwasher must be secured against tilting.
Therefore, make sure that the counter it is fitted
under, is suitably secured to a fixed structure
(adjacent kitchen cabinets, wall).
Attention!
When the dishwasher is secured to the kitchen
cabinets, do not drill any holes into the sides of
the machine.
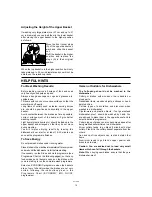
Adjusting the door balance
After fitting the door panel, the adjustment of the door
balance may be necessary.
The door of the dishwasher is balanced when it is
open in any position.
For this purpose use the
two front screws. Open the
door, remove the caps and
screw or unscrew the
screws.
In this way the tension of
the door balancing springs
is increased or decreased
respectively. Insert the
caps again.
Attention!
The weight of the panel should be within the limits
given in the "dimensions of the panel", otherwise
balancing the door will not be possible.
Levelling
Make sure that the dishwasher door closes properly,
without rubbing on sides. Otherwise level the machine
by slightly screwing or unscrewing the two front feet
until perfect closure of the door is reached.
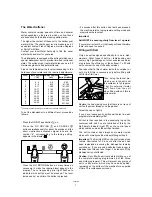
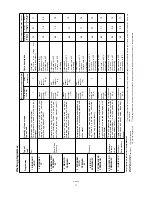
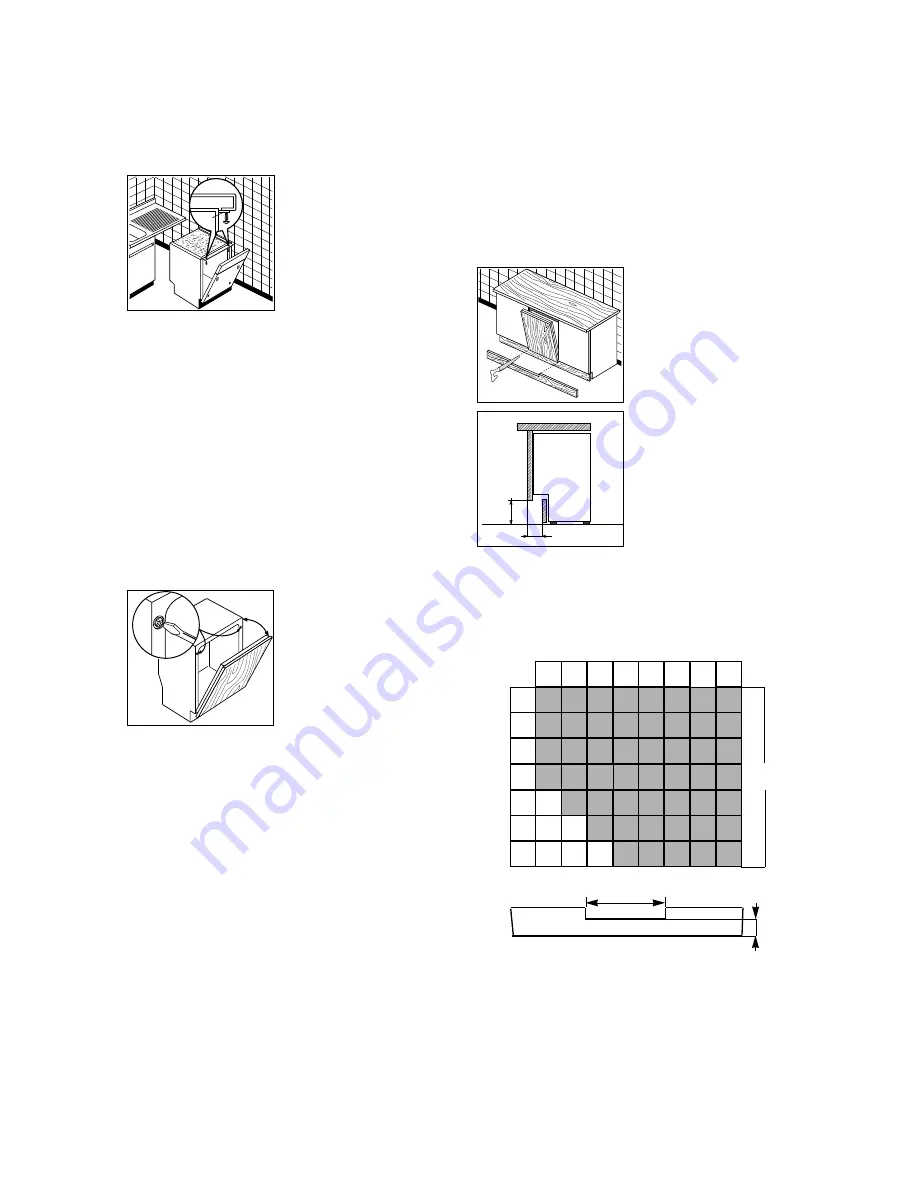
Kitchen plinth adjustment
To allow correct opening of
the door it is sometimes
necessary to cut the
kitchen plinth. Refer to the
cutting table below.
According to dimensions of
(a) and (b) as shown on
the figure, you will find on
the following table the
depth (x) of the cut to be
made on the plinth.
The dimensions (a) and (b) of the table are those
more frequently used in the kitchen furnitures.
A
II03
II13
a
b
II15
45
°
II09
1 7 0 1 6 0 1 5 0 1 4 0 1 3 0 1 2 0 11 0 1 0 0
136 131 125 118 110 100 93 85
135 131 125 118 110 102 92 85
137 132 125 118 110 102 94 85
138 134 128 120 110 104 95 85
139 130 124 115 105 98 88
138 129 120 110 100 90
135 125 115 105 95
/
/
/
/
40
50
60
70
80
90
1 0 0
/
/
Height (a)*
Depth (b)
*
X
X
450 mm
(minimum)
Dimensions of the cut on the plinth
*dimensions in mm


